Setting up with FL Studio
This content is hosted by YouTube and may set cookies.
In this page we’ll be getting Dubler 2 setup in FL Studio
First make sure that you have the Dubler application open, and that you’ve followed the in app steps to calibrate a mic. You can find guides for calibrating your mic on Mac and Windows.
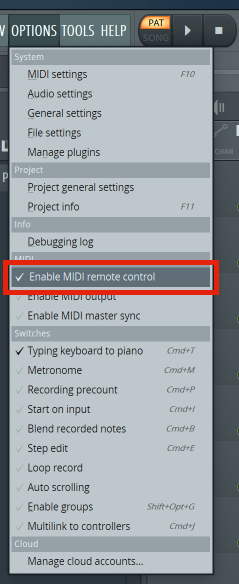
Once this done make sure that Enable MIDI remote control is selected on the Options drop-down menu
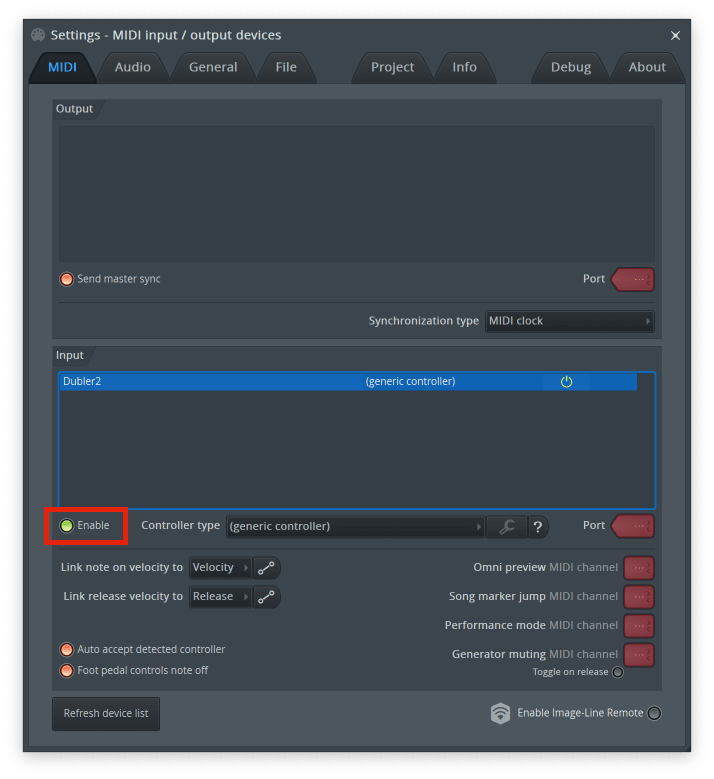
In MIDI settings select Dubler 2 from the Input section and select (generic controller) from the Controller type menu. Once this is selected make sure to click Enable below the input box
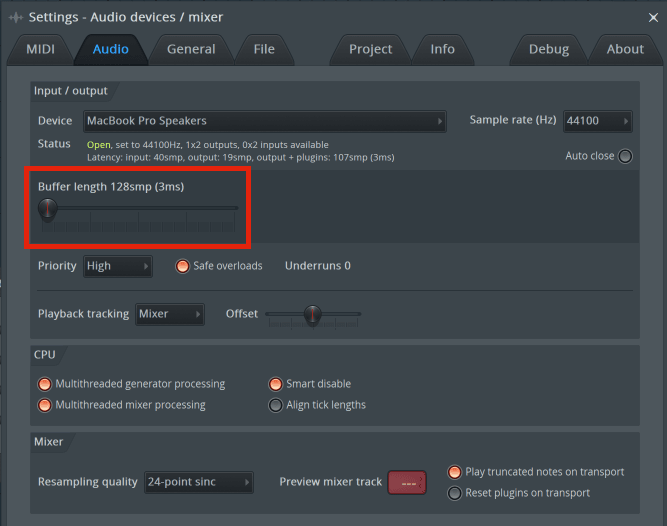
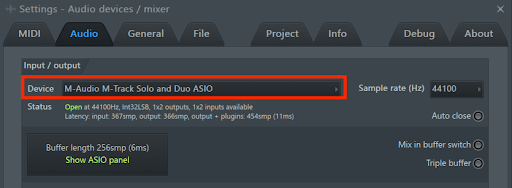
Once this is done you can now navigate to the Audio tab in the preferences. Here we can set our output and adjust the buffer size to 128 Samples or below in order to ensure the latency is as low as possible when using Dubler.
IMPORTANT: If you're on windows and you don’t have an audio interface that comes with it’s own ASIO drivers you'll need to use ASIO4ALL as your output in FL Studio in order to get low latency. You can find out how to set up ASIO4ALL here. Once your audio driver is selected make sure the buffer size for the driver matches the buffer size in FL Studio.
You can now exit the preference. If the MIDI connection is successful the MIDI activity light on the main panel will blink each time controller data is received.

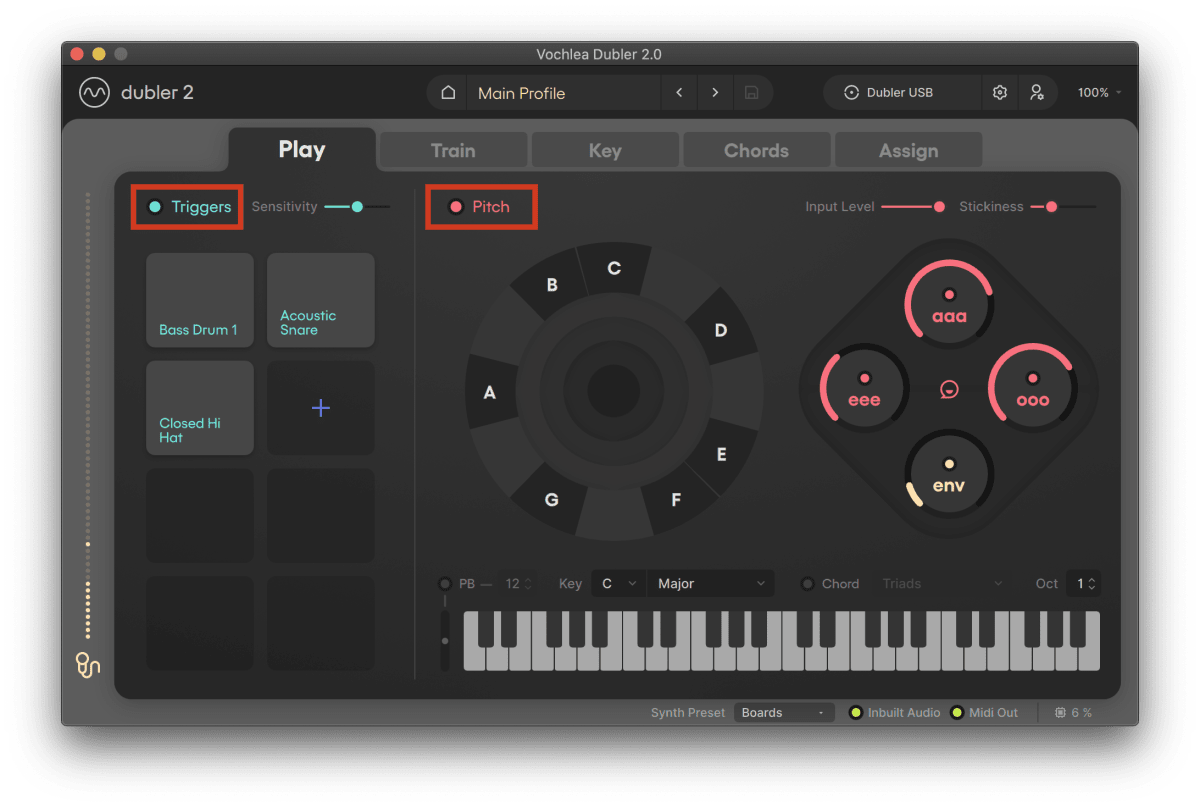
After this Dubler is now ready to use in FL Studio. However, with the current settings it cannot separate Triggers and Controls. To ensure you don’t get accidental MIDI notes from the side you are not using, you will need to switch that side off in Dubler via the toggle switches.
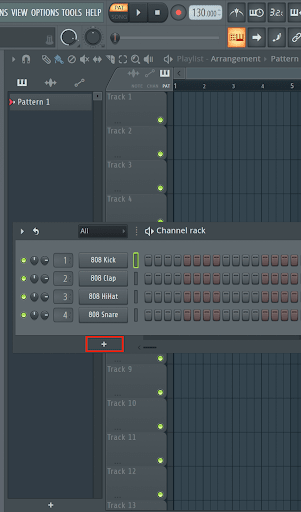
If you have multiple drum samples on different channels in the channel rack, then Dubler will only be able to control one sound at a time regardless of how many triggers you have. In order to control a full kit you'll need to setup a channel with FPC or another sampler such as Native Instruments Battery for example that can multiple samples on one channel
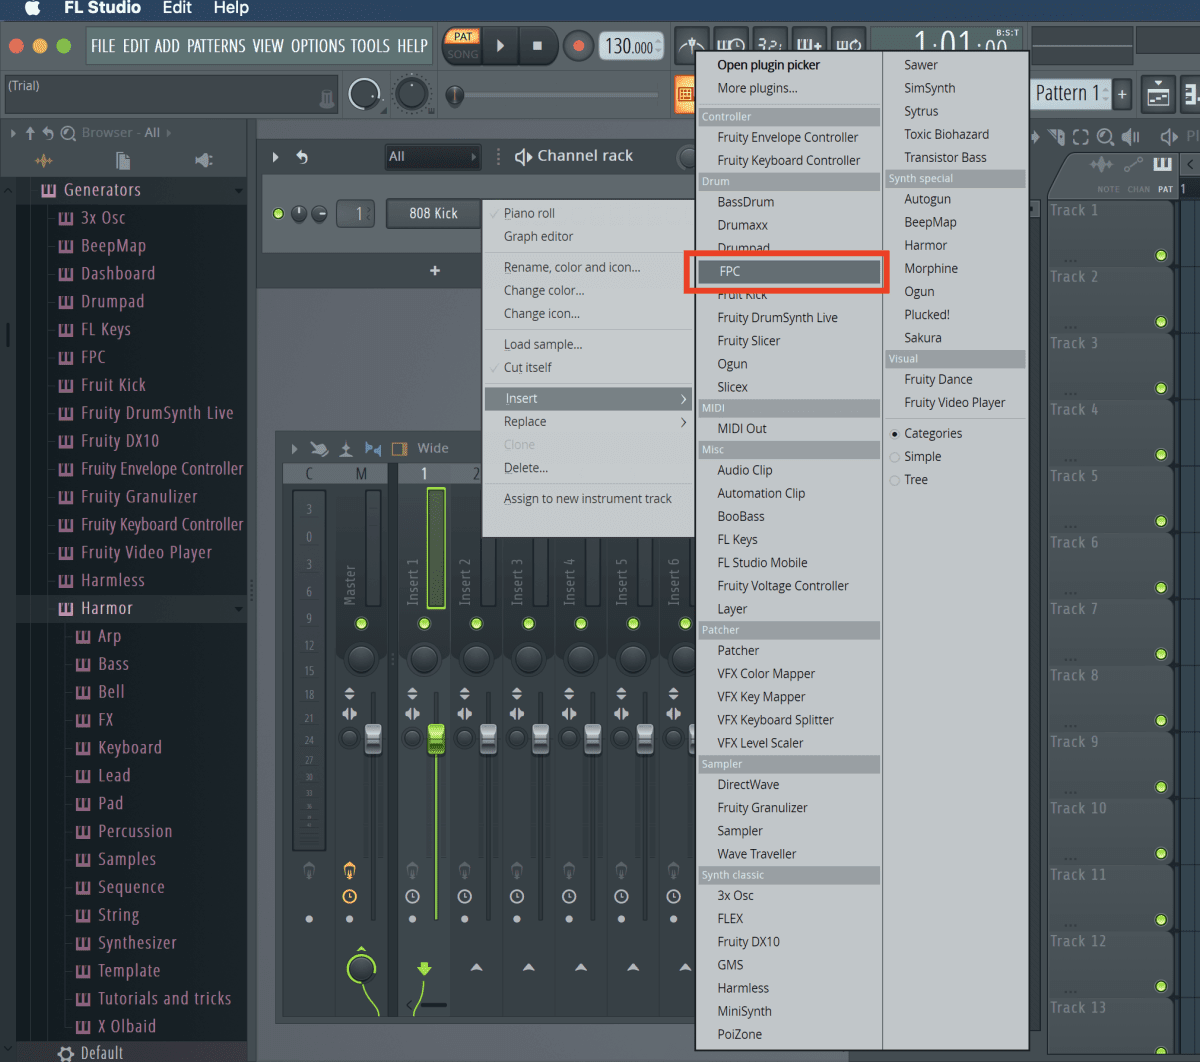
If you're using FPC you can load it on to a channel by right clicking a channel, navigating to 'Insert' and selecting FPC from the Drum section
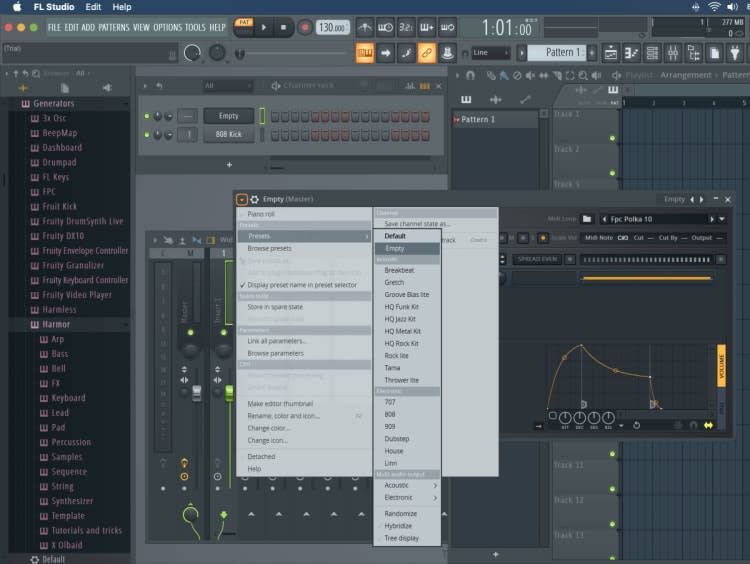
You can use the presets on FPC, however if you want to control your own samples you'll need to create an empty bank. You can do this by selecting the drop down arrow in the top left of FPC, opening Presets and selecting Empty.
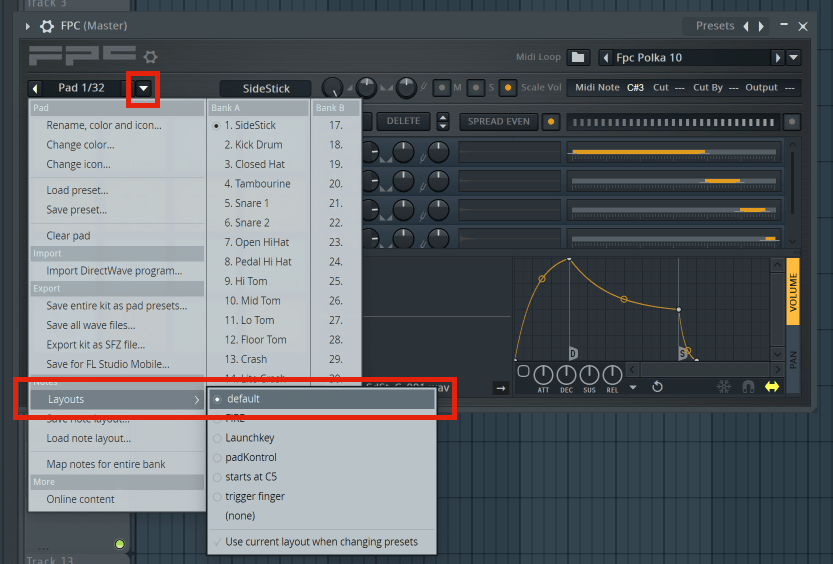
Once this is done you can now drag any samples you like onto FPC to control a full kit using triggers.
If for any reason you find the notes the triggers are assigned to don’t correspond to the pads in FPC you can reset the note layout to default
MIDI Capture
Dubler MIDI Capture is an instrument plugin in FL Studio that works alongside our standalone application. You can see the full tutorial on what the MIDI capture plugin does here
Within FL Studio, open your Channel Rack and click the + button, click ‘More Plugins’ and double click to select ‘Dubler MIDI Capture’ in VST3 format.
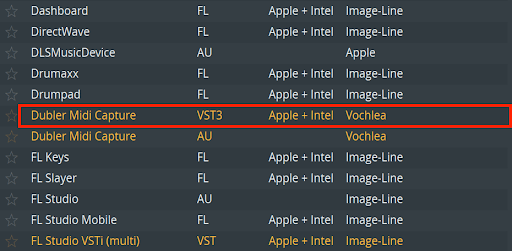
(NOTE: Dubler MIDI Capture is an Instrument plugin not a MIDI or Audio Effect)
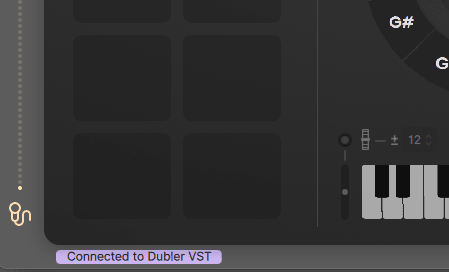
In order for MIDI Capture to work it must be connected to the Dubler 2 app. You can do this by selecting ‘Open Dubler 2’ in the VST. Once Dubler is connected it will display ‘Connected to Dubler VST’ in the app.

***IMPORTANT***
If FL Studio ASIO is selected in your audio device settings within FL studio then MIDI Capture will not work. Please ensure you have either selected your audio interface or ASIO4ALL. If you don’t have an audio interface please see our article on how to use ASIO4ALLhere.
It’s also important to note that for MIDI Capture to work smoothly, you must be in a Key Lock and have the Play tab open in the Dubler app.
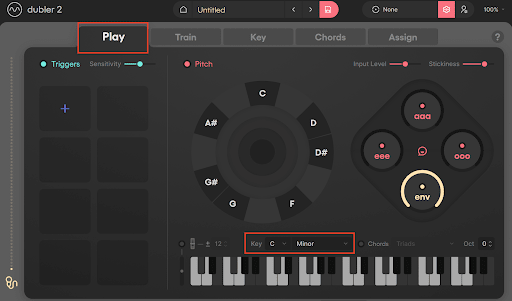
MIDI Capture will reflect any changes or settings that you have selected in the Dubler app such as Key Restrictions. Once connected, you’re ready to record.
You can set up a separate track with any sound you want to control, and arm it to receive MIDI info in real time from Dubler 2 as per the instructions above. The track containing MIDI capture does not need to be armed or have the input set to Dubler2.
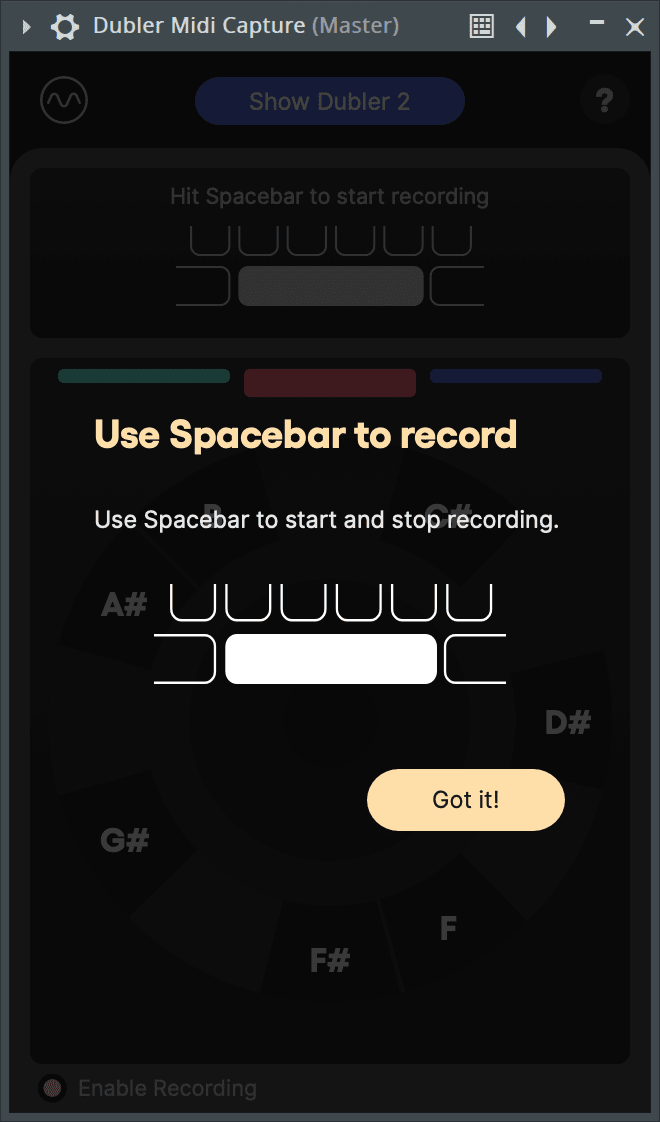
All you need to do is then press the spacebar to start recording with MIDI Capture. You do not need to press record in Ableton, unless you also want to record your idea in real time as well.
The recorded clip will be visible within MIDI capture which you can click and drag into FL Studio.