Calibrating your mic on Windows
In this page we’ll be going through the steps to calibrate your mic on Windows. We recommend watching the video at the top of the page for an in depth guide on calibration based on the equipment you are using. The Dubler USB mic comes auto calibrated so the following steps are only if you are using an input that is not the Duber USB mic.
Calibrating with an audio interface
If you’re using your own audio interface as an input for Dubler 2 first make sure you have the interface’s dedicated drivers downloaded from the manufacturer’s website.
When starting the app for the first time without a calibrated mic, the calibration process will begin automatically. The calibration process can also be started by clicking on the active device at the top right. This will be set to None if you have no calibrated inputs connected
The first screen in the calibration process is where you can select the interface that you are using.
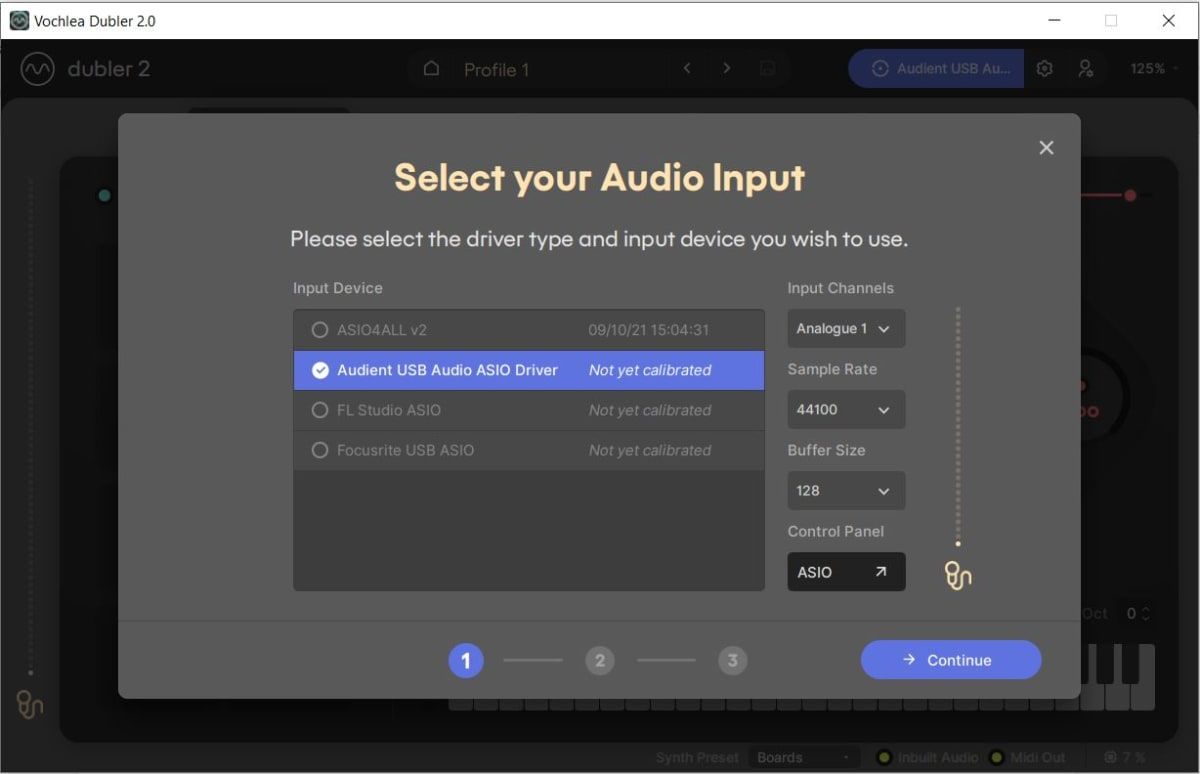
In the top right, select the input channel that the mic is connected to on your audio interface. Once this is done you can check if there is input by the level meter on the right hand side.
Below this you can also set the Sample Rate and Buffer Size. We strongly recommend keeping the sample rate at 44100 and buffer size at 128 samples in order to reduce any latency and avoid any issues with audio output
If you can’t set the buffer size to 128 samples you may need to first set it in your interface's dedicated app. You can open the control panel at the bottom to access this, or may you need to open the app separately from Dubler.
Once you have your input selected, with the correct buffer size and sample rate set you can continue to the next step.
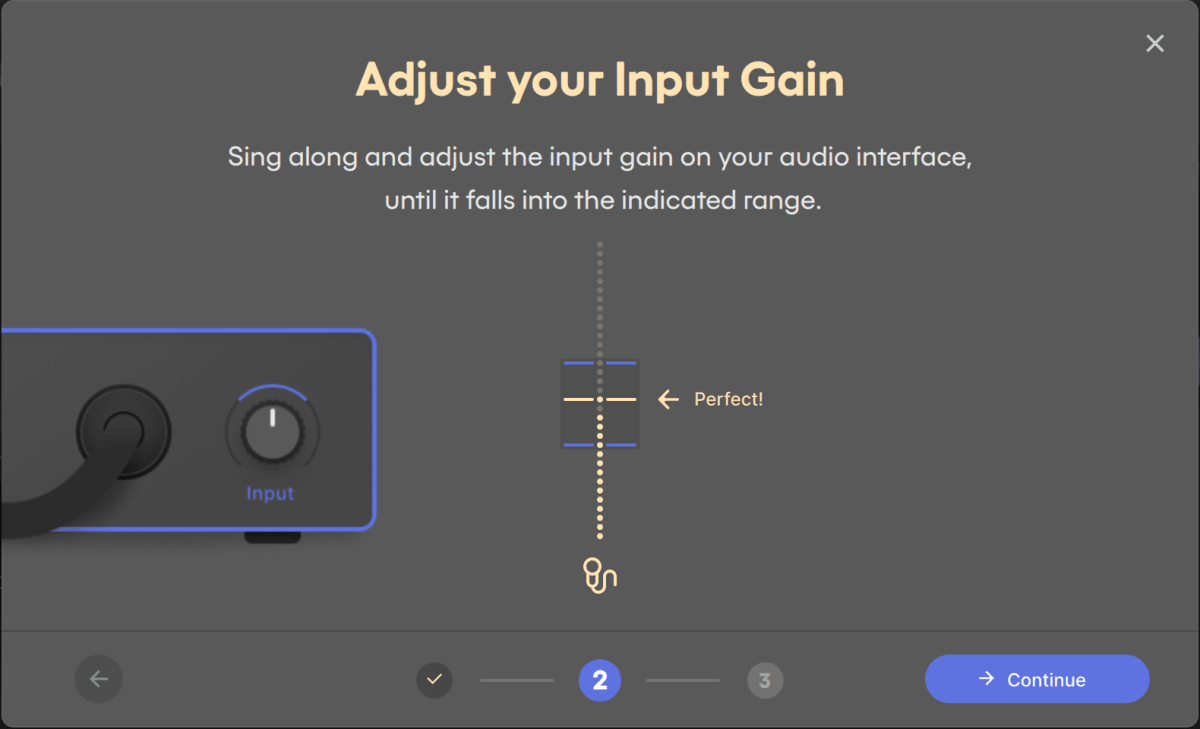
In the next step you’ll need to adjust the gain on your input to make sure it falls within the blue area. Sing into the mic at your normal level and make sure the input falls in this area. If the level is too high or low continue singing at a comfortable level and adjust the gain setting on your interface

You can then proceed to the final step of the calibration process, where you’ll need to hold some notes in the set area of the pitch wheel until the bottom bar is full
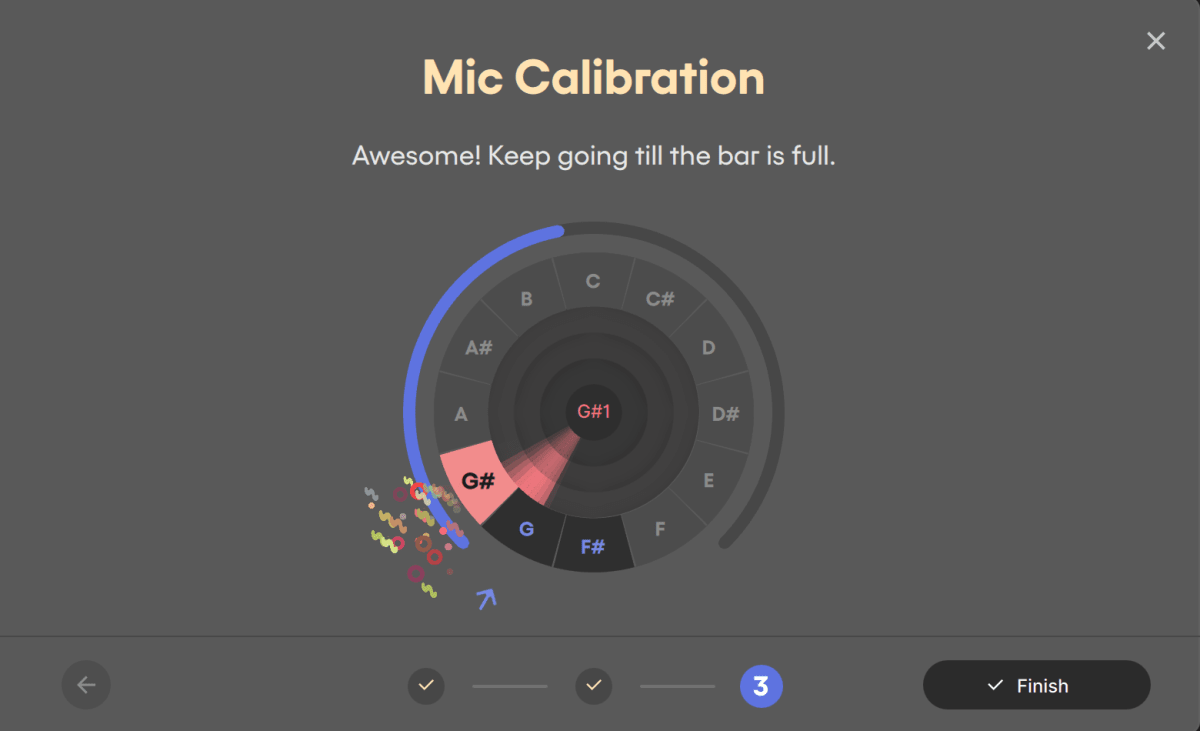
Once this is completed, you can hit finish and your mic is now calibrated.
It’s important to note that if you adjust the gain knob on your interface at any point you may need to recalibrate your mic to make sure all the settings are correct. Similarly if at any point Dubler isn’t responding accurately the first step should be to recalibrate your mic. You can do this by clicking on the active mic in the top right

Calibrating with ASIO4ALL
If you do not have an audio interface that comes with it’s own dedicated ASIO drivers, and you’re not using the Dubler USB mic, you’ll need to use ASIO4ALL in order to set your mic as an input and get low latency performance. ASIO4ALL is a free audio driver available to download here.
Please note that this is not the recommended setup for using Dubler2 and you may have a very poor experience. We strongly recommend using either the Dubler mic or an audio interface that comes with dedicated audio drivers.
When starting the app for the first time without a calibrated mic, the calibration process will begin automatically. The calibration process can also be started by clicking on the active device at the top right. This will be set to None if you have no calibrated inputs connected

The first step is where you can select ASIO4ALL as the input. Once this is done, open the ASIO control panel in the bottom right
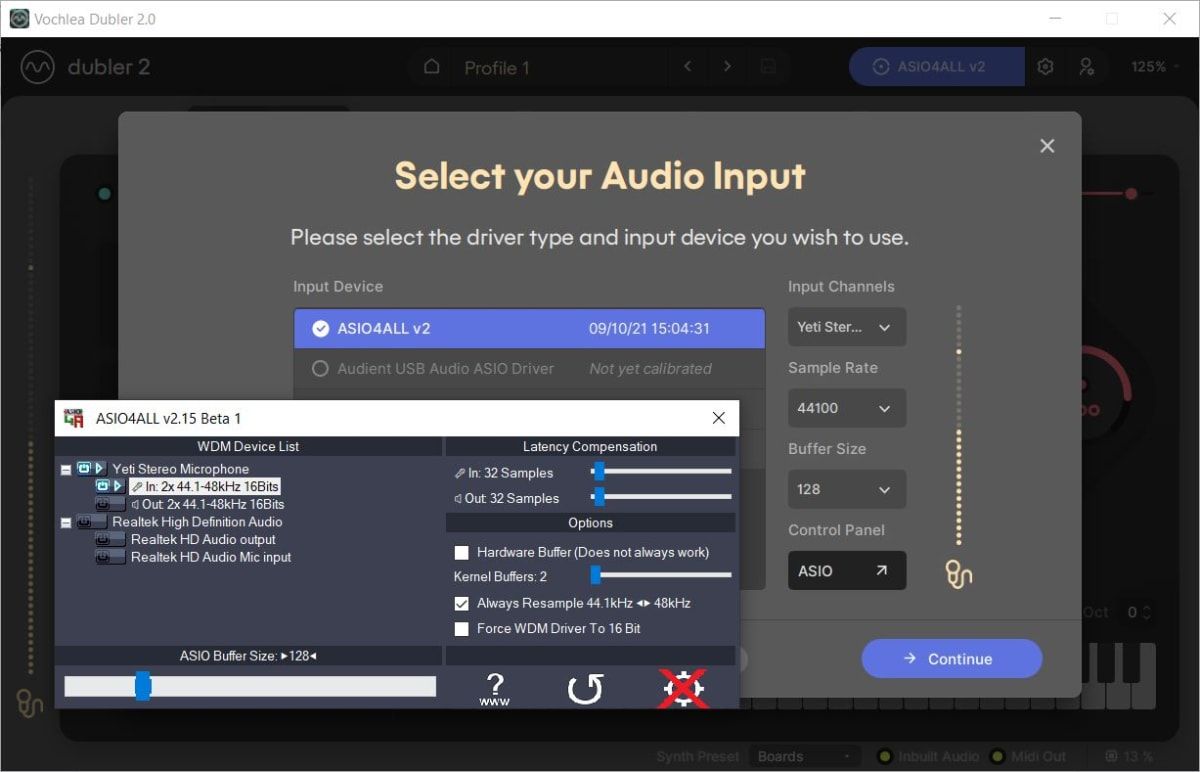
Here you can set the inputs and outputs you want to use, as well as setting the buffer size. It’s very important here to only have the desired inputs and outputs selected. Make sure any other devices that you are not using are turned off. You can open the advanced view by clicking on the cog in the bottom right of the ASIO panel, and see the inputs and outputs for each device.
IMPORTANT: Only one application can use an output or input device in ASIO4ALL at a time. That means we can’t use Dubler’s in built audio, and audio from our DAW at the same time. If we want to use ASIO4ALL to hear output from our DAW, make sure ONLY the input is turned on in this control panel
For example in the above screenshot, we have the Yeti microphone as our input, and all other outputs turned off.
At the bottom make sure the buffer size is set to 128 samples, this can be changed by dragging the blue bar on the slider.
Once this is set you can close the ASIO panel and continue to the next step.
Here we want to make sure that when singing into the mic the input falls within the blue area, if it’s too loud or too quiet we’ll need to adjust the gain. If you’re using an interface with ASIO4ALL you can adjust the gain on the interface directly. If you’re just using a USB mic, most will have a gain knob on the mic itself that you can adjust until the level is right.
You can then proceed to the final step of the calibration process, where you’ll need to hold some notes in the set area of the pitch wheel until the bottom bar is full

Once this is completed, you can hit finish and your mic is now calibrated.
If at any point you need to recalibrate your mic you can restart the process by clicking on the active device in the top right of the app

If you’re having issues using ASIO4ALL you can find our Using ASIO4ALL page here for an in depth guide on setting inputs and outputs in your applications.