Setting up with Maschine 2
In this page we’ll be showing you how to set up Dubler 2 with Maschine
First make sure that you have the Dubler application open, and that you’ve followed the in app steps to calibrate a mic. If you need, we have set up guides for calibrating your mic on both Mac and Windows.
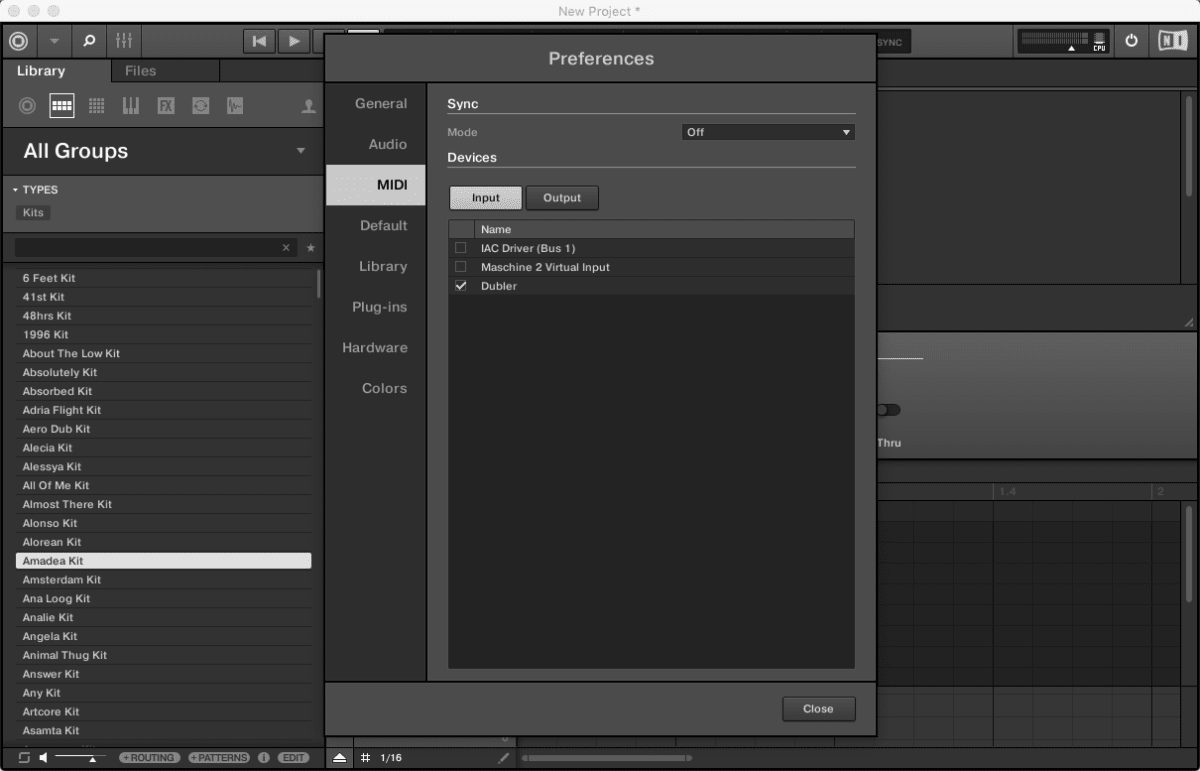
Now you’ll want to enter Maschine -> Preferences

In the preferences enter the MIDI tab and make sure that Dubler is selected on the Input tab
Next you’ll want to head to the Audio tab and make sure the buffer size is set to 128 samples or below. A lower buffer size will mean a lower latency when using Dubler, however this can be more CPU intensive and cause audio drop outs. Find the sweet spot that works for your setup
IMPORTANT: If you're on windows and you don’t have an audio interface that comes with it’s own ASIO drivers you'll need to use ASIO4ALL as your output in Maschine in order to get low latency. You can find out how to set up ASIO4ALL here. Once your audio driver is selected make sure the buffer size for the driver matches the buffer size in Maschine
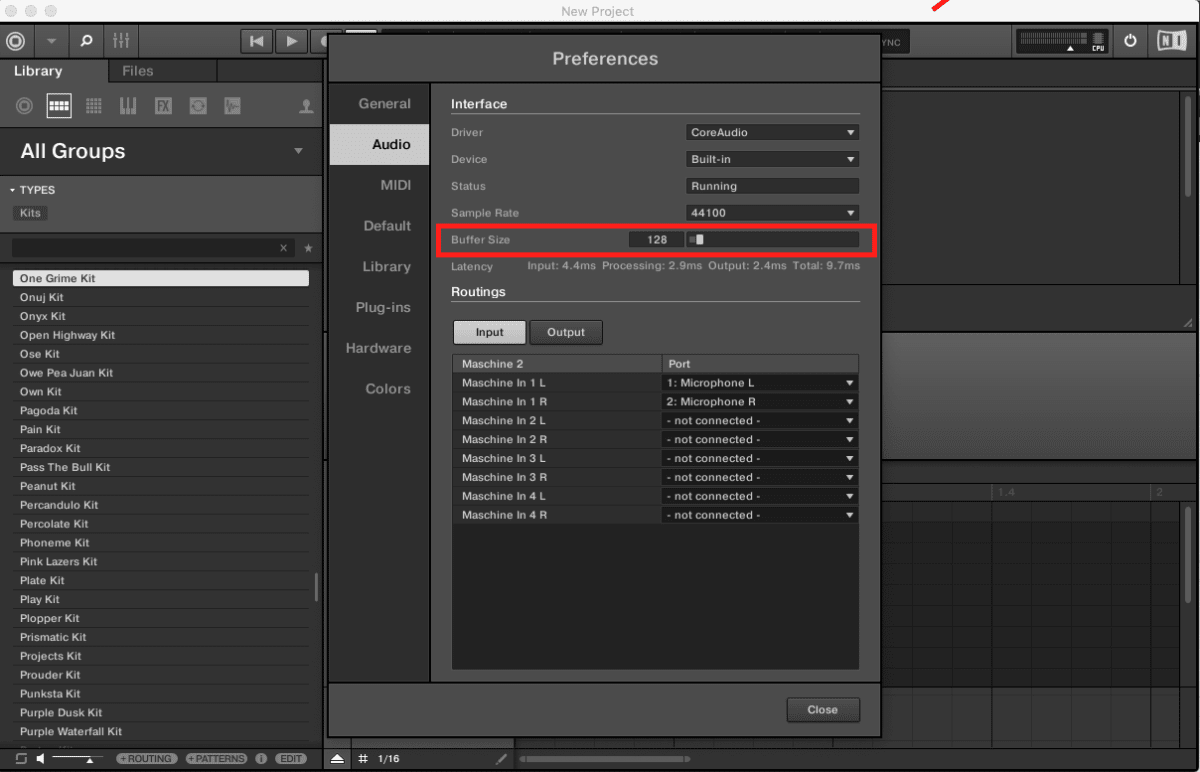
You can now click close.
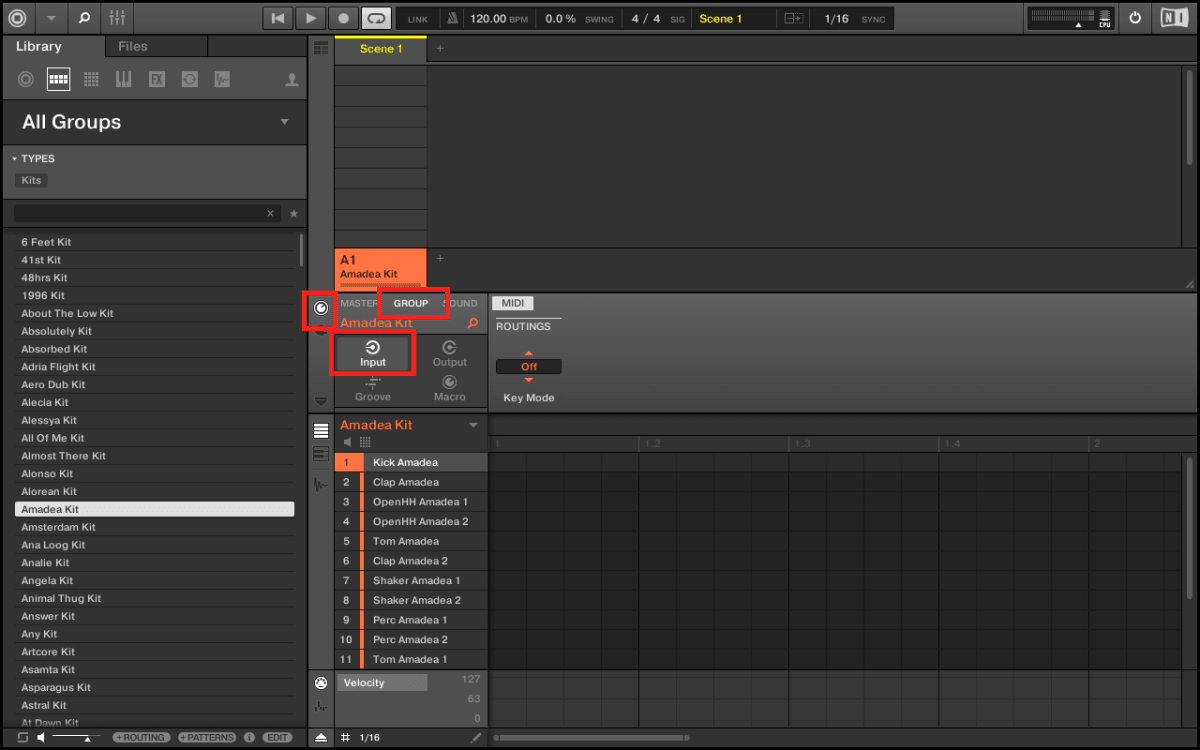
To control a whole group using the triggers, select the knob on the left, go to Group -> Input
Above Key Mode select Manual
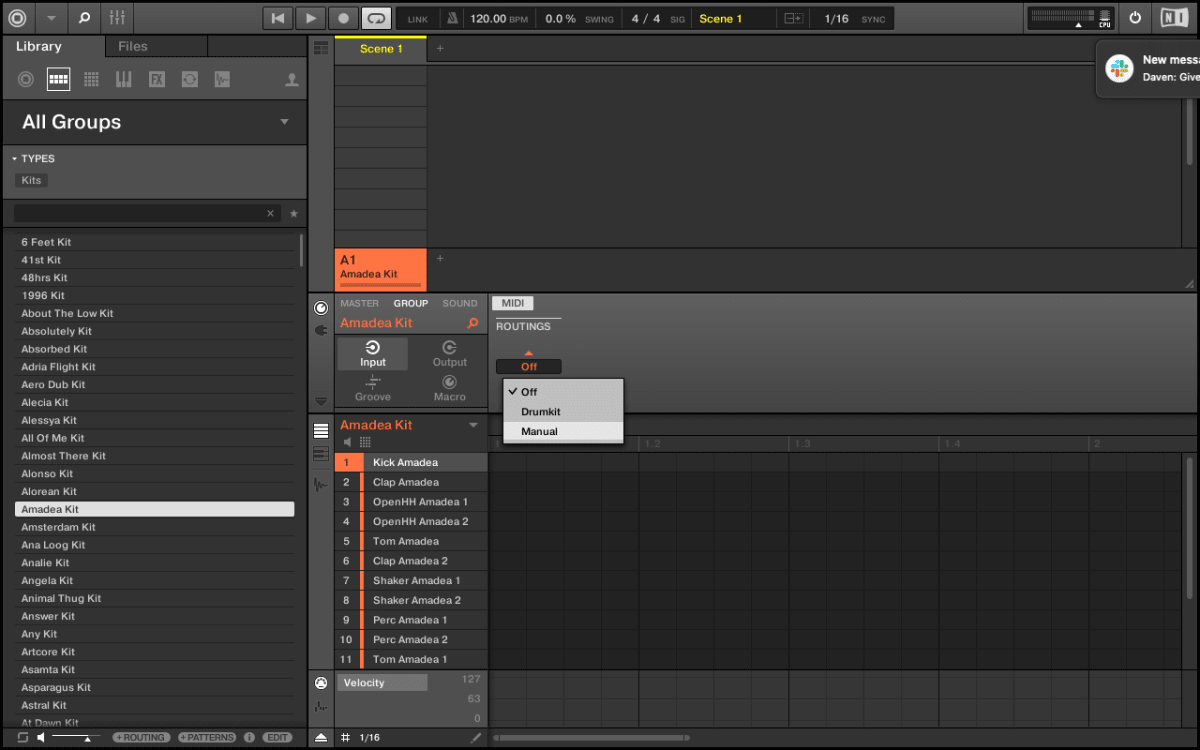
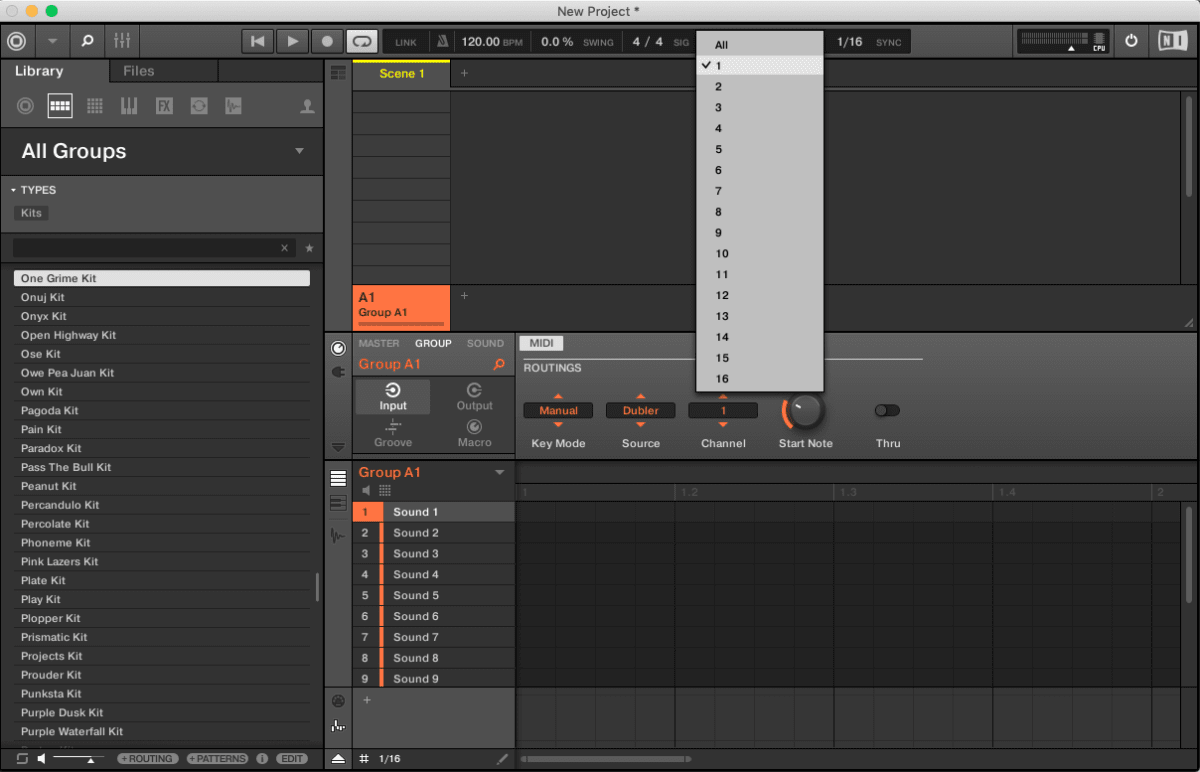
Select Dubler in source and then you can select the MIDI Channel that you wish to receive information from. If you are using triggers to control the Drum Group you’ll want to select MIDI Channel 10
Note: By Default Dubler sends pitch information on channel 1 and triggers on channel 10. Both of these can be changed within Dubler
You’ll now be able to play a whole group with the triggers. You can repeat this process on the sounds tab instead of group if you wish to control individual synths with just the pitch side for example.
To place patterns in, simply hit record at the top, and the beatbox or sing to place them in the grid.
If you want to find out about using Maschine as a VST within Ableton, you can find a user made video here