Setting up with Cakewalk
In this page we’ll be getting Dubler 2 set up in Cakewalk.
First make sure that you have the Dubler application open, and that you’ve followed the in app steps to calibrate a mic. If you need, we have set up guides for calibrating your mic on both Macand Windows.
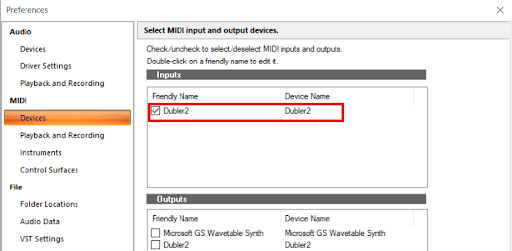
Once this is done, open Cakewalk's Preferences under the file tab in the top left corner (or simply press 'P' on your keyboard), then head to the MIDI Devices tab and you can then select ‘Dubler2’ from the Input list.
Once this is done you can now navigate to the Audio Devices in Preferences. Here you can set your output from your selected output devices (e.g Audio interface or external speakers).
IMPORTANT: If you're on windows and you don’t have an audio interface that comes with it’s own ASIO drivers you'll need to use ASIO4ALL as your output in Cakewalk in order to get low latency. You can find out how to set up ASIO4ALL here. Once your audio driver is selected make sure the buffer size for the driver matches the buffer size in Cakewalk.
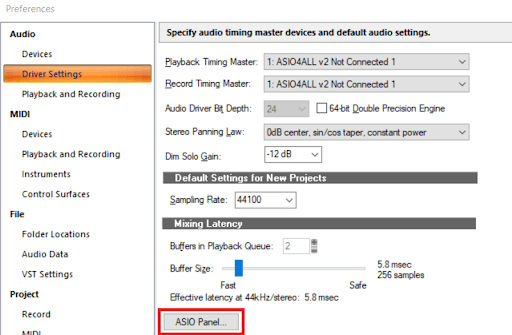
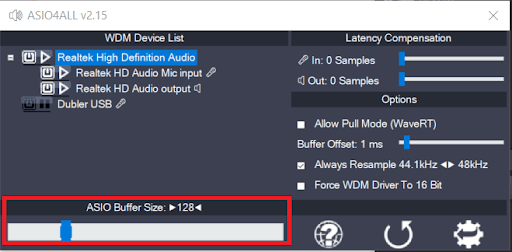
To set the buffer size in Cakewalk, you will need to open the 'ASIO Panel' within the 'Audio Driver Settings'. A new window will appear where you can adjust the 'ASIO Buffer Size' down to 128 samples.
You can now exit Preferences.
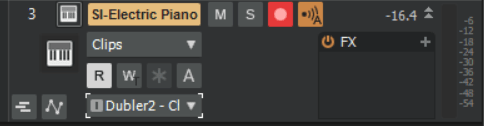
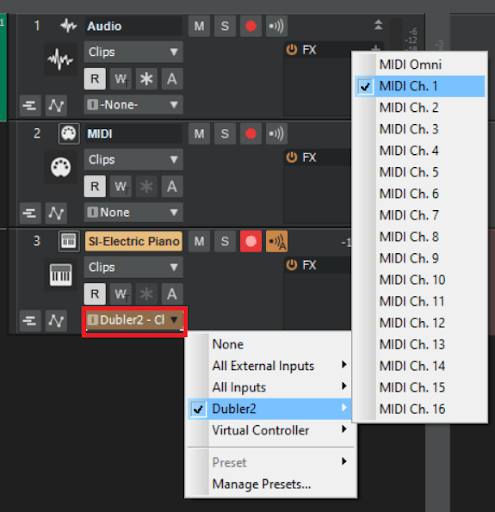
You can change the MIDI channel your active track is receiving information from by clicking on the MIDI Input drop down menu on your chosen MIDI channel.
By default, Channel 1 receives MIDI information from the PITCH side of Dubler and Channel 10 receives MIDI information from the TRIGGERS side of Dubler. You can change this in the Assign Tab in Dubler.
After this, make sure the track is armed and Dubler is now ready to use with the selected MIDI channel.