Getting Started with Cubase
In this page we’ll be guiding you through how to set up Dubler with Cubase
First of all make sure that the Dubler application is open at the the mic is connected, as shown by the green logo at the top of the app

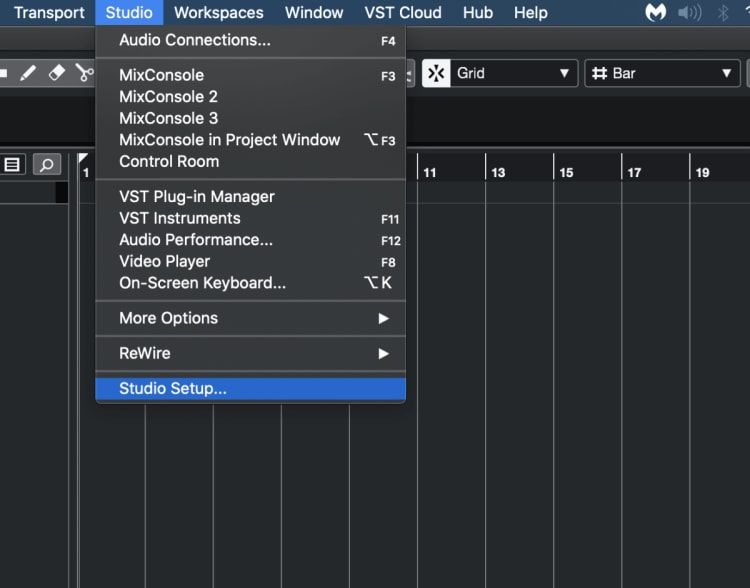
Once this is done you can now open Cubase and enter one of your projects. Head to Studio at the top and then Studio Setup
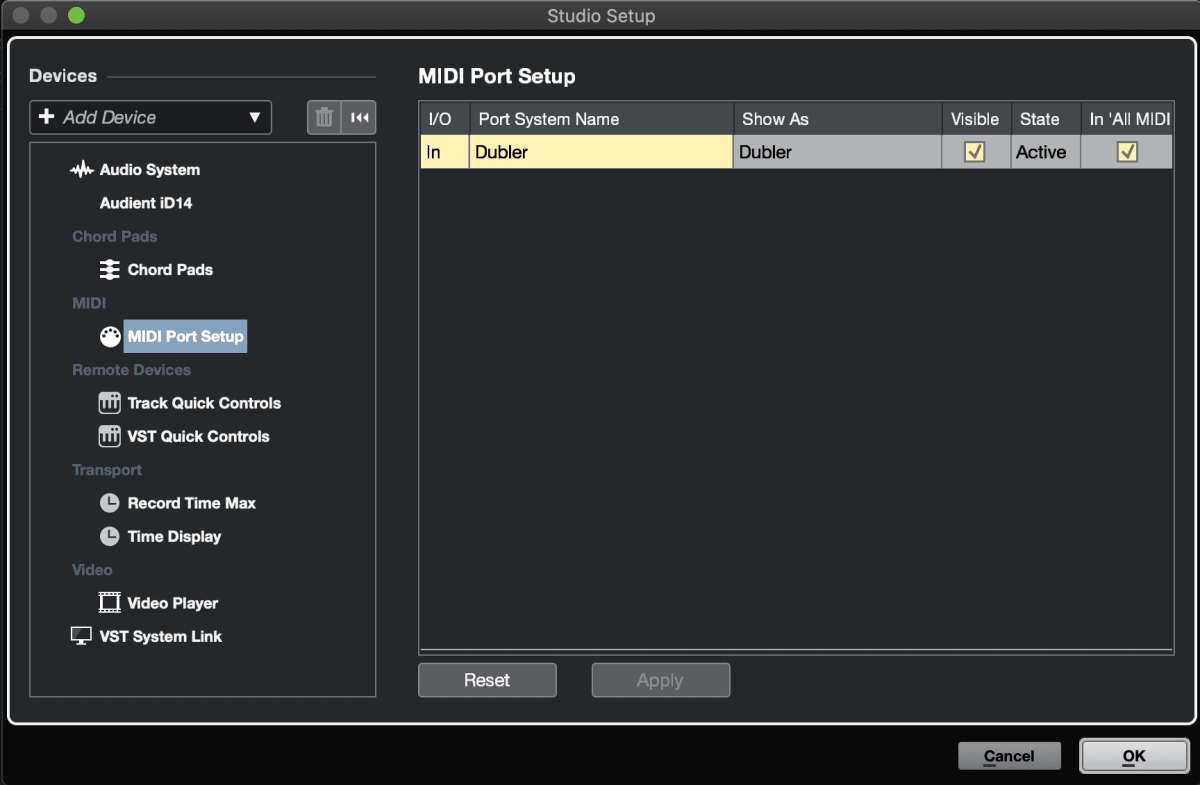
In the Studio Setup navigate to MIDI Port Setup and make sure that both Visible and In 'All MIDI inputs' is selected for Dubler
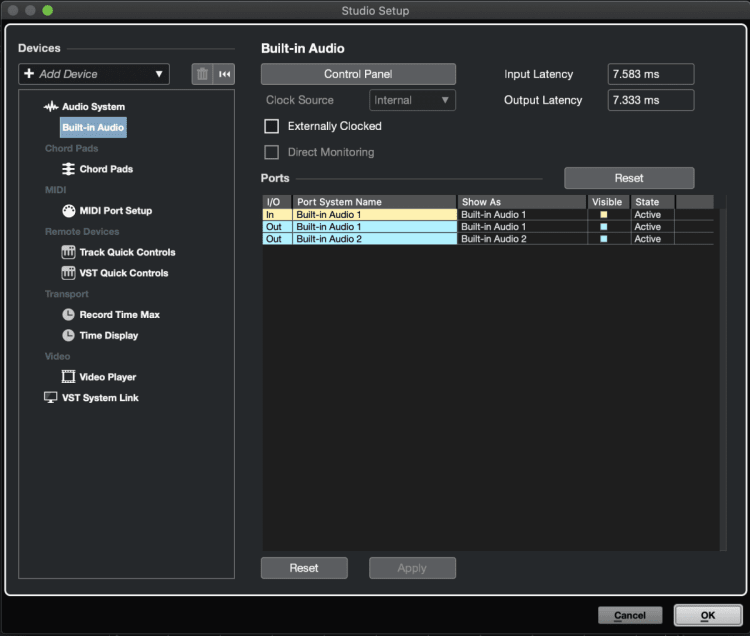
Now navigate to Audio System and make sure you have the appropriate driver selected for your output
IMPORTANT: If you're on windows you'll need to use an audio driver such as ASIO4ALL or a driver that comes with an audio interface to make sure you have low latency. If you use the in-built driver on your windows computer the latency with Dubler will be bad. You can find out how to setup ASIO4ALL here.

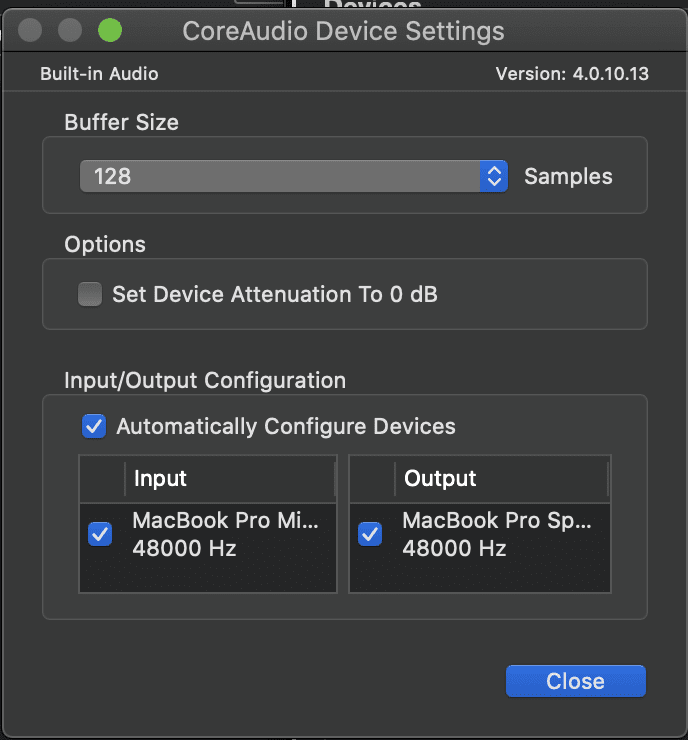
Now we can head to Built-in Audio and select Control Panel. Here we can set the buffer size. In order to achieve low latency we recommend you setup the buffer size to 128 samples or below
You can now click close on the control panel and click OK to exit Studio Setup
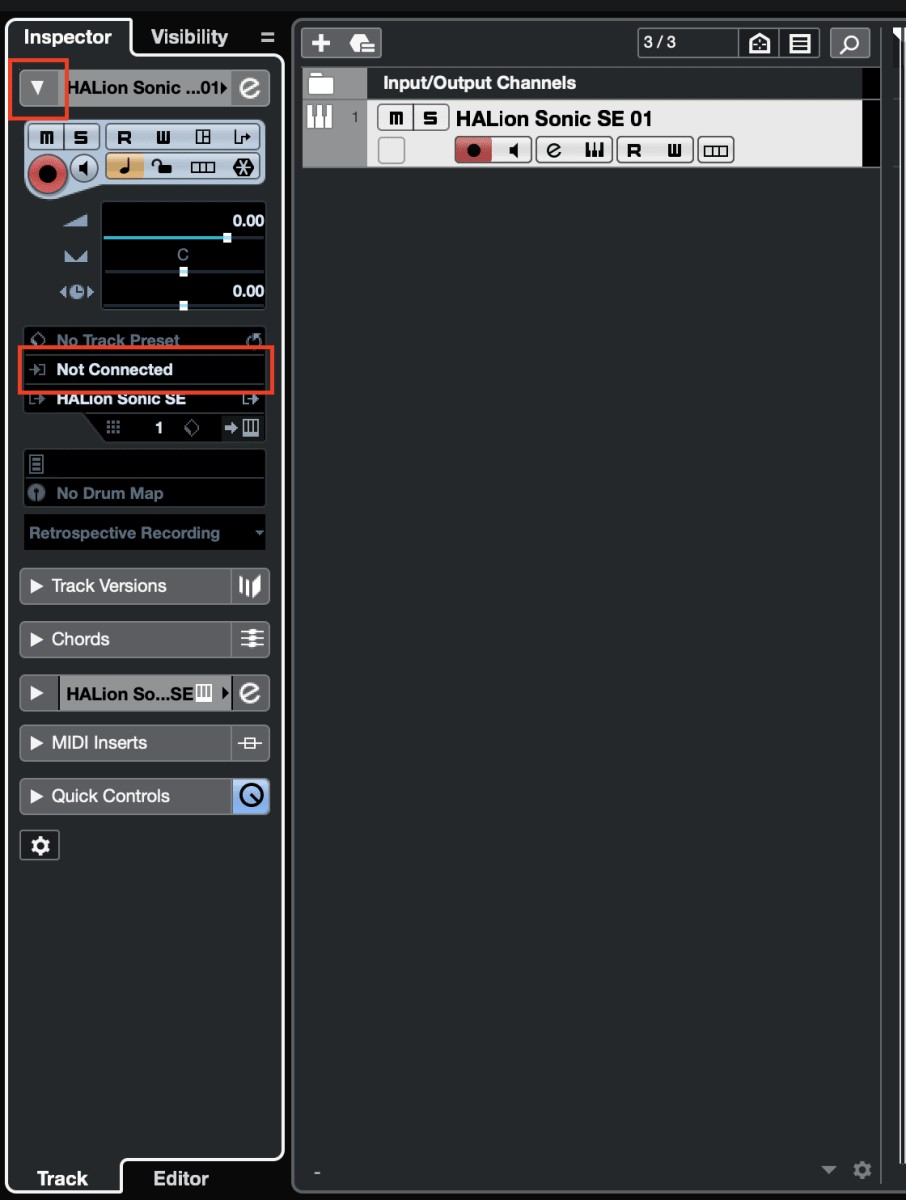
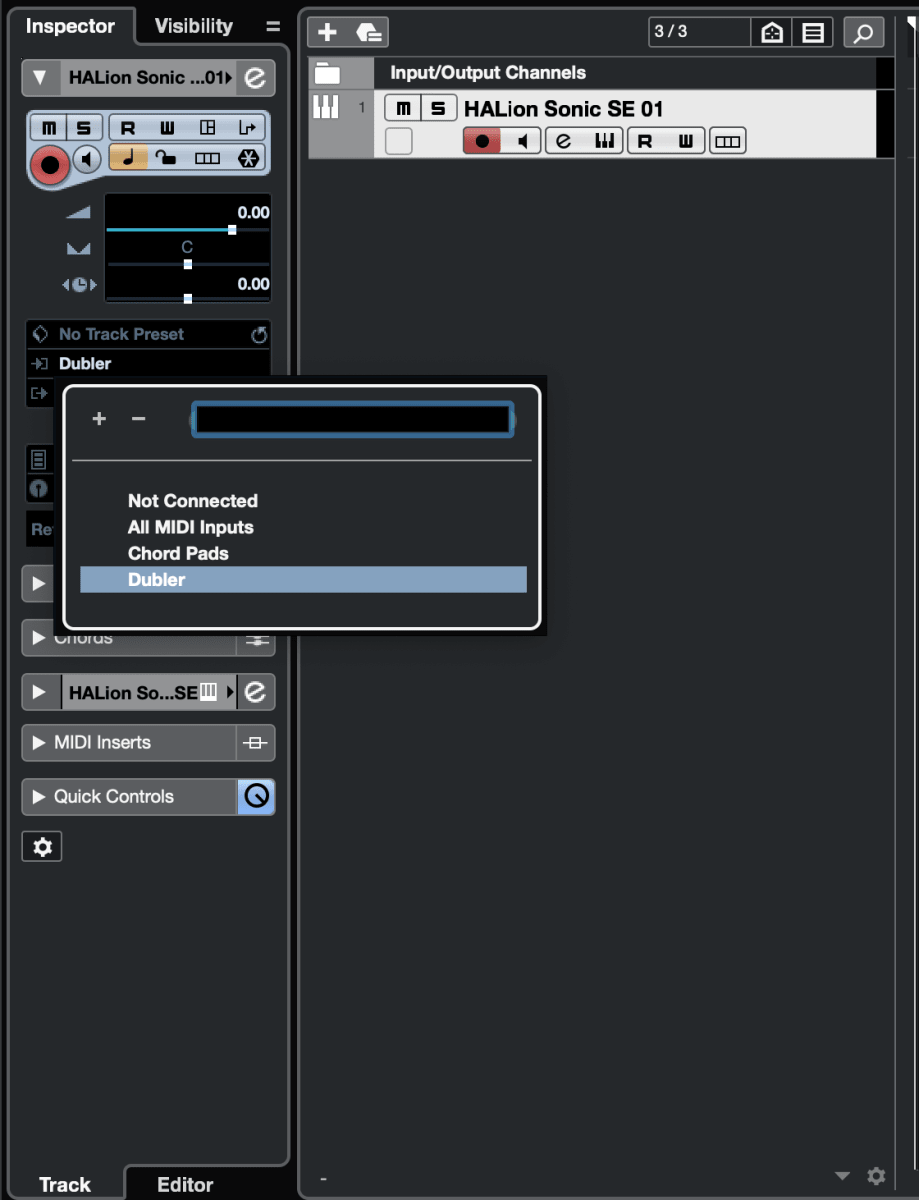
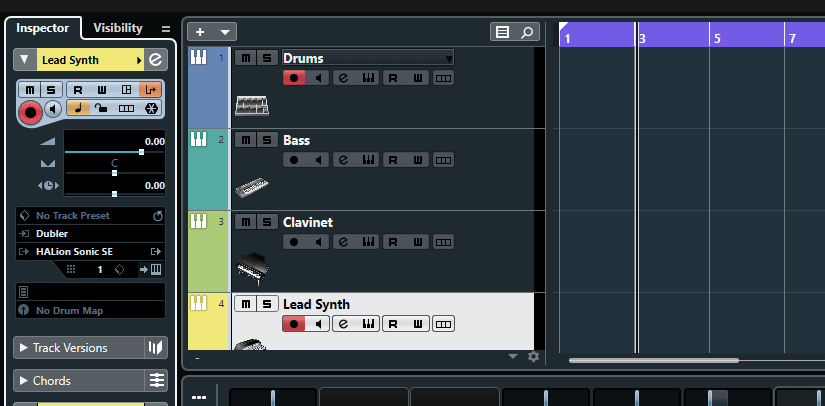
Next add a software instrument track that you want to control. In the Inspector tab on the left, open up the Edit Channel Settings drop down and select Dubler from the Input Routing box
Now this is done, you can arm the track and Dubler will be ready to use
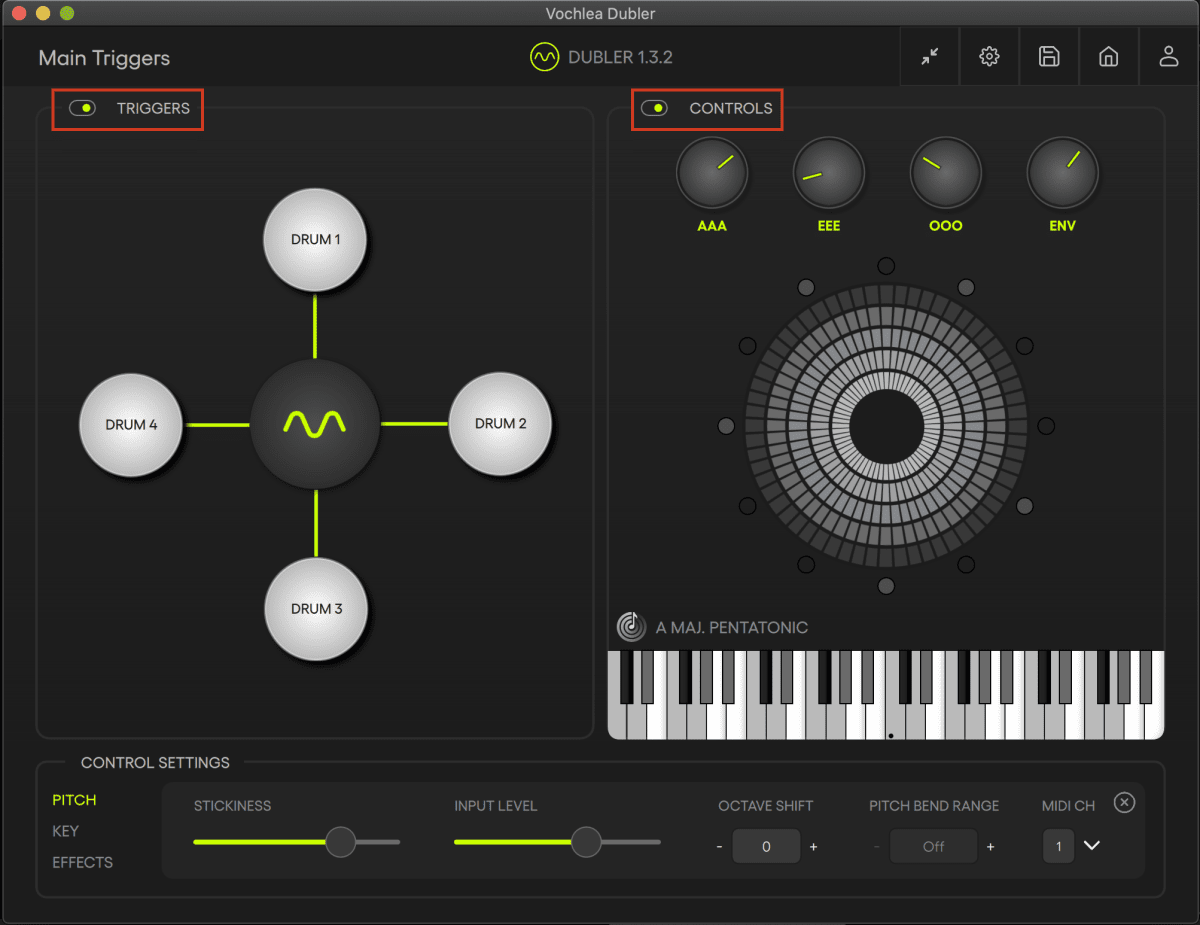
When Cubase is setup this way it will be receiving information from both the triggers and pitch side of Dubler. In order to avoid sending unwanted notes we recommend turning off the side of Dubler that is not in use. You can do this via the green sliders in the Dubler app
If you want to leave both sides of Dubler on, or want to control multiple channels with both triggers and pitch, you can select which MIDI channel the track receives via these steps
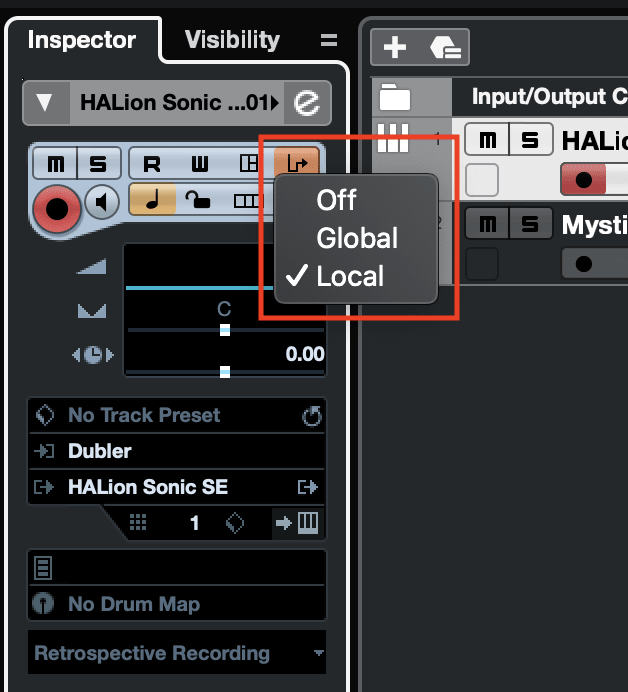
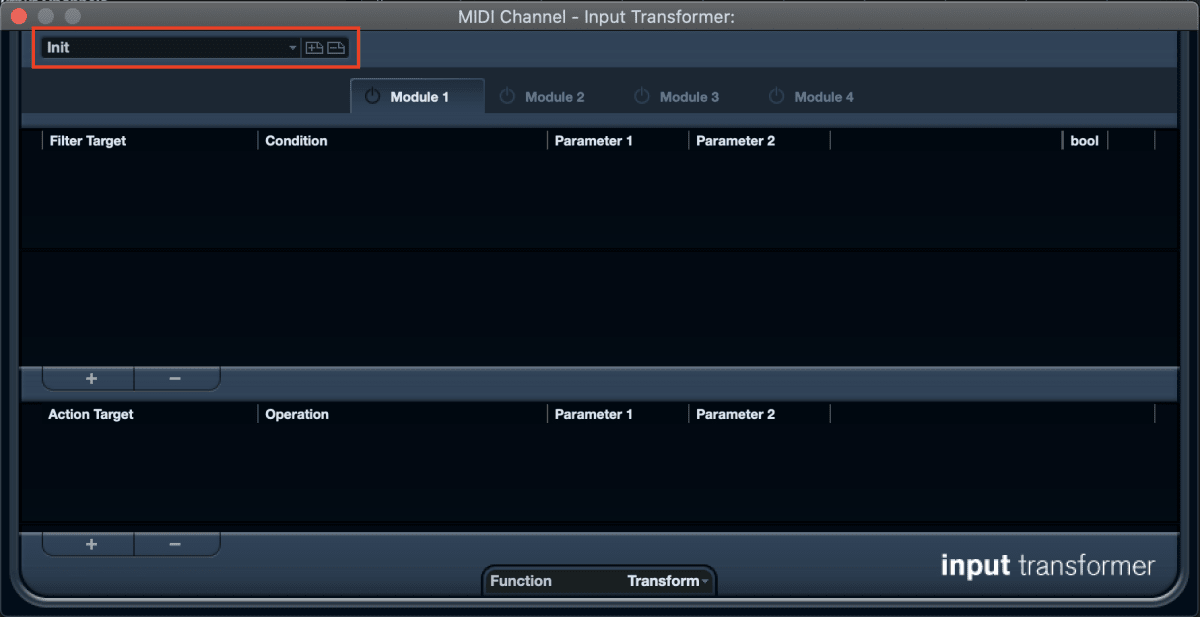
Select the Input Transformer button in the Inspector tab and select ‘Local’ from the drop down menu
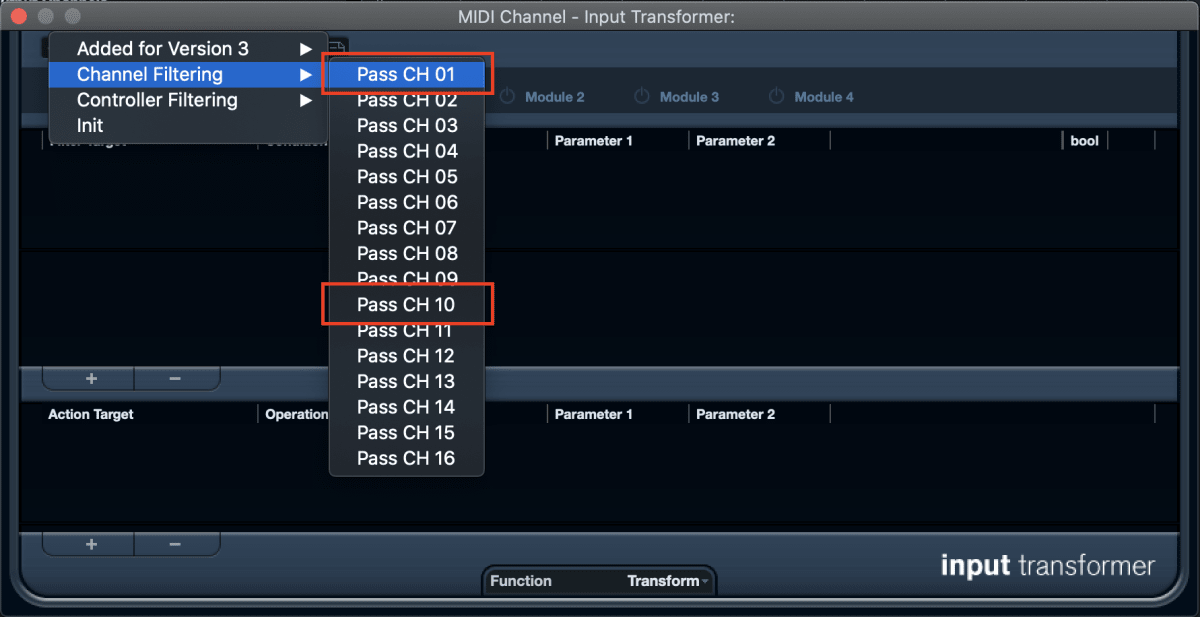
You’ll now see the input transformer box. Click the box in the top left of the window and select Channel Filtering from the drop down menu. Here you can then select which MIDI channel you want the track to receive info from.
Note: By default the Triggers works on MIDI channel 10. The Pitch works on MIDI channel 1.
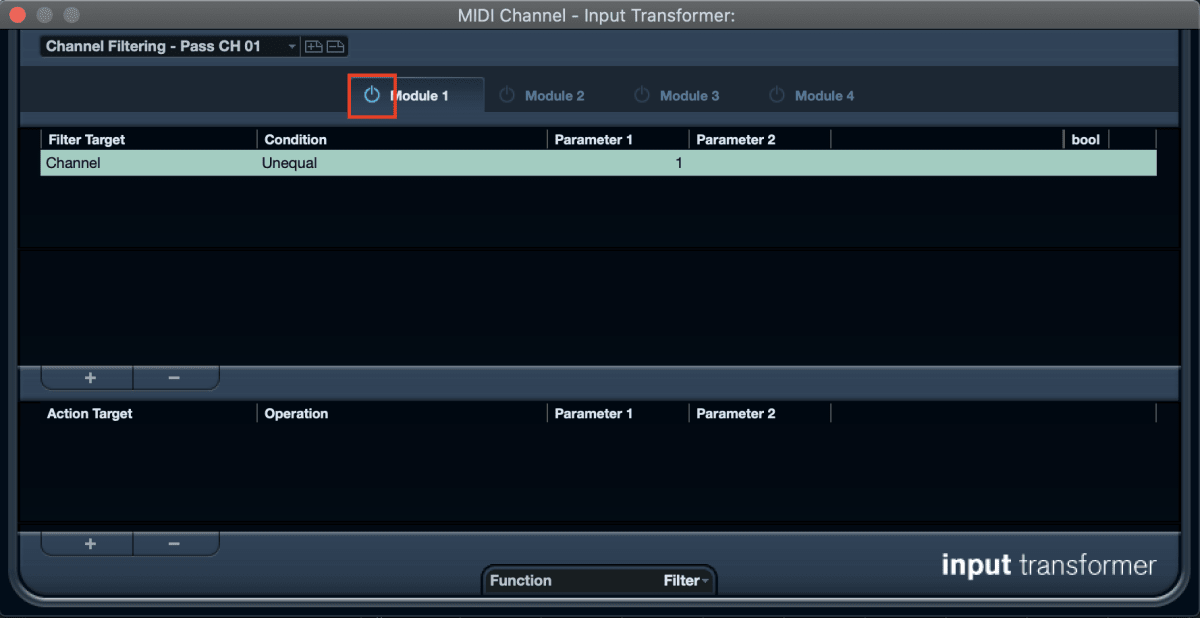
You can now close the input transformer box and repeat the above steps for which ever channel you like. In order to play multiple channels at the same time, make sure that the above steps are done for each track and then you can arm multiple tracks by alt clicking the record button
Note: On Windows make sure “Constrain Delay Compensation” is on in order to reduce latency.