Using Pitch
This content is hosted by YouTube and may set cookies.
In this page we’ll take a look at using pitch in Dubler 2.
The pitch wheel at the centre of the play tab gives you feedback on the pitch you’re singing and the corresponding note that is being sent out to your DAW. The ‘spokes’ that fan around the wheel light up in coral according to the input pitch and envelope. They act like a compass pointing towards the note your input singing is closest to. This is also a great way to see if you are singing flat or sharp.
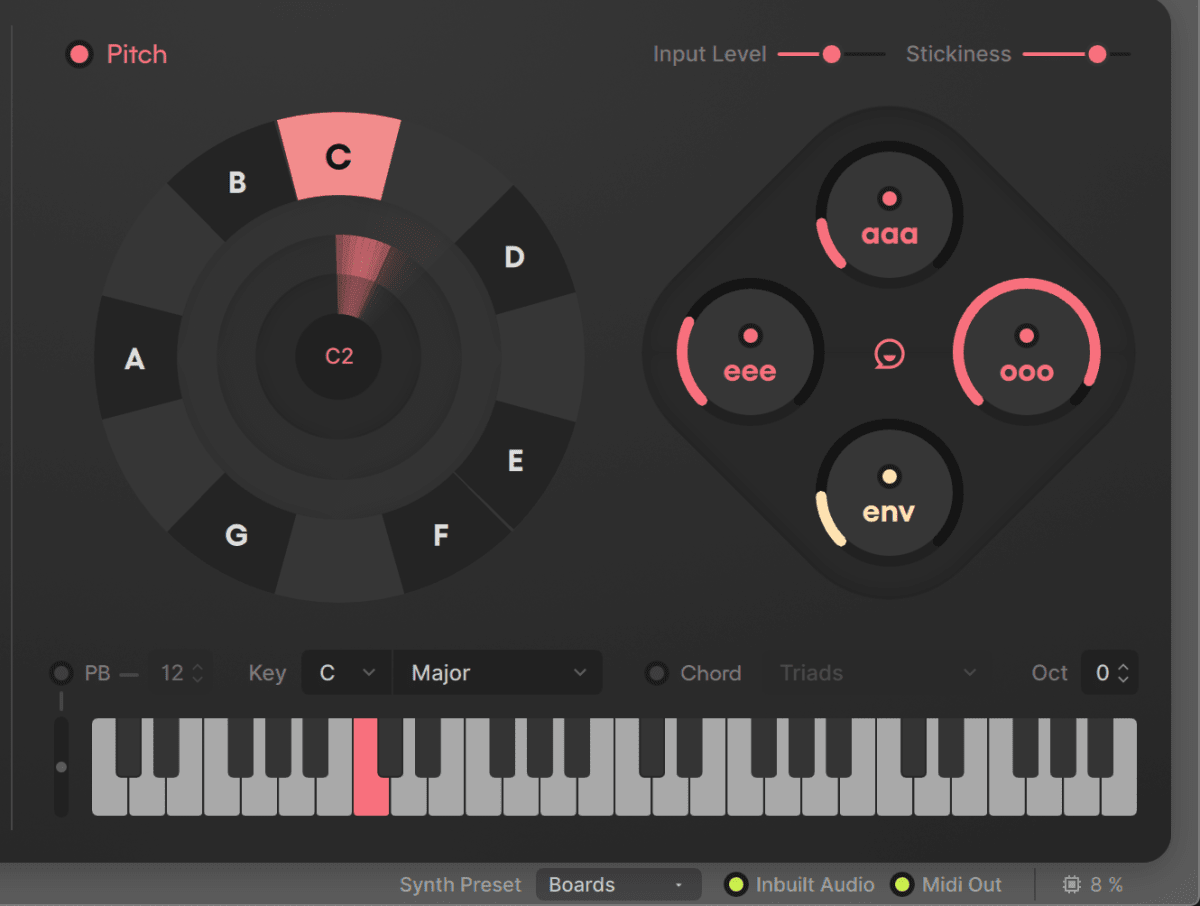
On the outer circle of the pitch wheel there are evenly spaced segments, showing the active notes in the key you have set. The current key you have set restricts the output to the specific range of notes in that key, and will help avoid any unwanted notes. If you want to find out more about how key restrictions work, including how to create custom key restrictions, check out our pagehere
IMPORTANT:When using Dubler, make sure you’re singing clearly, confidently and most importantly distinctly. Meaning you make sure you’re separating notes when singing a melody.
The difference between mumbling a melody and clearly singing it is quite drastic in terms of MIDI output. To hear an example of this watch our using pitch video at the top of this page
There are also sliders that can be adjusted to change Dubler’s response depending on your input style. We recommend keeping these at the default level whilst you’re first getting used to Dubler, but they can be adjusted to find what fits best for you.

The input level allows for a more accurate control depending on singing or input style. A higher input level will pick up more information from your voice and would be recommended for quiet singing or humming. Higher input level can be more susceptible to background noise and a lower input level might be preferable for louder singing styles with noisy backgrounds.
Pitch Stickiness determines how close you have to get to another note before the MIDI information will change. A high pitch stickiness will make it easier to hold a note but also harder to change from it.
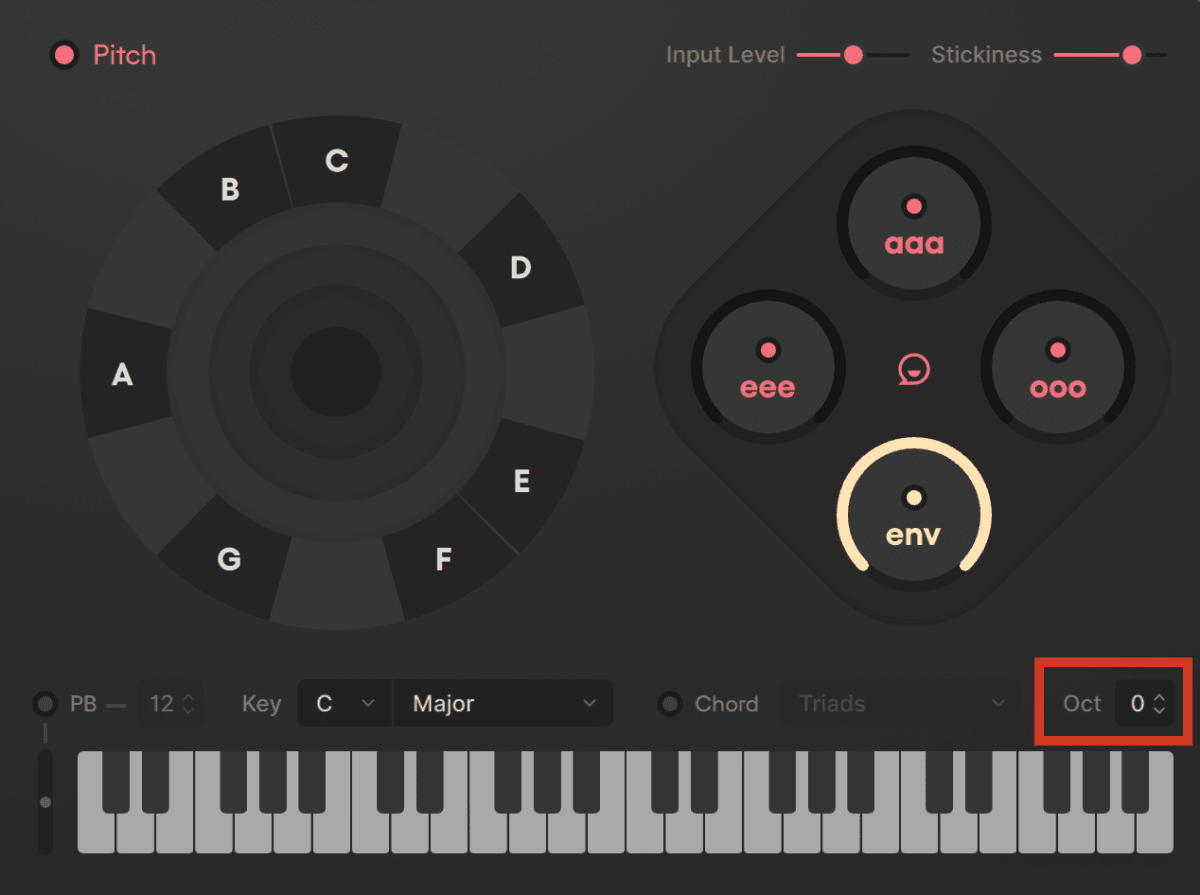
The octave of the MIDI output can also be adjusted in the bottom of the right of the play tab.
Pitch Bend
Pitch Bend can also be toggled on or off and allows you to bend the pitch of a note with your voice, the same as you would with a pitch wheel on a MIDI keyboard. Pitch bend works over a range – where the range number represents how many notes away from the original note you can bend.
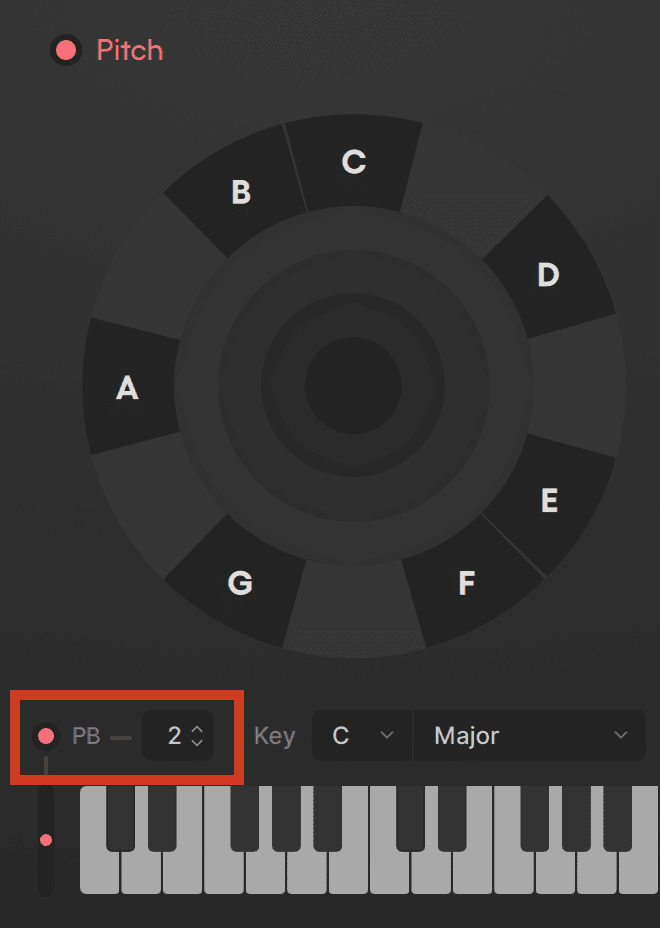
For example with a pitch bend range of 2 if you start singing a C and then bend your voice up, you can bend 2 steps, as far as a D, before a new note is triggered in your DAW.
IMPORTANT: Make sure the pitch bend value in Dubler matches the pitch bend range on the MIDI instrument or plugin you are controlling in your DAW. If these numbers don’t match then the output pitch from your DAW won’t match the input pitch of your voice.
There are different types of pitch bend that you can select in Dubler, which can be changed over in the Assign Tab.
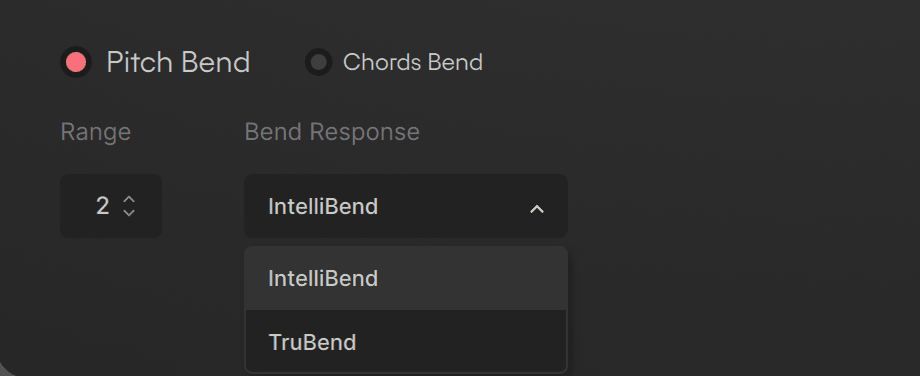
IntelliBend is an intelligent system that turns off pitch bend when you are settled on a note. So you can bend into or out of a note, but whilst you are close to a note you will be anchored to it. How strongly you are anchored to sustained notes can be adjusted using the stickiness slider in the play tab.
TruBend will give a more precise bending based on your input, and will track your voice more closely than IntelliBend
Also in the play tab, pitch bend can be applied to chords independent from the root note you are singing.