10 Tips For Getting Started With Dubler 2
12 min read • 26th Jan 2022
In this article, we’re going to go over our top tips for getting started with Dubler 2. We chose many of these based on common questions we get from our community so we hope that they’re helpful, whether you’re using Dubler for the first time or even if you’ve been using the software for a while.
Let’s dive right in!
Tip #1 - Dubler 2 is a standalone app and not a plug-in
We get lots of people writing to us asking why Dubler 2 isn’t appearing in their DAW as a plug-in or asking if there is a plug-in version as an alternative to the software. The short answer is that it’s not a plug-in!
Once you download the software from your Vochlea account and install it you’ll get the standalone app.
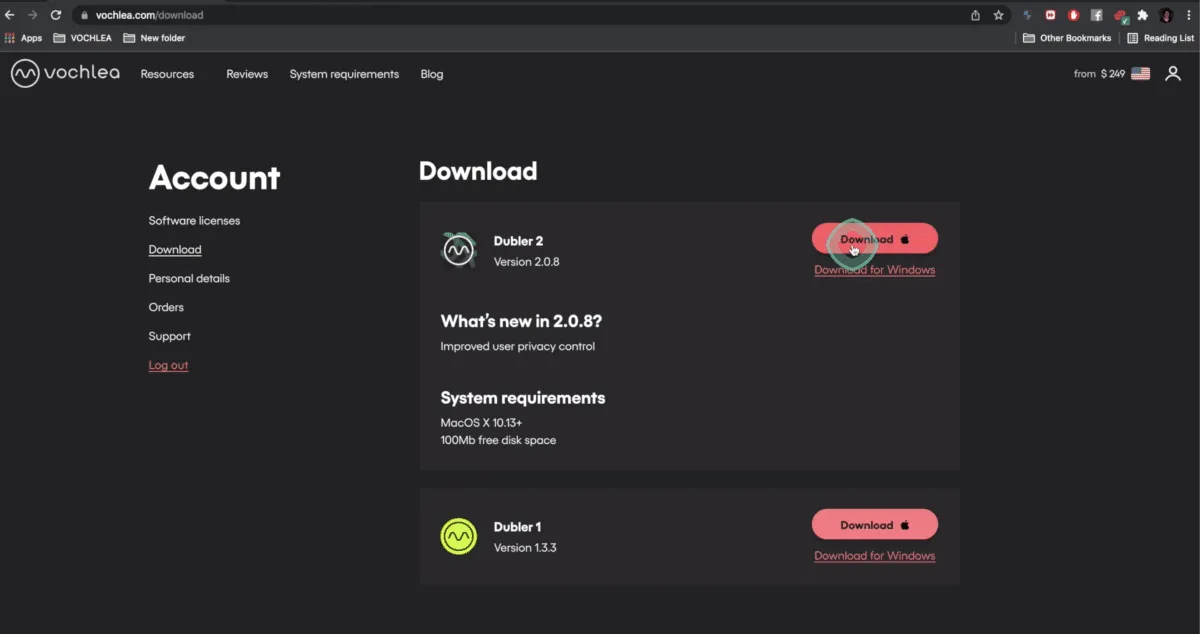
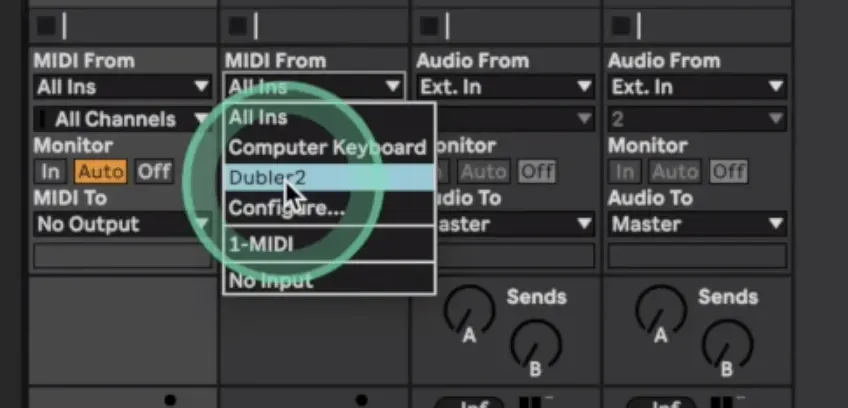
With the app open, your DAW sees Dubler 2 as a MIDI controller and it should appear in the MIDI Devices section in your preferences, like any common USB MIDI keyboard.
Tip #2 - Use our troubleshooting resources and don’t hesitate to contact support!
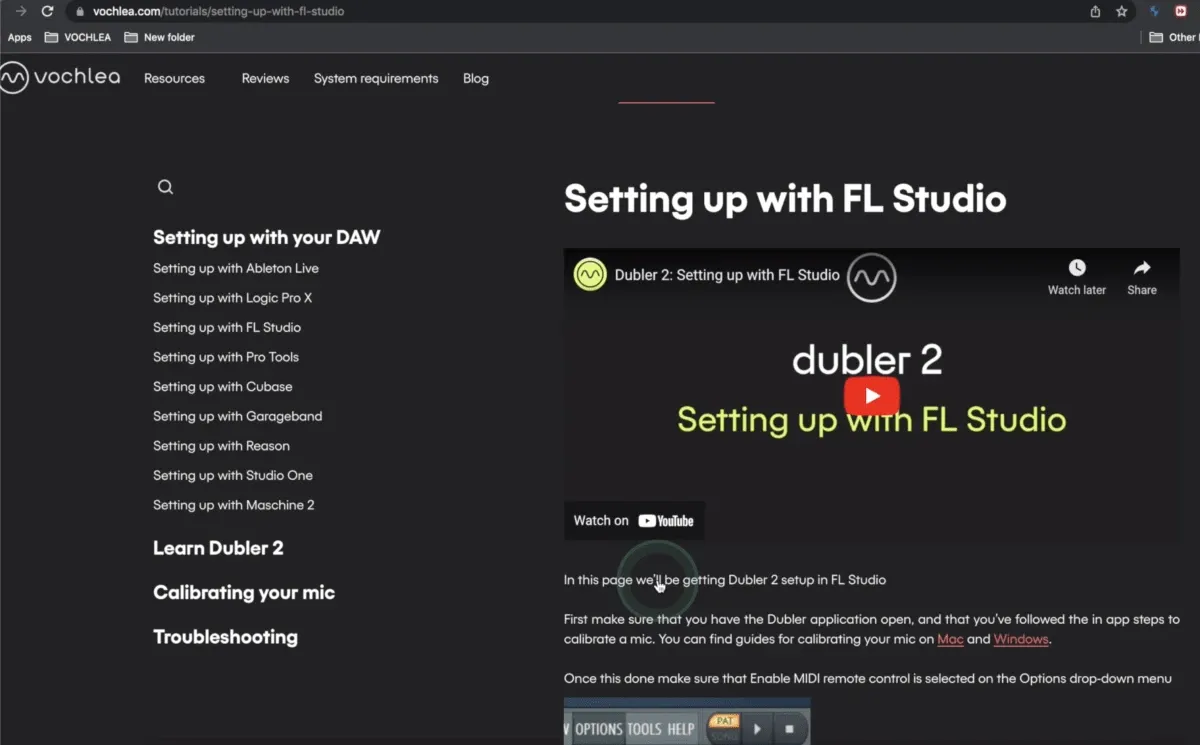
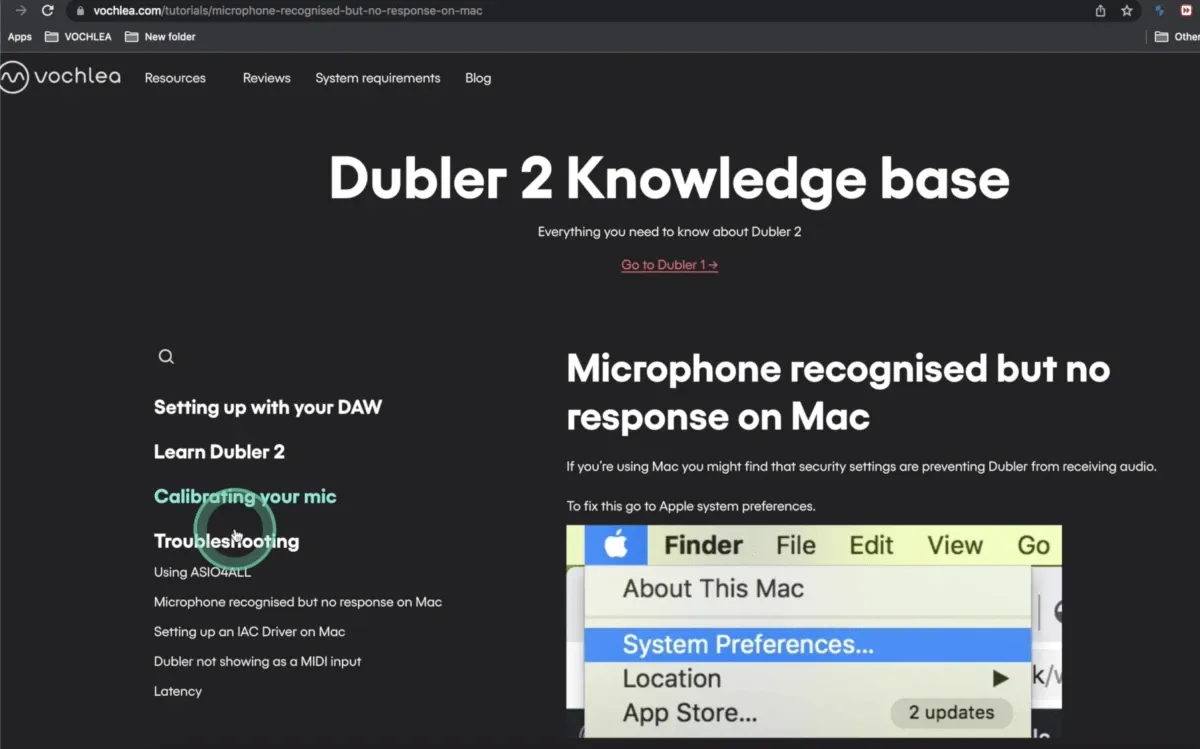
If you’re having trouble setting up, hearing latency or experiencing any kind of technical issues, be sure to use our troubleshooting page on our website vochlea.com.
There are lots of useful resources such as how to set up with the most common DAW’s, videos and articles exploring Dubler 2’s features, guides to calibrating your microphones with or without audio interfaces on both Mac and Windows, and solutions to other issues such as latency or Dubler 2 not appearing as a MIDI device.

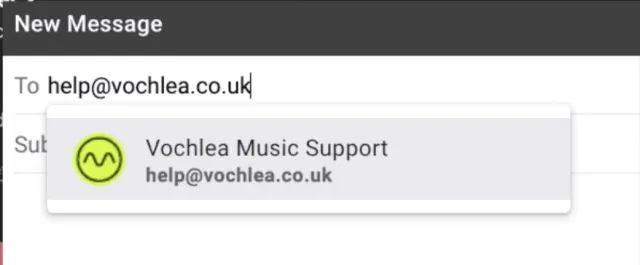
If you’re unable to solve an issue you’re experiencing our support team is very quick to respond and can be reached at help@vochlea.co.uk
You can also create a new support ticket from within your Vochlea account online by clicking Support and filling in the required fields.

Tip #3 - Separate notes by using percussive sounds and syllables while singing melodies
A common misunderstanding or expectation people have with Dubler 2 is that you’ll pick up your microphone, make a flurry of random sounds and get a perfectly flawless MIDI melody!
But like any instrument it takes some practice and there are some techniques you can apply to really improve pitch accuracy. The first thing to do is to use percussive sounds at the beginning of notes. For example singing a melody with 'Daa Daa Daa' or ‘Paa Paa Paa’ instead of 'Aaa Aaa Aaa’ or ‘Ooo Ooo Ooo’
This helps to separate each individual note, making the note start more obvious to Dubler. Here are a couple examples where we’re using syllables like “Pa” and “Ka” while singing each note:
If you sing without percussive sounds it’s much harder for the software to understand when you’re changing notes! Singing like this can also add additional unwanted notes to your MIDI melody.
Find the syllables that work best for you and sing clearly and confidently for the best results!
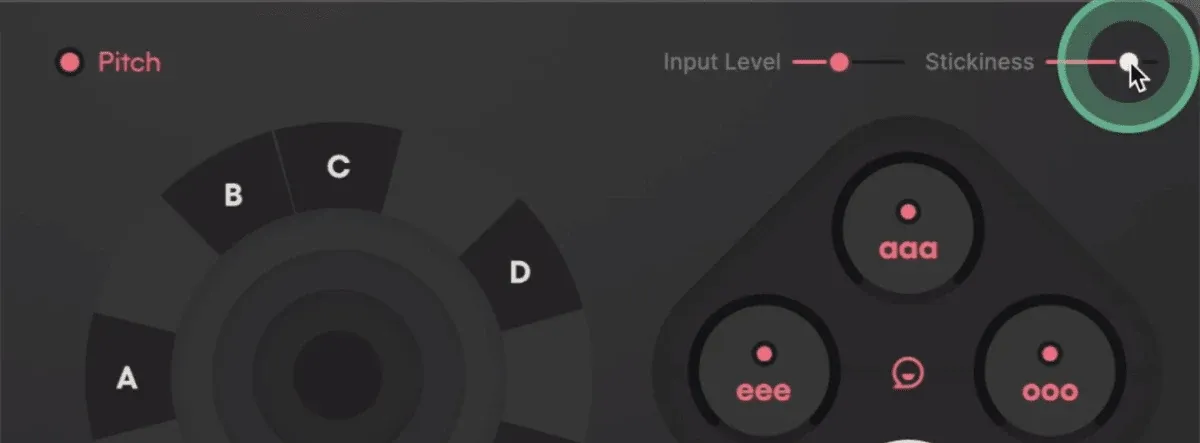
If you’re finding that the notes are jumping around a lot as you sing, you can try dialing down the input sensitivity and turning up the stickiness. A higher stickiness value make it harder to switch from note to note.
Tip #4 - Sing with background music and use slower BPM’s to increase pitch accuracy
Most of us don’t have perfect pitch so when we sing a note out loud it will never be perfectly correct. Something that can really help with this is singing over music.
This could be a chord progression, a pad or even one long sustained note. The musical context will help you stay in key and sing more correct notes even if you’re not an experienced singer.
Having an idea in your head before singing it out loud will help even more with this technique.
For busier melodies with more notes it’s good practice to lower your BPM. Even if your song is fast you can record your idea at a slower tempo and then speed everything back up.
Here’s an example where we’ll sing in a bass part at 108 BPM and then speed our track back up to 125 BPM:
Tip #5 - Use sounds that fit with your style of singing
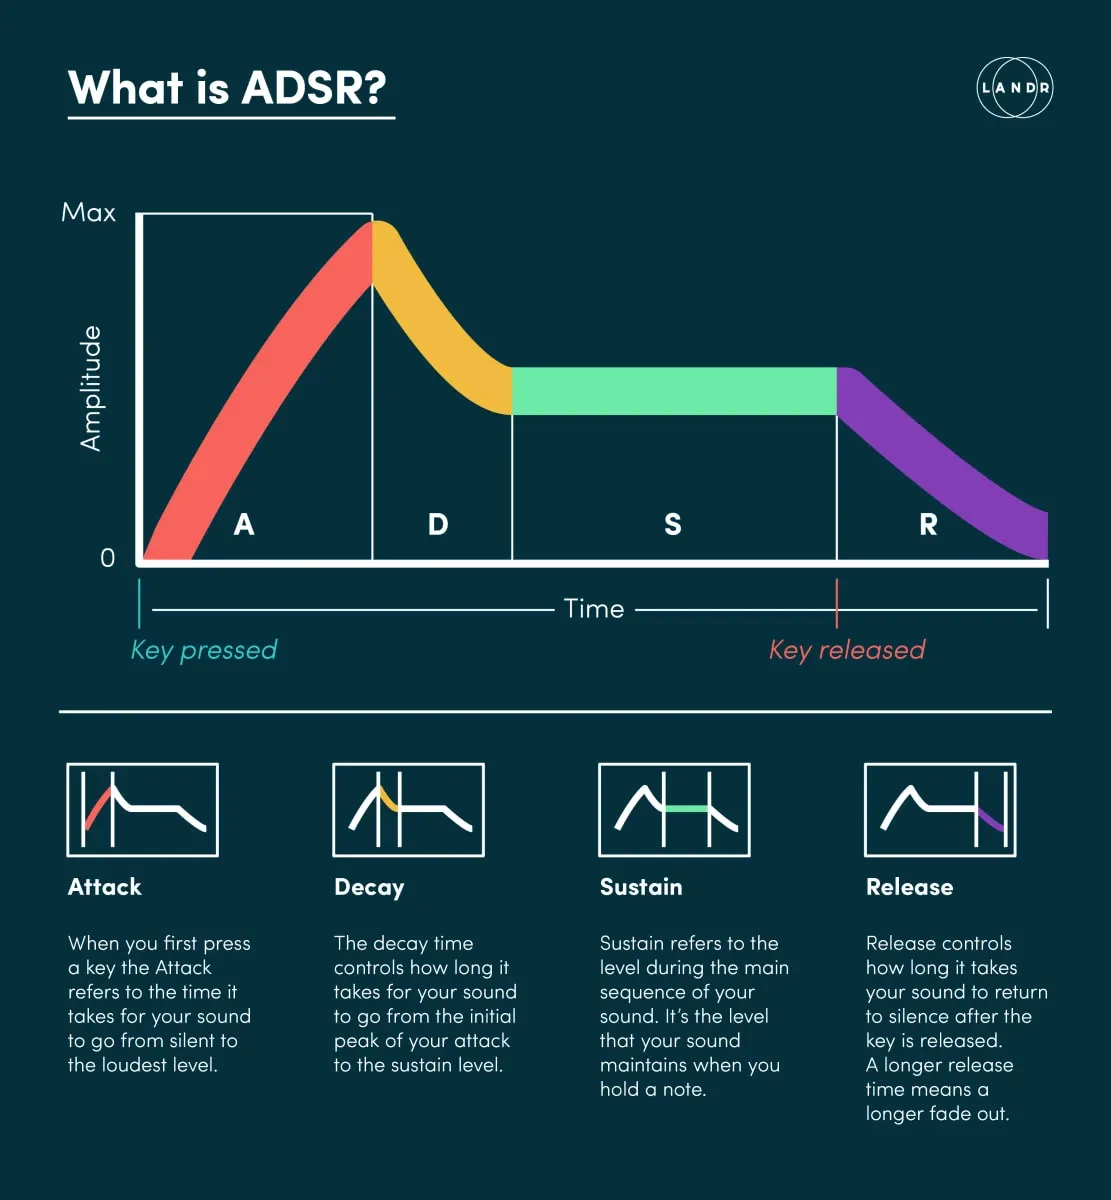
The envelope of the instrument, synth or sample you use is crucial in your ability to perform it with Dubler 2. For example if you’re going to sing a lot of consecutive notes, it’s not a good idea to use a pad sound where each note has a slow, rising attack:
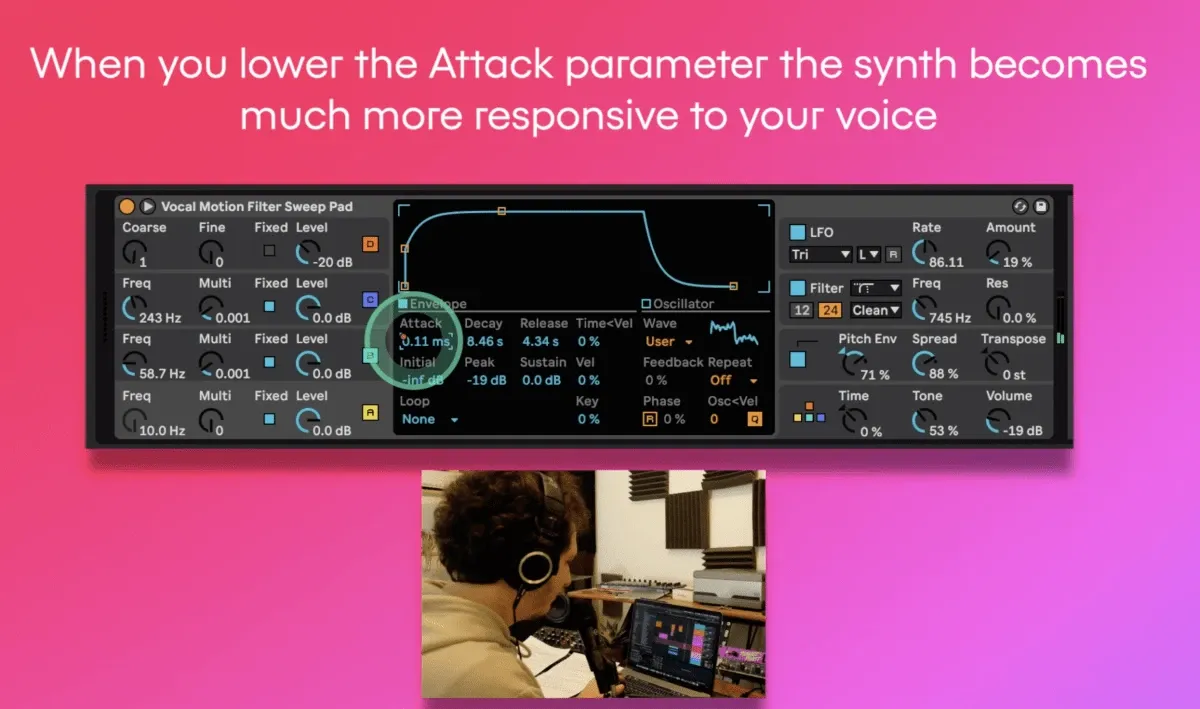
Here's the same instrument with the synth's Attack parameter decreased:
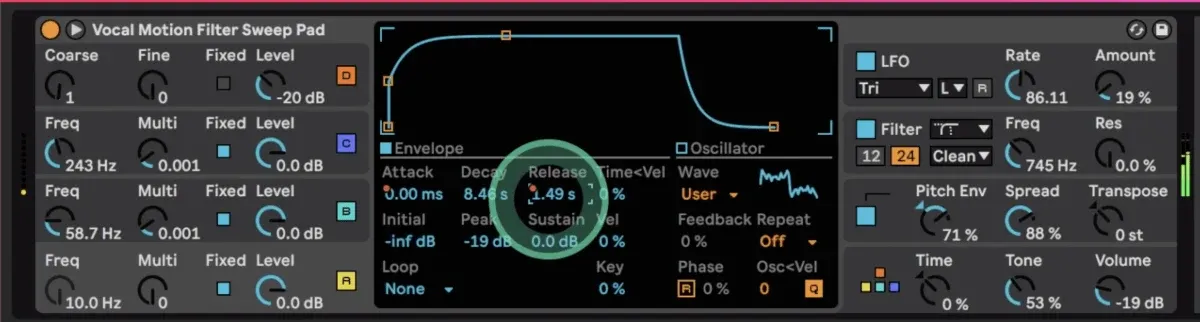
Release is another key envelope parameter because a high release means that the notes take longer to fade out and this will lead to your notes overlapping. Here's the same synth again with a very high release time and then with a low release time:
When you find sounds in your DAW that match your idea and style of singing you’ll definitely have much more accuracy while singing!
Tip #6 - Sing with key lock for better results and find the scale of your melodic idea using the Key Tab
A lot of people think that it can be counter-intuitive to restrict yourself to a scale so it’s better to use Dubler 2’s Chromatic mode. However, it can be difficult to sing with every note available and using scales can significantly increase pitch accuracy.
The scales also have the benefit of working with the presets in the Chords Tab.
If you’re not sure which scale you want to work in you can sing in notes in the Key Tab and you’ll get a list of suggested scales. We'll singin the following notes for example:
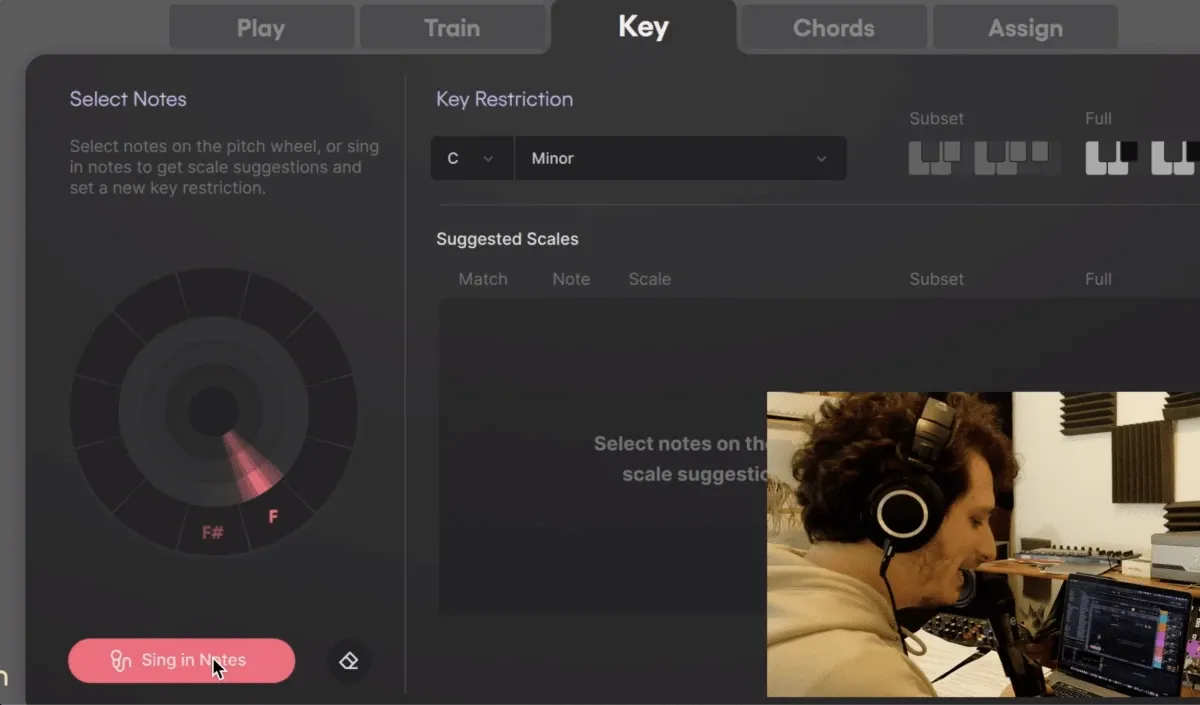
After you sing in your idea the Key Tab will display a list of scales, You can click the keyboard icon to hear the full scale and then click update at the bottom to commit to it. When you return to the Play Tab, the notes will now be restricted to that scale.
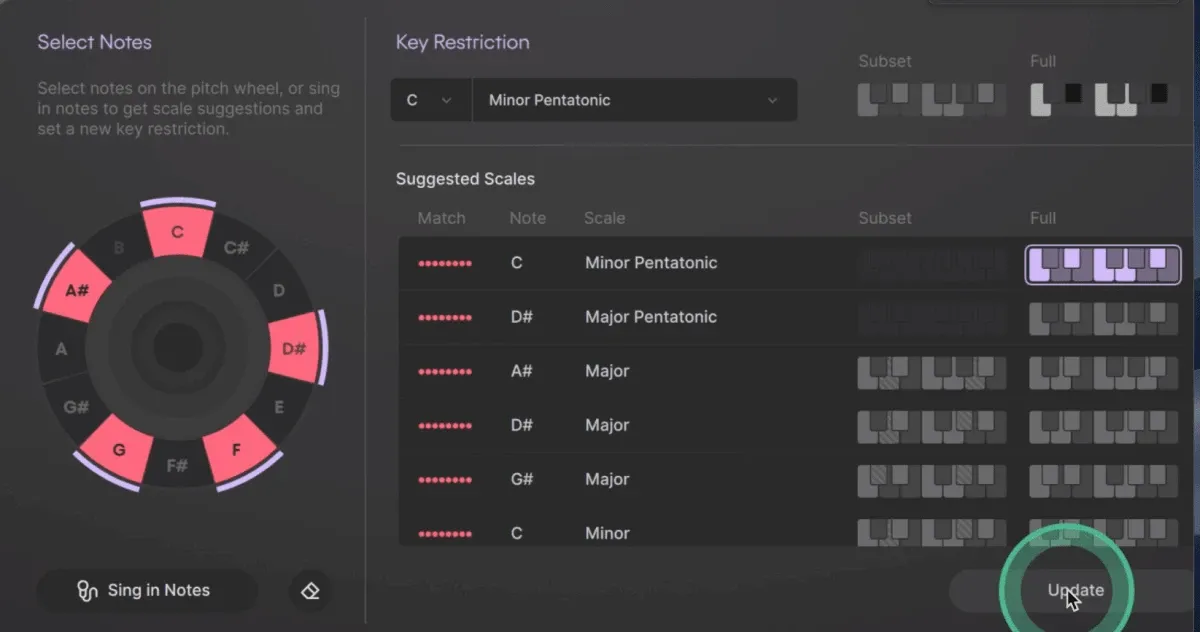
We've chosen the C Minor Pentatonic Scale and here's a quick melody we've sung in using this key:
Tip #7 - Differentiate your triggers and use sounds that you will remember!
Until now we’ve been looking at the pitch side of Dubler 2 but let’s switch over now to the triggers!
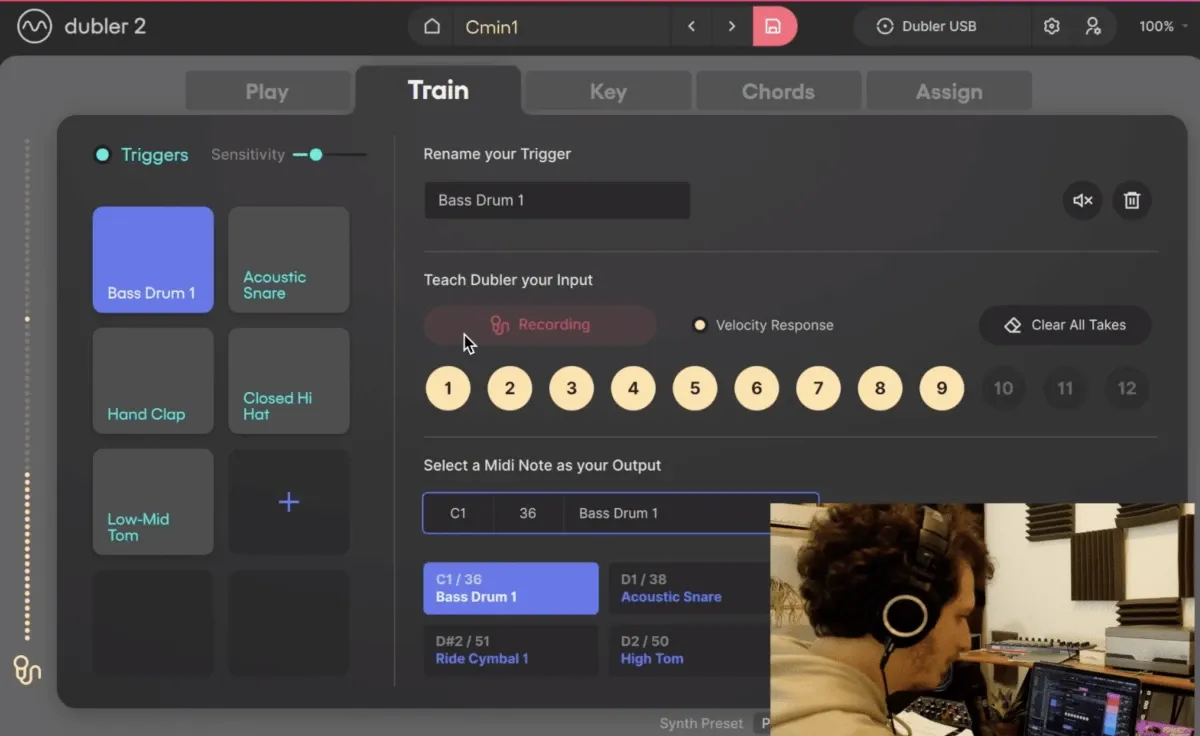
Firstly, consistency is important so repeat the same exact sound or syllable while training triggers. Here are some examples with snare, clap and shaker sounds loaded up in our DAW:
If you think you’ll have trouble remembering your triggers after training multiple be sure to make note of them. Worst case, you can erase your takes and re-train.
Another key point is clearly differentiating your triggers. If your triggers are too similar Dubler will have a harder time separating the notes.
Over time and with some practice you’ll develop your own go-to drum kit of syllables or sounds. An example of a 5-sound trigger kit couldd be “Buh, Cha, Ka, Tss” syllables and a finger snap.
Here's a beat performed with the triggers we trained before:
Remember you can map any sound to triggers so being a good beatboxer is not a requirement!
Tip #8 - Save your profiles!
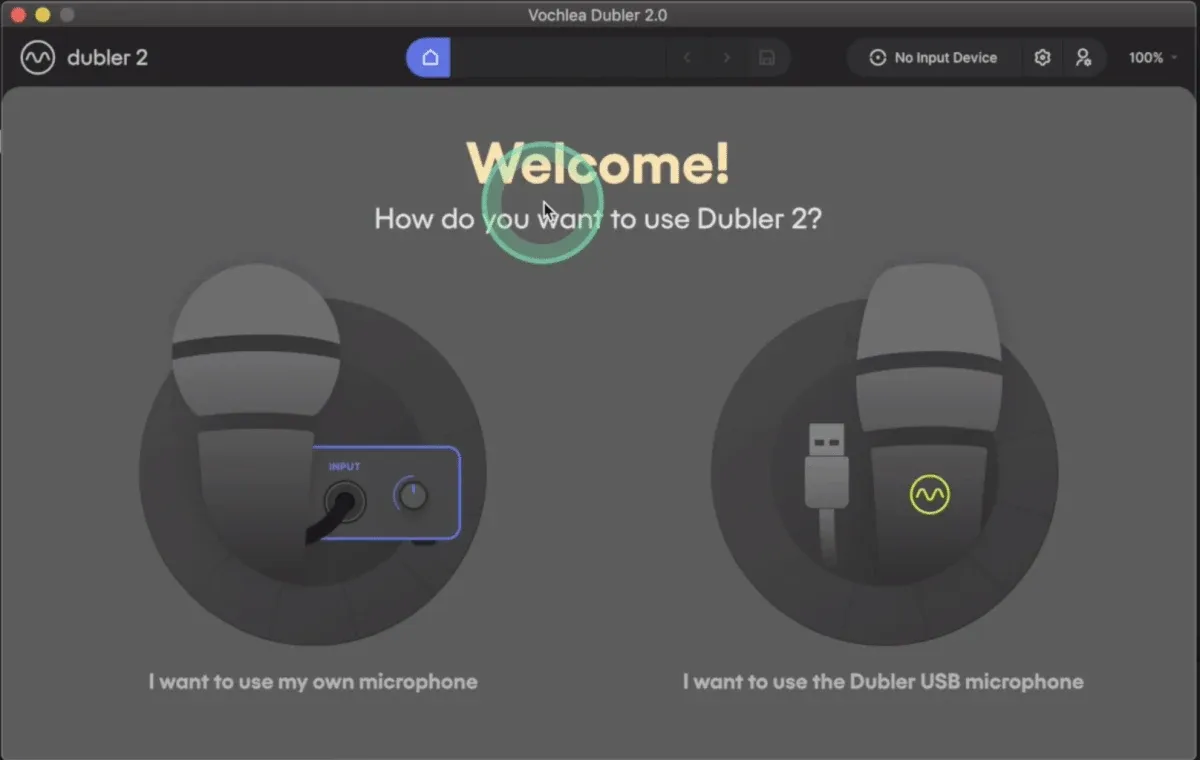
After you open Dubler 2 for the first time and calibrate your microphone you’ll see the Profiles Page.
Profiles allow you to save sessions including trained triggers, key settings, pitch bend settings, chord configurations, MIDI mapping settings and more.
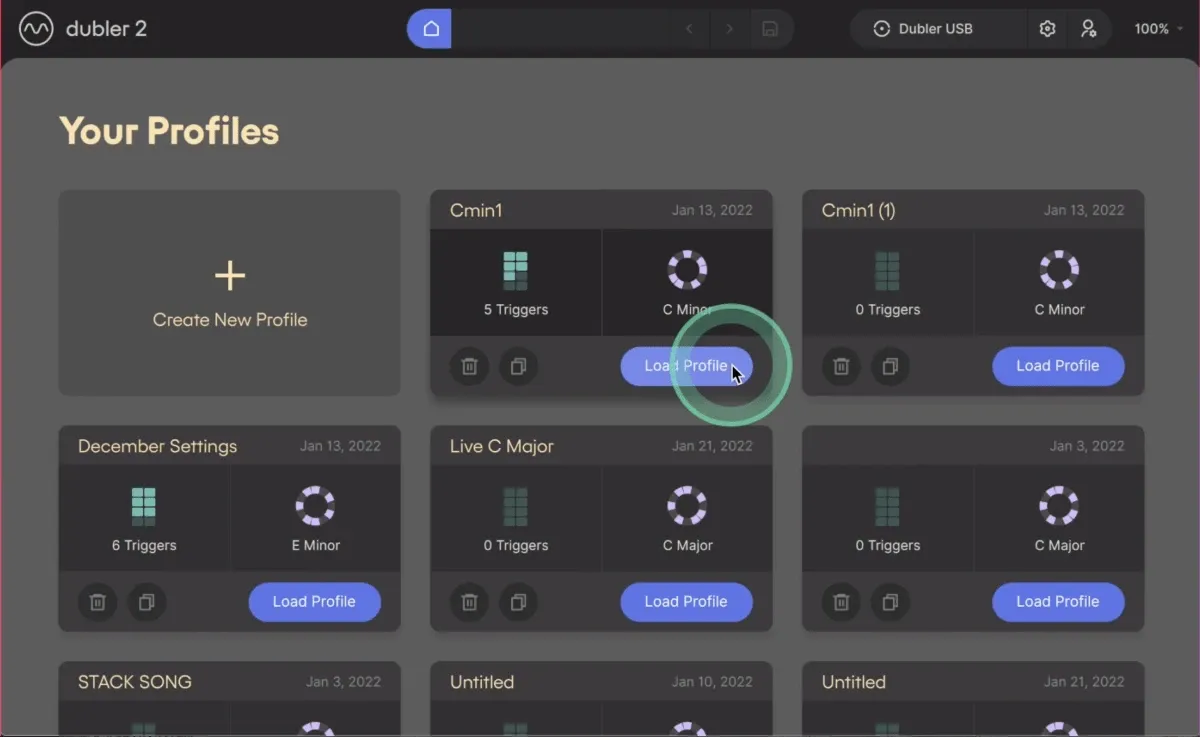
This can speed up your workflow as you won’t have to re-train triggers, you can have different profiles for different songs for live performances for example, and you can save the settings that work best with your voice.
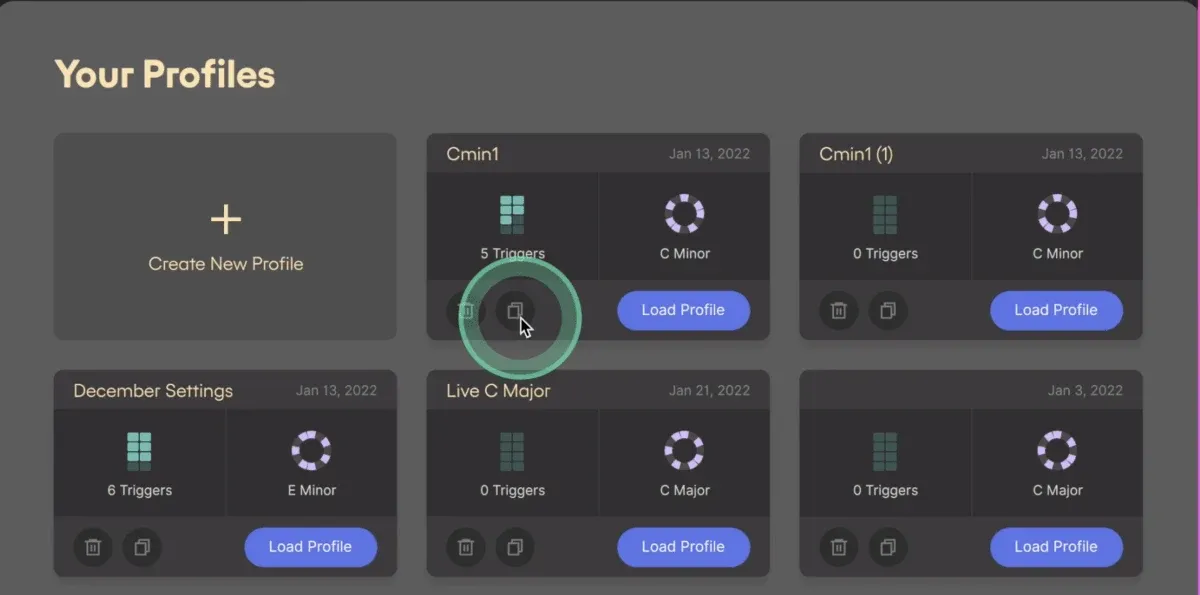
To save time you can duplicate your profiles with the Duplicate button and make any changes to the new profile without erasing your settings in the original.
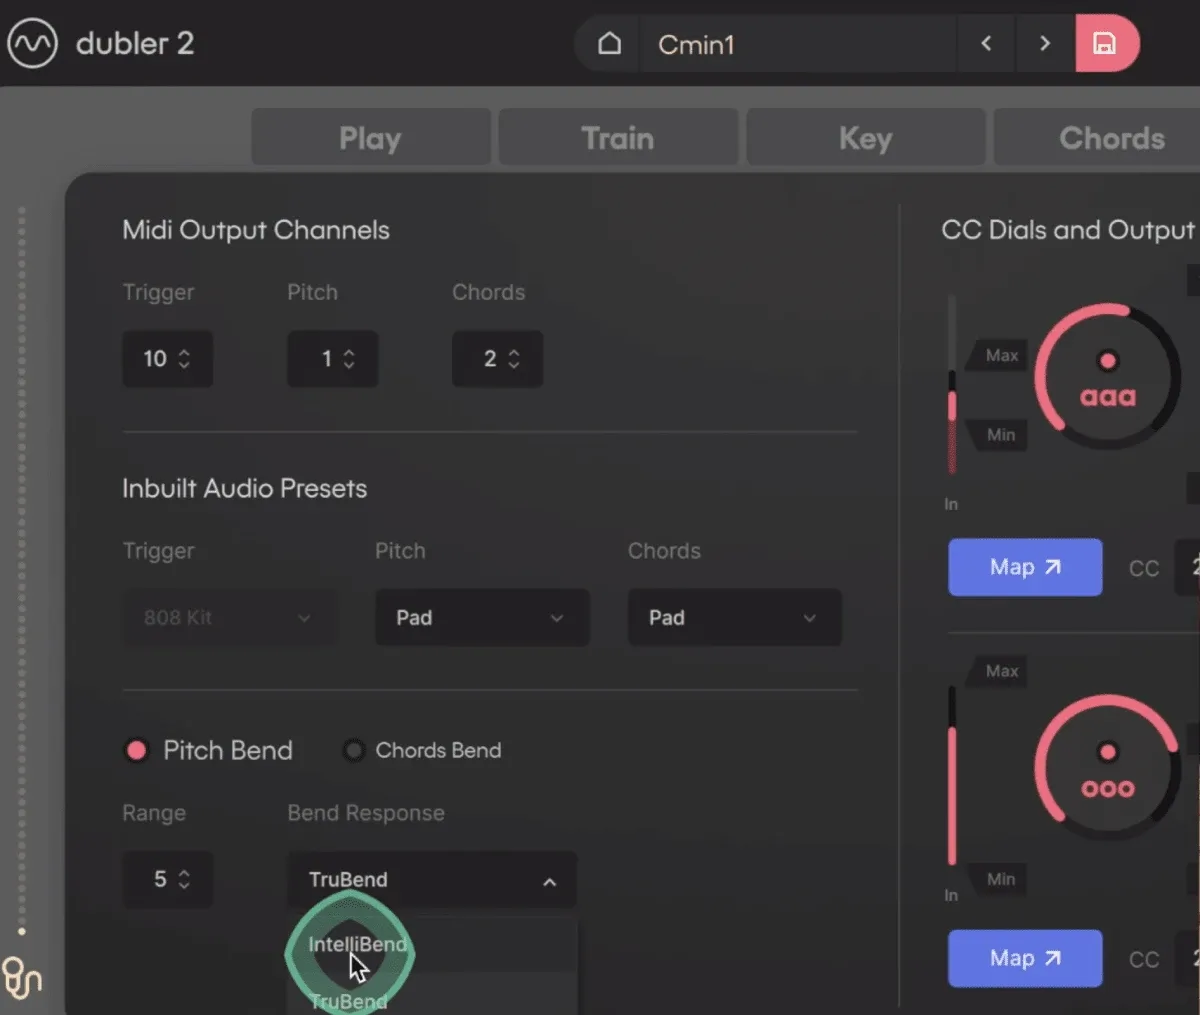
Tip #9 - Use Intellibend to make singing with Pitch Bend easier
Pitch Bend Response modes are one of our favorite new features of Dubler 2. You can choose between TruBend and IntelliBend in the Assign Tab.
TruBend follows your voice’s pitch exactly, which can be useful but it’s harder to sing because the software will respond even to pitches between the 12 chromatic notes.
IntelliBend makes it a bit harder to change from note to note and the algorithm understands when you’re trying to bend up or down, making for smoother transitions.
Here’s an example of a synth melody sung with TruBend and then Intellibend:
You can immediately tell that TruBend is much more sensitive! It definitely requires more practice than Intellibend would.
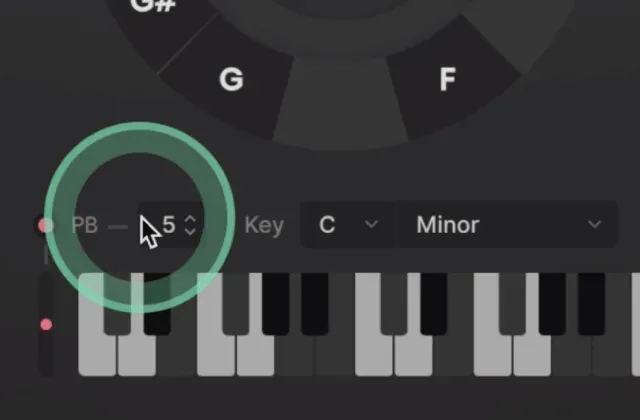
As a reminder, for Pitch Bend to work all you have to do is make sure that the Pitch Bend range in Dubler 2 matches the Pitch Bend range in the instrument or synth you’re using.

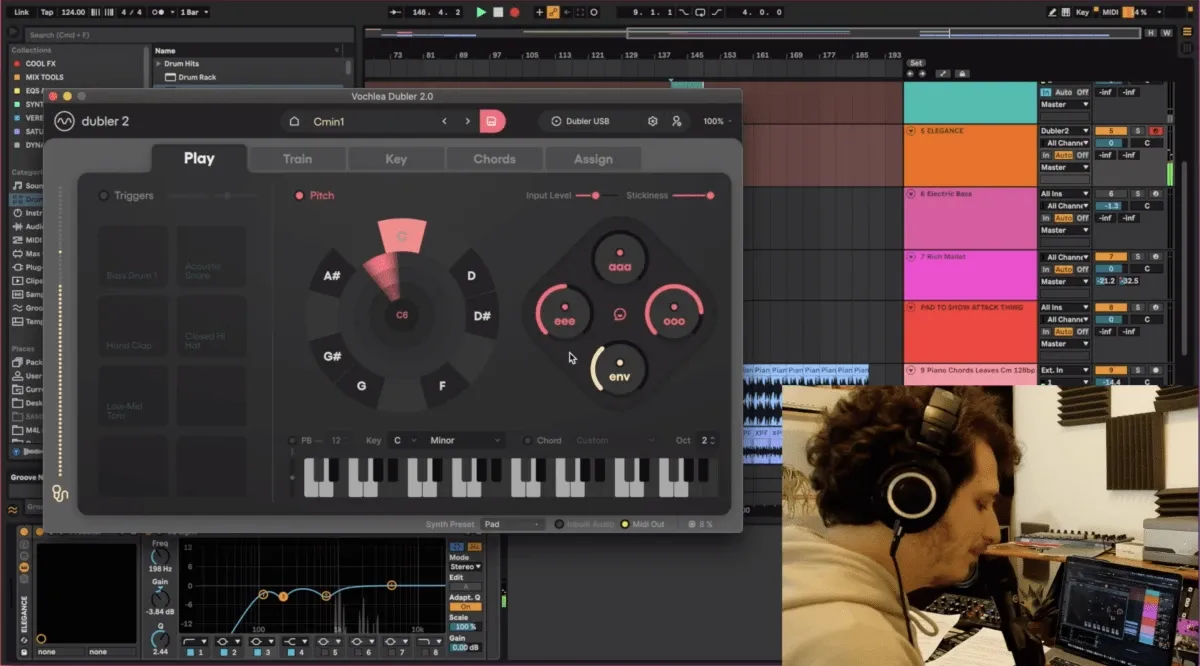
Tip #10 - Take the time to learn and use the Assign Tab!
The Assign Tab can be intimidating for beginners because of how it looks, but it is one of Dubler 2’s most powerful tools for expression.
On the right hand side you have the CC dials that control MIDI Mapping. MIDI Mapping is used to control parameters live in your DAW and even third party plug-ins. Dubler 2 allows you to map vowels and the loudness of your input (via the env knob) to parameters.
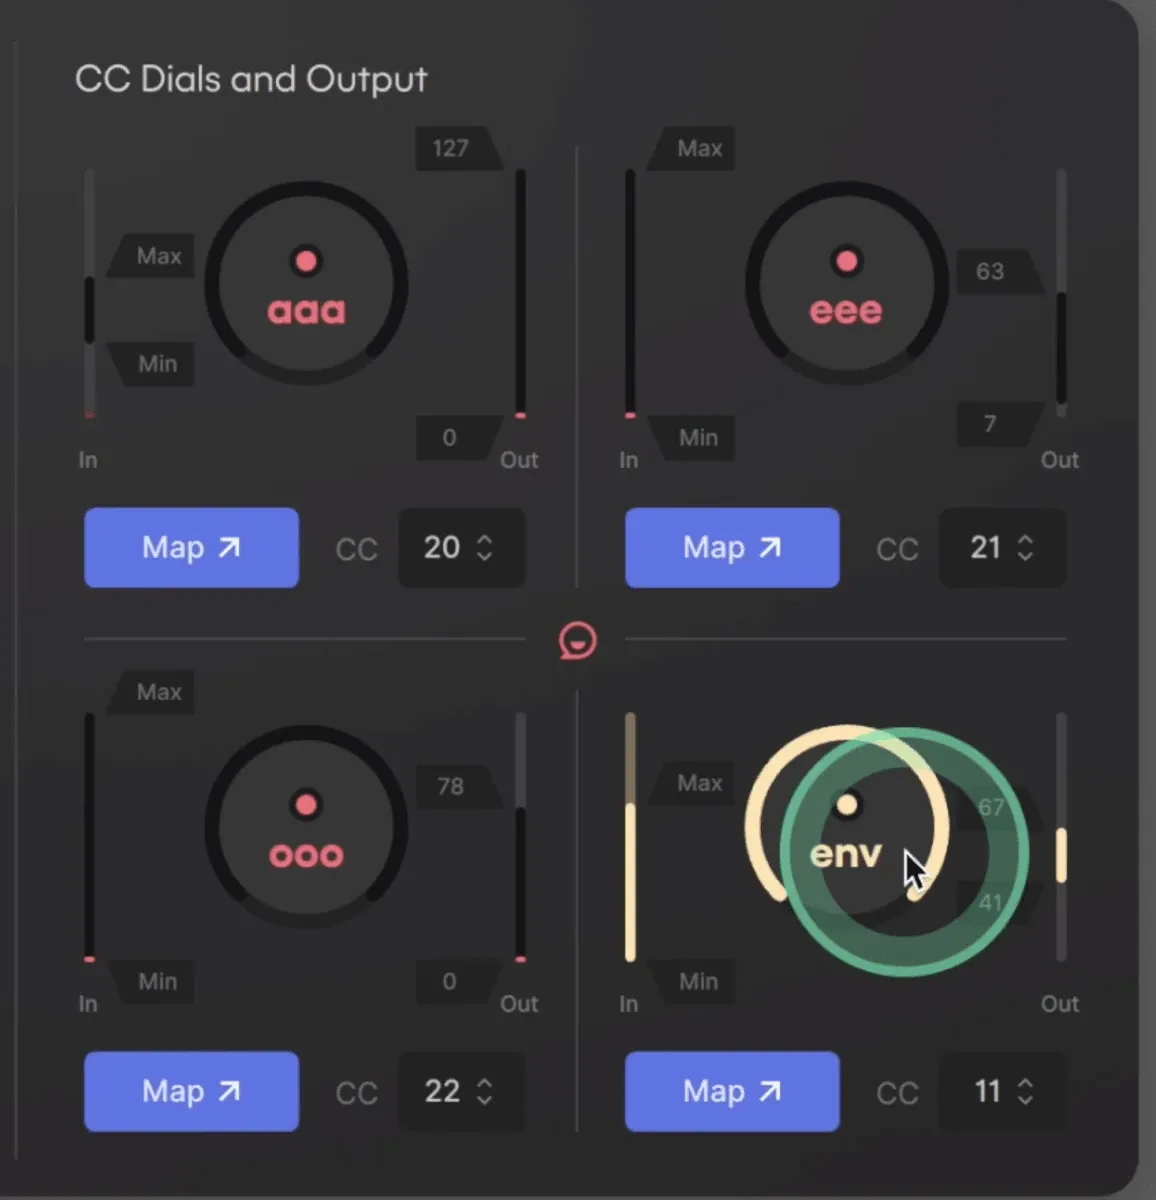
In the following example we’ve mapped the env to the Filter envelope of a bass so the louder we sing the more the filter opens. We also mapped the aaa vowel to open up the resonance so we get some more squelchy sounds as we emphasize the aaa syllable more:
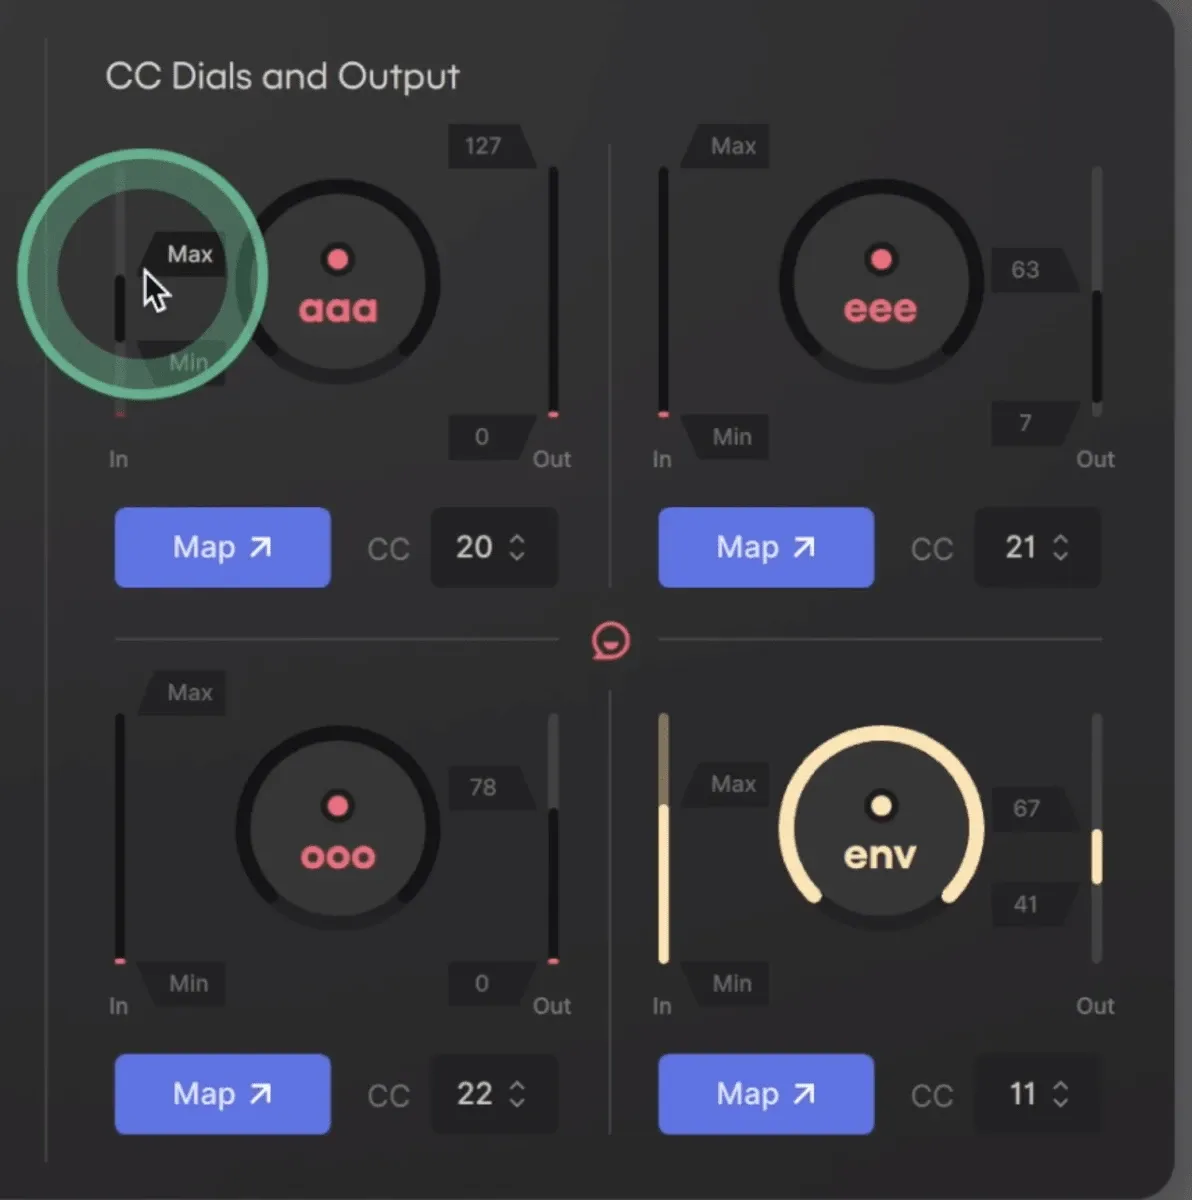
It’s really useful to be able to control the responsiveness of the dial via the slider on the left and you can also control the minimum and maximum values of the parameter you’re controlling with the slider on the right.
Here’s a link to another short video that explains these controls and setting up MIDI Mapping in more detail: https://youtu.be/XHZbaJNNghI
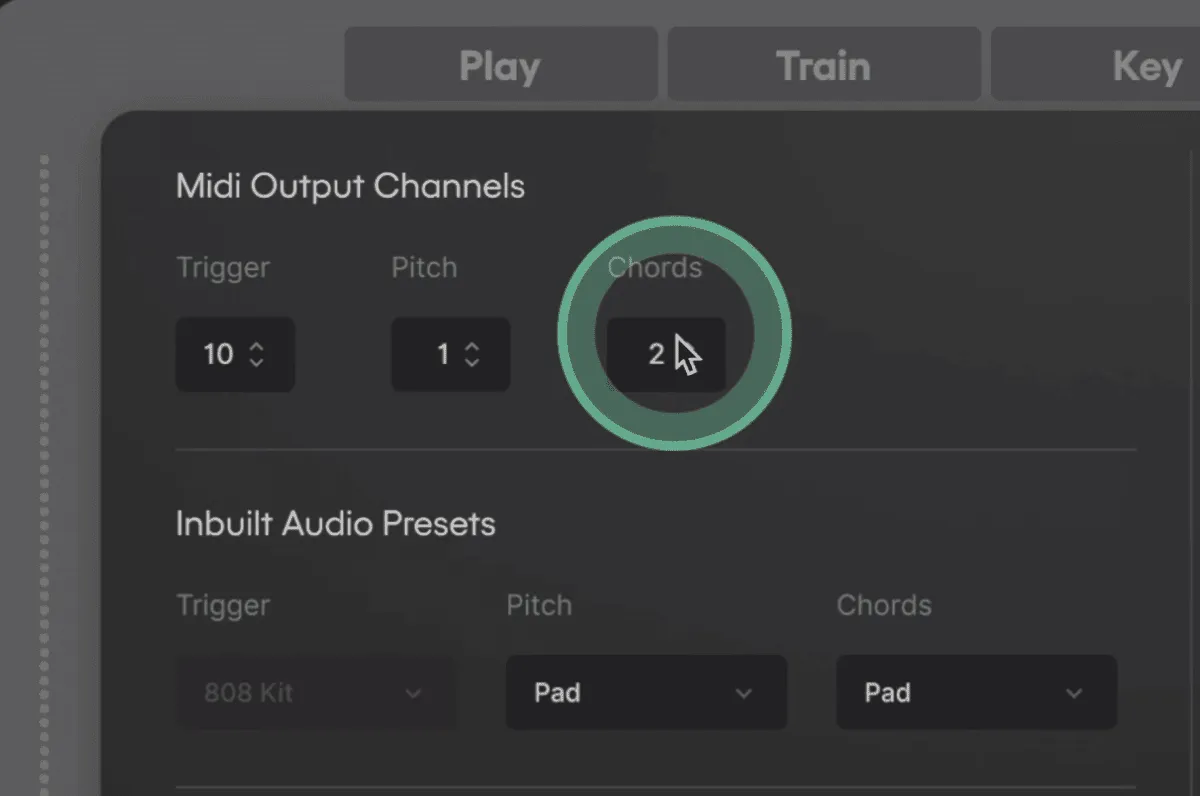
One more great feature about the Assign Tab is MIDI Output Channels. If you separate the MIDI channels of your Pitch and Chords you can, for example, perform a bass and pad at the same time.
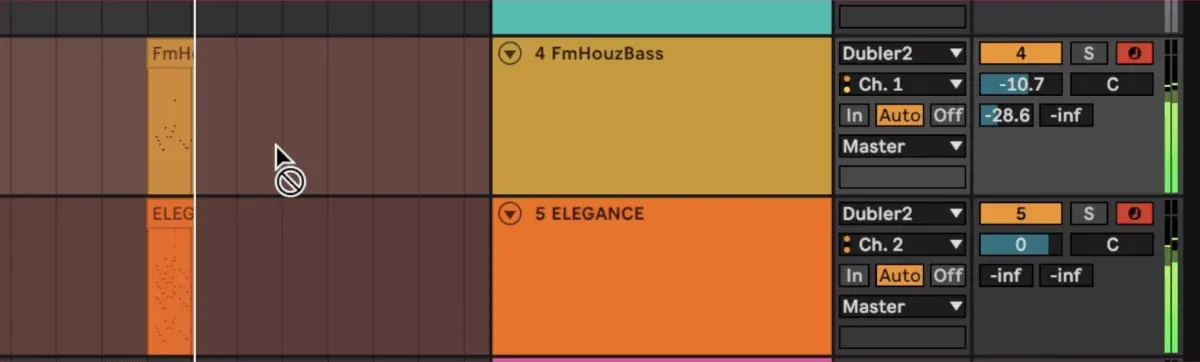
In the following example we’ll set Dubler 2's Pitch MIDI channel to 1 and select Channel 1 as a MIDI input in the Bass' channel in our DAW so that the bass only inputs the exact pitch that I’m singing. We’ll set the Chords’ MIDI channel to 2 and set Channel 2 as the MIDI input in the pad instrument in our DAW, so that it only inputs the chords’ MIDI.
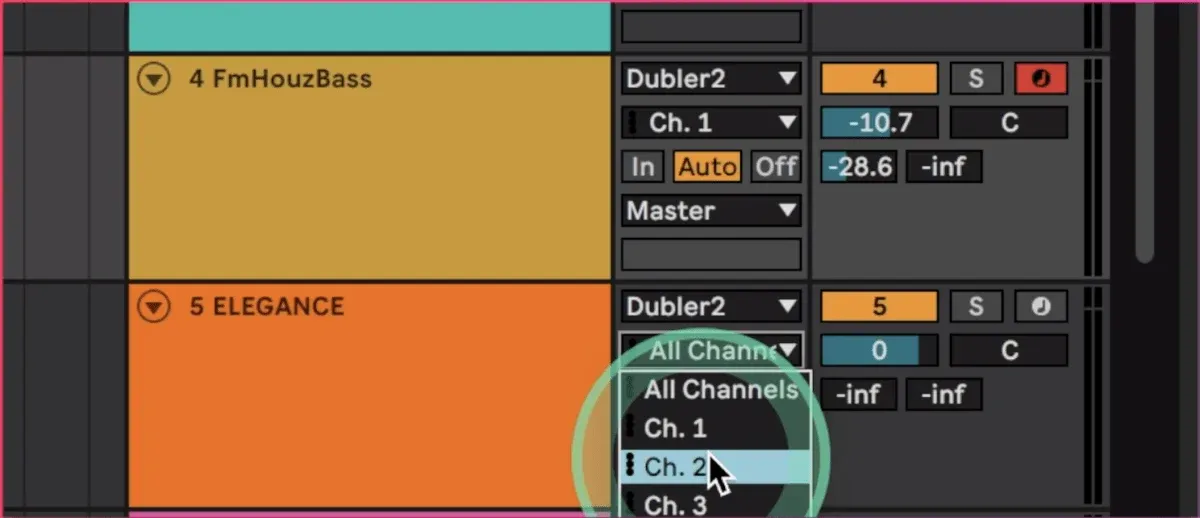
When we record arm both channels we can perform pad chords and bass simultaneously:
We hope these pointers were helpful and remember that at any point you can contact our support team and even arrange video chats to help get you up and running!