
DubBox Quick Start Guide
From fresh install to your first exported drum loop in about ten minutes. If you've just downloaded DubBox, this is the only page you need.
The basic workflow is simple: give DubBox some examples of your input sounds (beatboxing, clicking, clapping - any percussive sound you can make), choose the samples to map those sounds to, then record, quantize, loop and layer. Here's that journey step by step.
1. Set up your audio
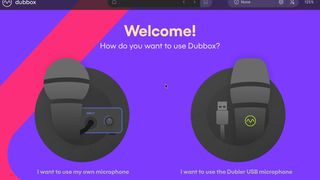
When you open DubBox for the first time, you'll be asked what kind of audio input you're using.
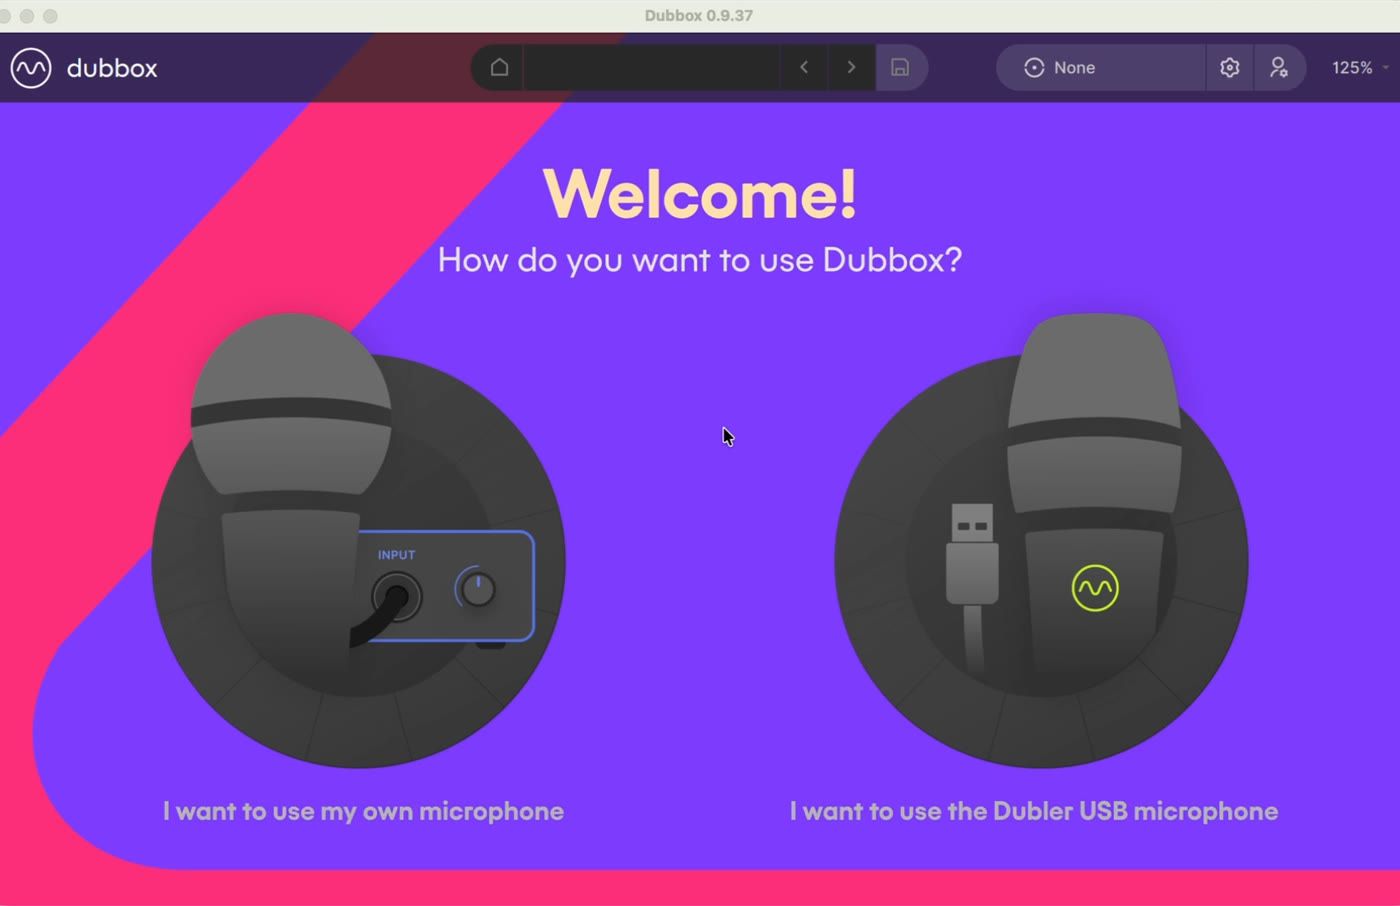
Using your own microphone? Select "I want to use my own microphone". We recommend a dynamic microphone with an audio interface - the interface is especially important on Windows for low latency. DubBox walks you through a short calibration: pick your input device, choose your output, set your input gain so it sits in the indicated range, then beatbox freely into the mic so DubBox can learn the kinds of sounds you'll make.
Using the Dubler USB microphone? Plug it in - it's recognised automatically and calibration is taken care of. (On Windows you'll still choose an ASIO output device.)
For the full walkthrough, including troubleshooting and recommended settings, see Audio Setup on Mac or Audio Setup on Windows.
2. Create your first project
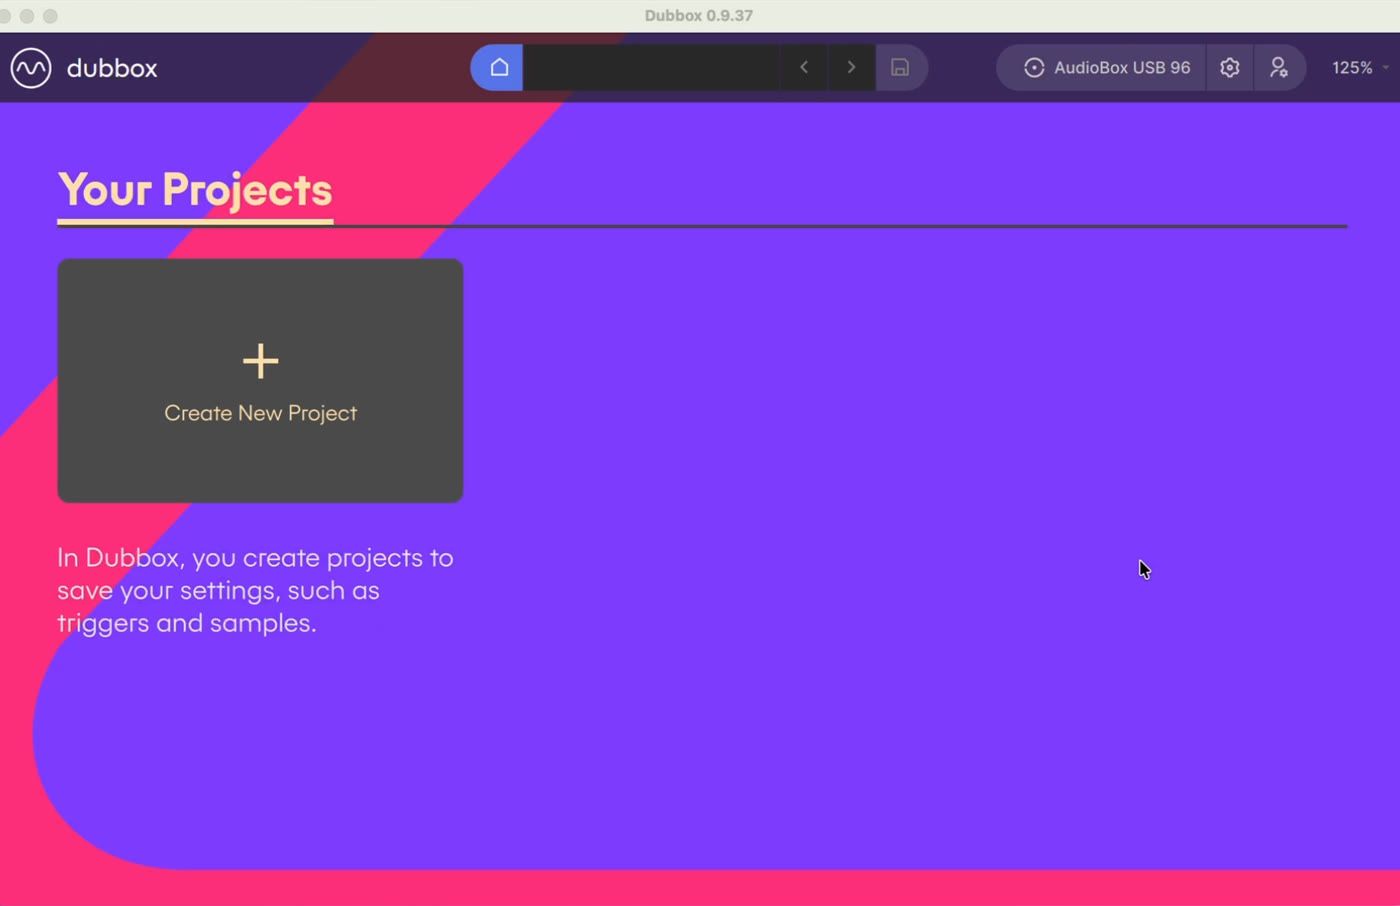
Once calibration is complete, DubBox takes you to the Your Projects page. Everything in DubBox is organised into projects - your trained triggers, your recordings and any packs you create are all saved there. Click Create New Project.
3. Train your first triggers
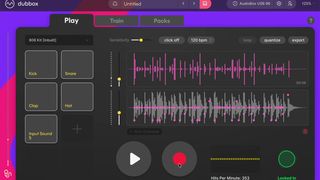
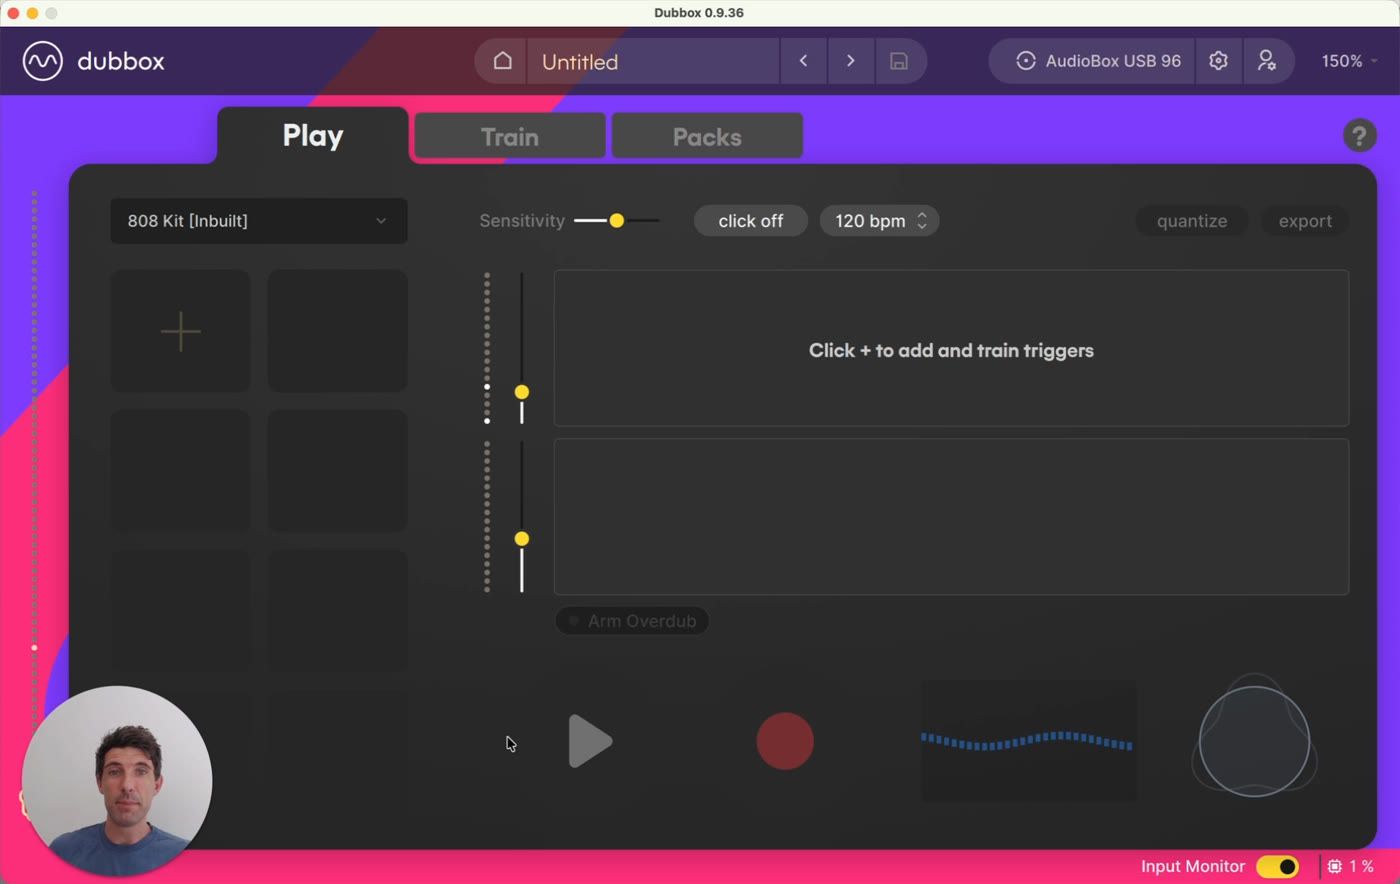
Your new project opens on the Play tab, which starts empty: no triggers yet. A trigger is a vocal sound you teach DubBox - each one fires a drum sample when DubBox hears it. Click the + pad to add your first trigger.
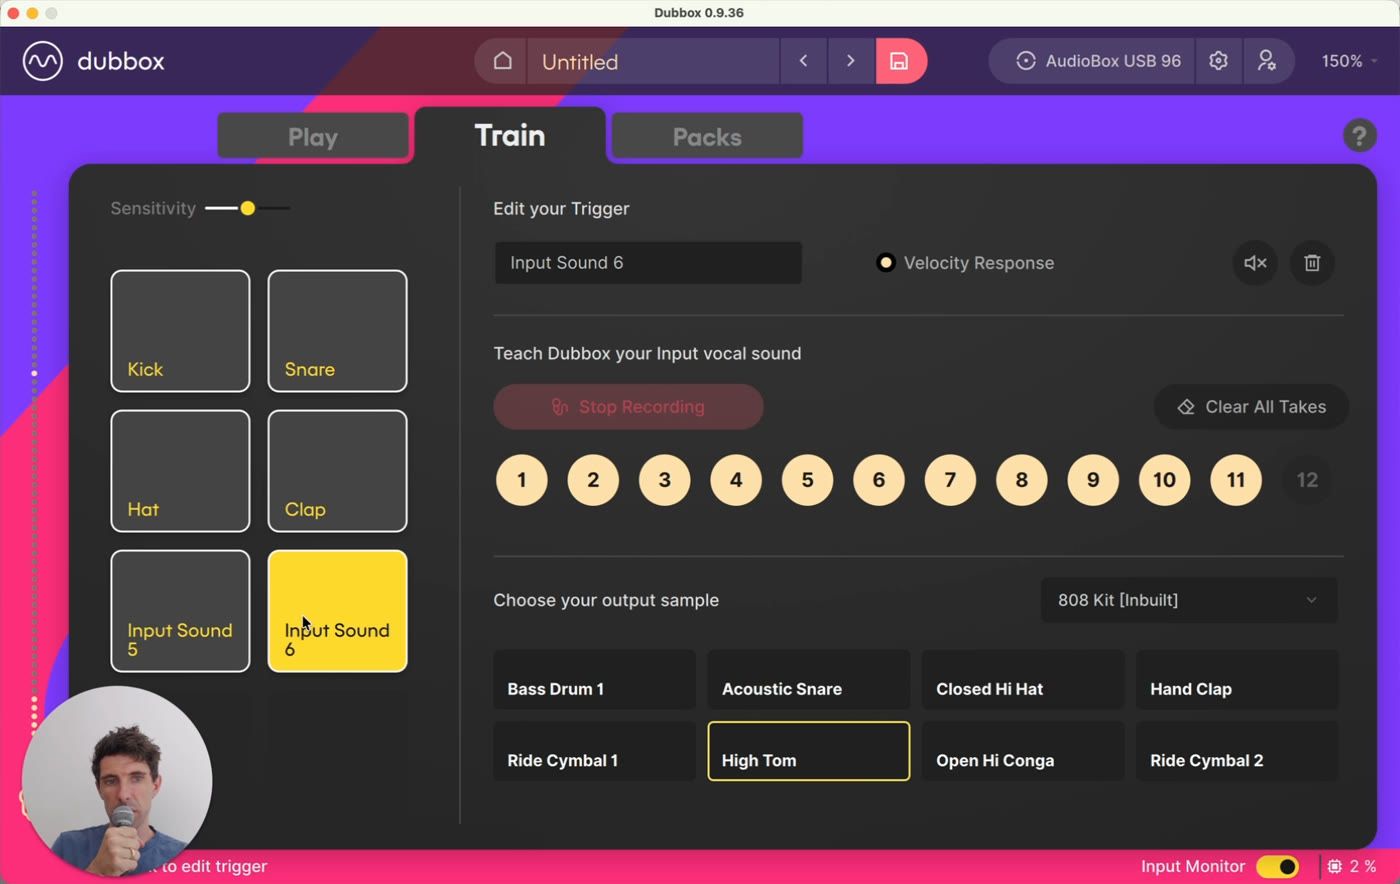
That takes you to the Train tab. The first trigger is automatically named "Kick" - you can rename it to anything you like.
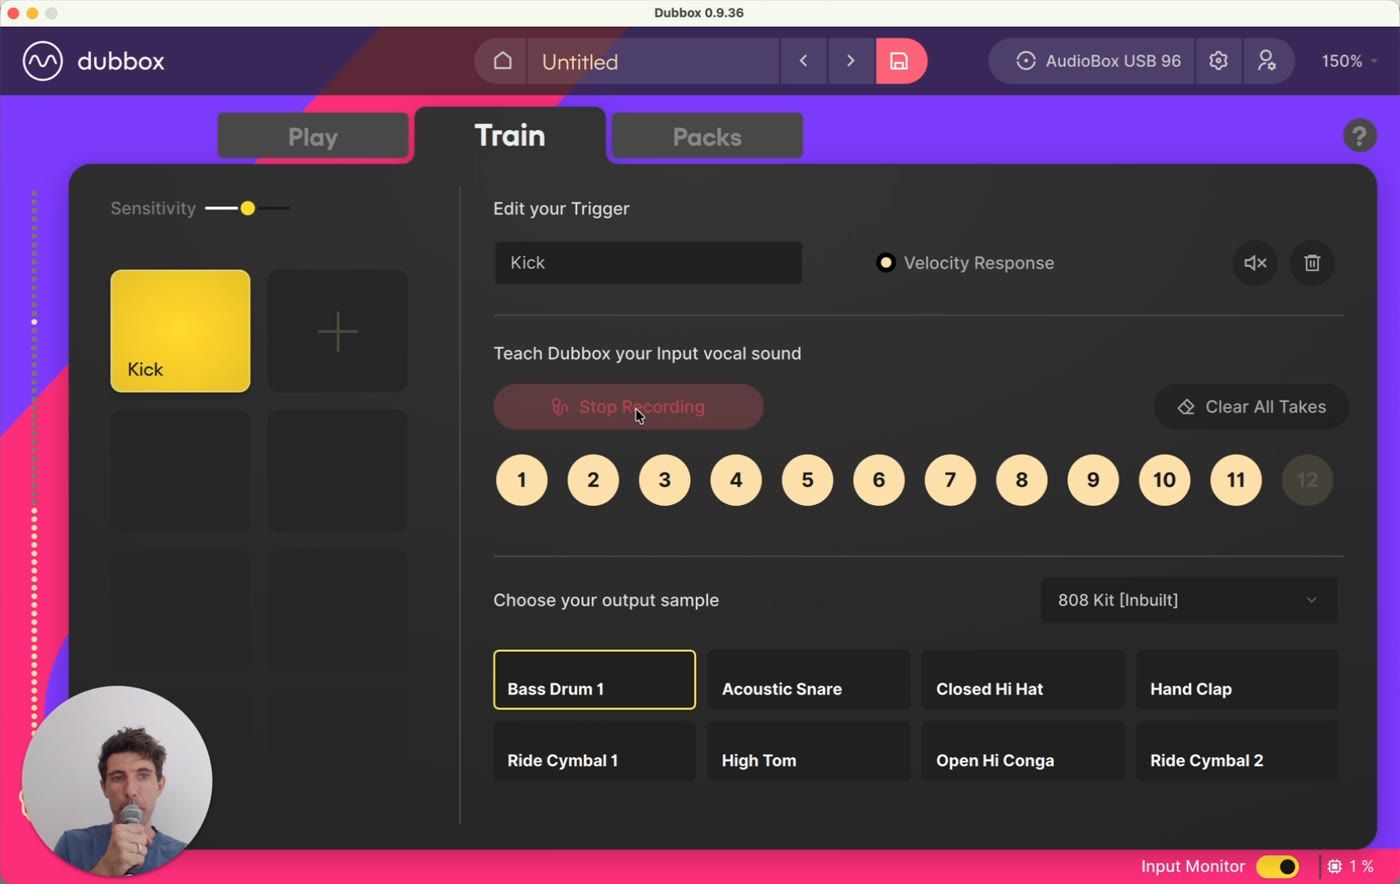
Press Record Takes and give DubBox examples of your kick sound - the takes fill up the numbered slots. Keep the takes consistent, and produce the sound exactly the way you will when you're actually beatboxing. It's easy to drift when repeating one sound in isolation, so imagine each take in the flow of a beat.
Under Choose your output sample, pick what the trigger plays. It's automatically mapped to a bass drum, but you can change it - or turn on additional samples so one trigger fires two sounds at once (a kick plus a hi-hat, say).
Toggle Velocity Response if you want how hard you hit the sound to shape how hard the sample plays.
Repeat for your other sounds - snare, hat, clap. You can have up to eight triggers in a project, and DubBox is really good at telling similar sounds apart.
4. Play - and watch the feedback
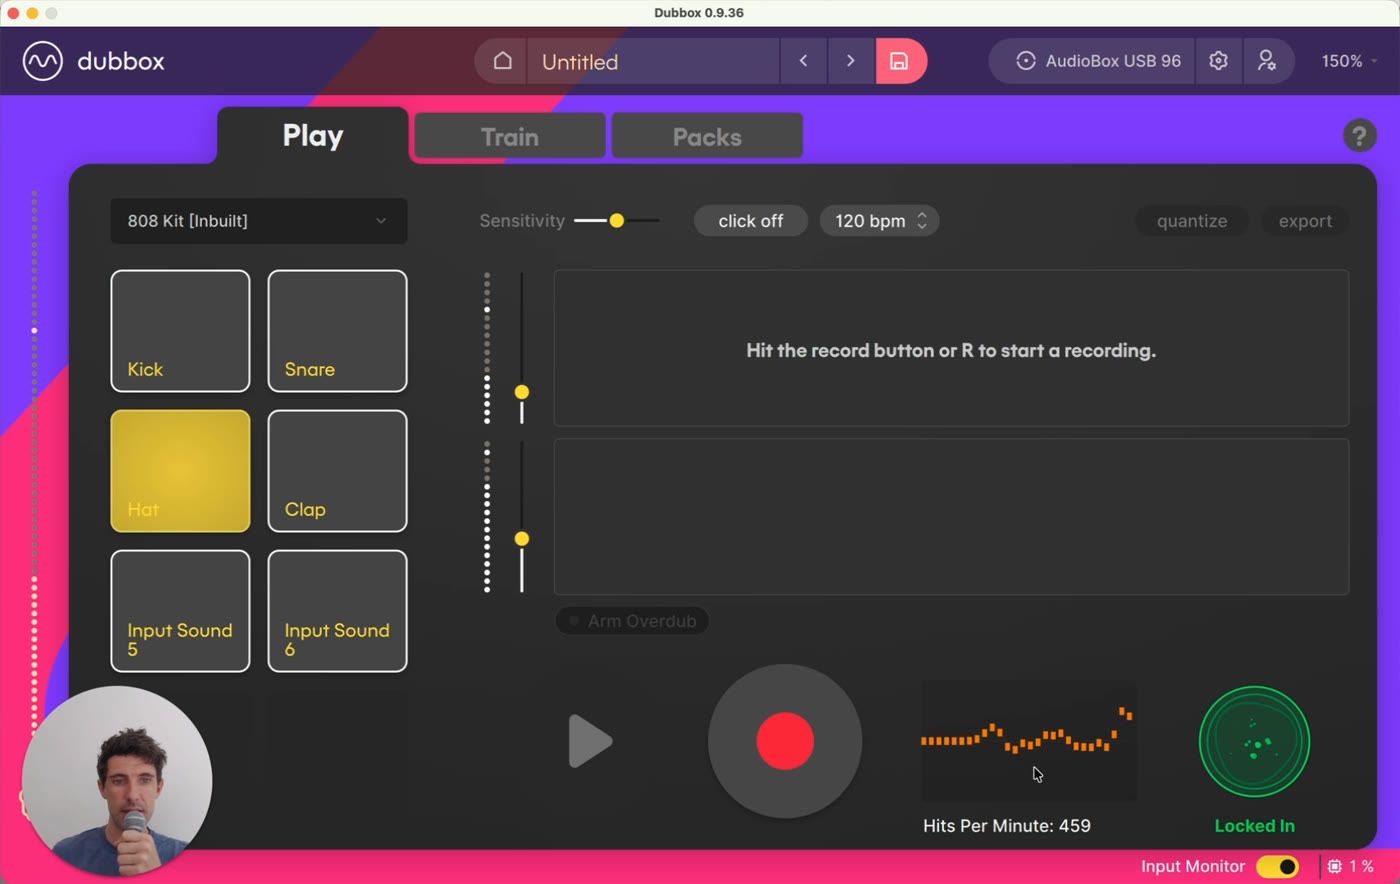
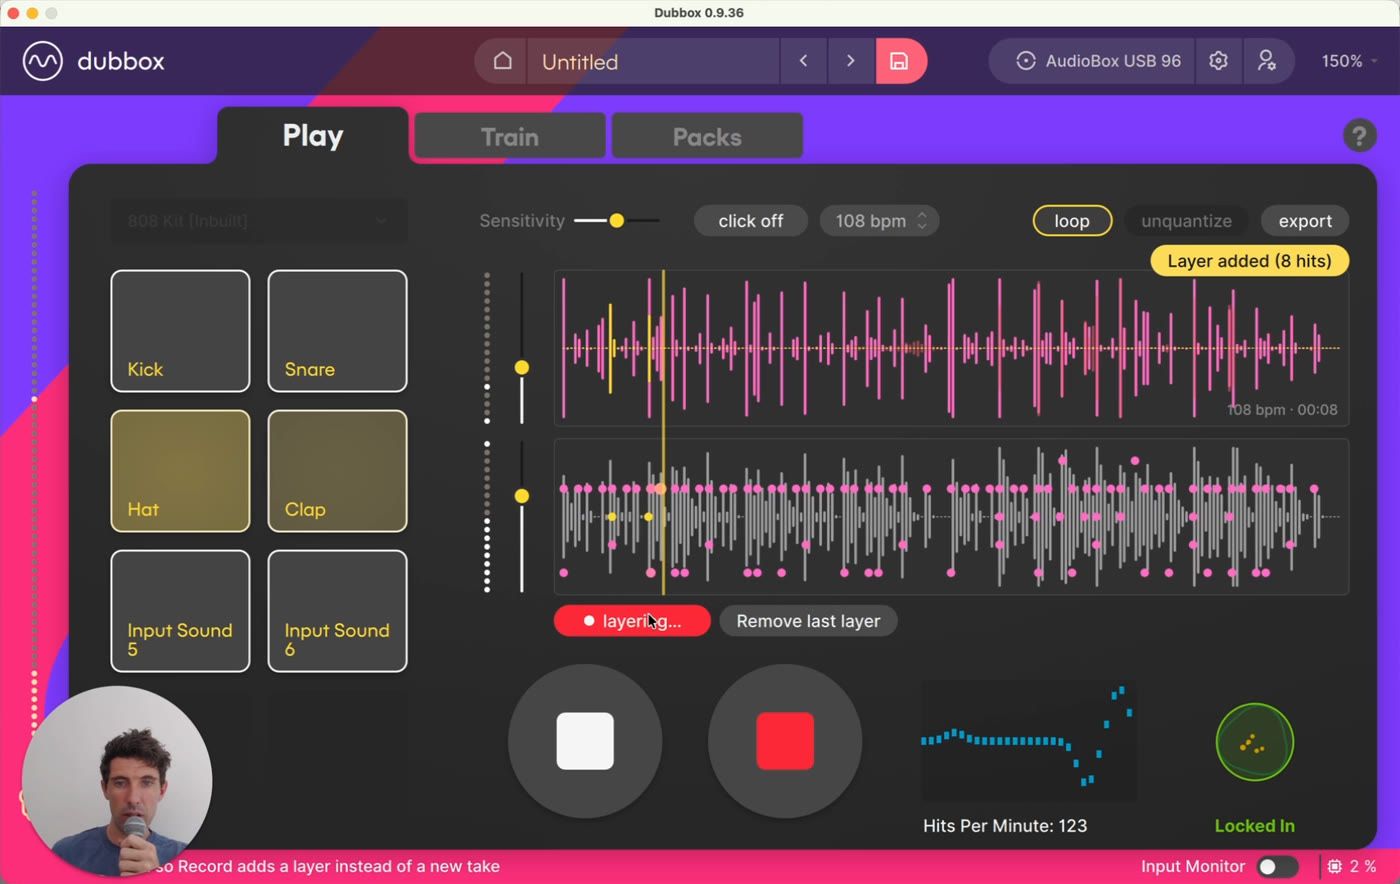
Back on the Play tab, beatbox into your mic. Your trigger pads light up as DubBox recognises each sound, and two meters on the bottom right give you live feedback:
Hits Per Minute - literally how many trigger sounds you're making per minute (it's not BPM)
Precision - how locked in you are to a consistent grid. Tight playing reads Locked In; swung or loose playing reads Loose.
Two small things worth knowing before you record:
The Input Monitor toggle (bottom right) controls whether you hear your own voice live through DubBox. Turning it off doesn't stop your voice being recorded - it's just what you monitor.
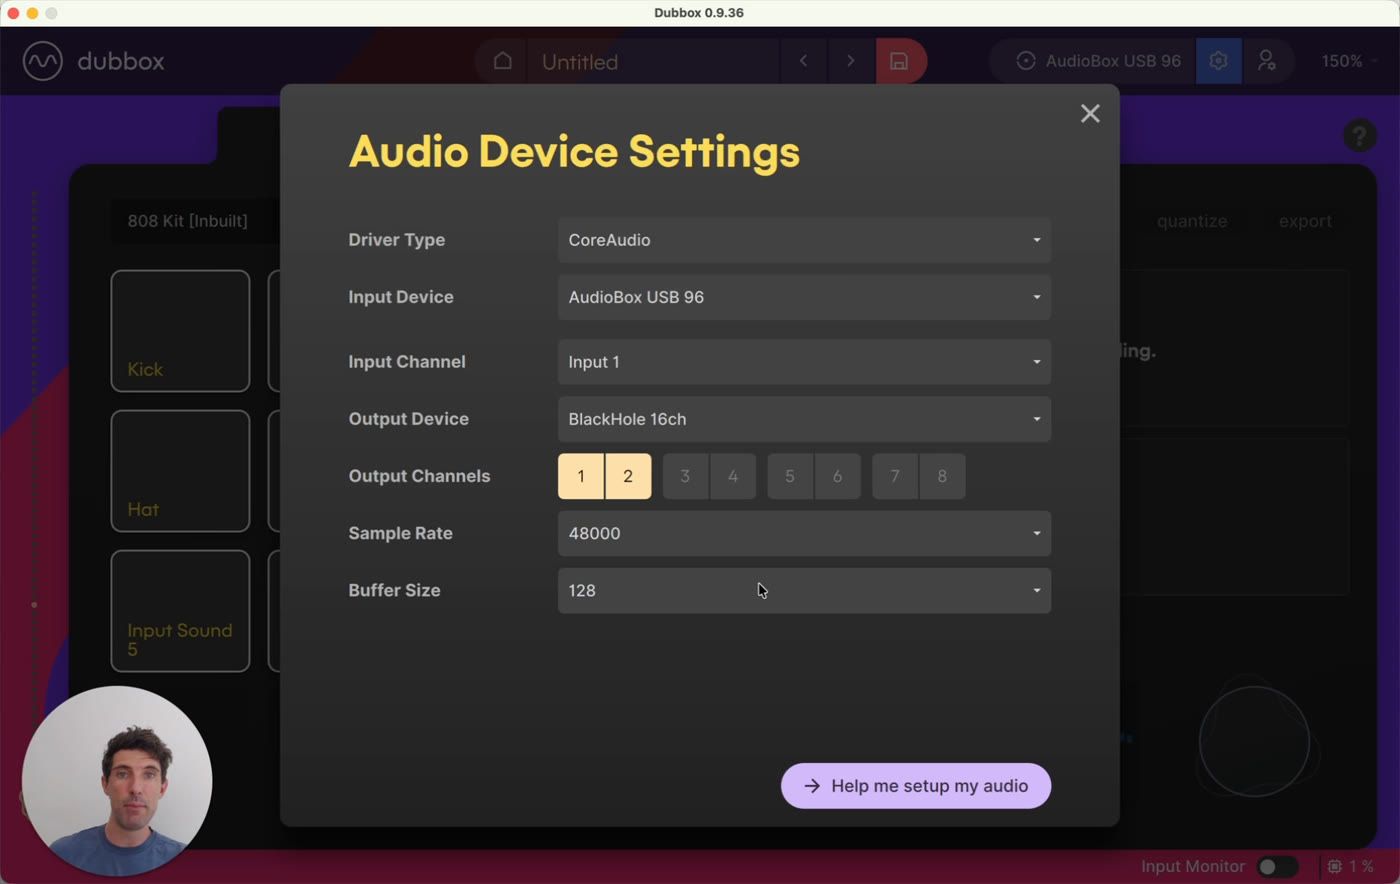
If you notice latency or audio crackle, open the audio settings (cog, top right). A larger buffer size means smoother audio but more delay; a smaller one is snappier but needs a powerful CPU. You can also recalibrate from here at any time.
5. Record your first beat
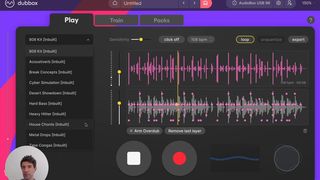
Hit the record button (or press R) to record a loop. You can record with or without a metronome: the click button turns it on or off, and with the click on you'll get a count-in and a click track at your chosen BPM.
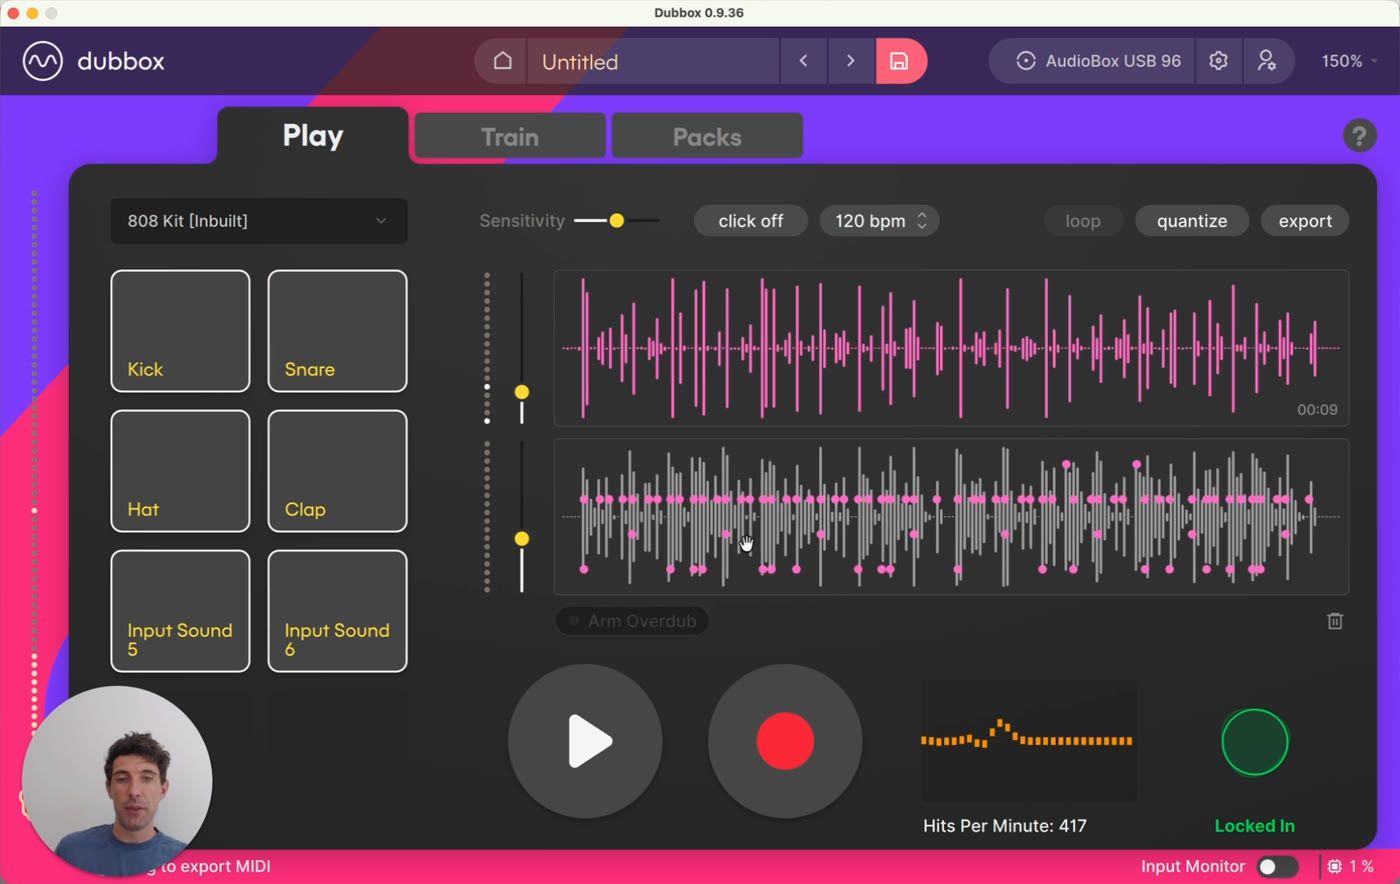
Press play to hear it back. The two sliders on the left set the levels of your input voice and the output samples independently.
Now hit quantize. If you recorded without the metronome, DubBox assesses the audio, picks an average BPM, and stretches your take to fit the grid perfectly. If you recorded to the metronome, your take is quantized to that grid, at the BPM you set. Unquantize toggles it back - nothing is destructive. DubBox also keeps a history of takes: flick through them with the arrows, and delete any you don't want.
6. Layer it up and swap kits
Turn on loop, click Arm Overdub, and record again to stack layers on top of your beat. Everything is automatically quantized as you layer - including your voice track underneath - and Remove last layer removes a layer you don't like.
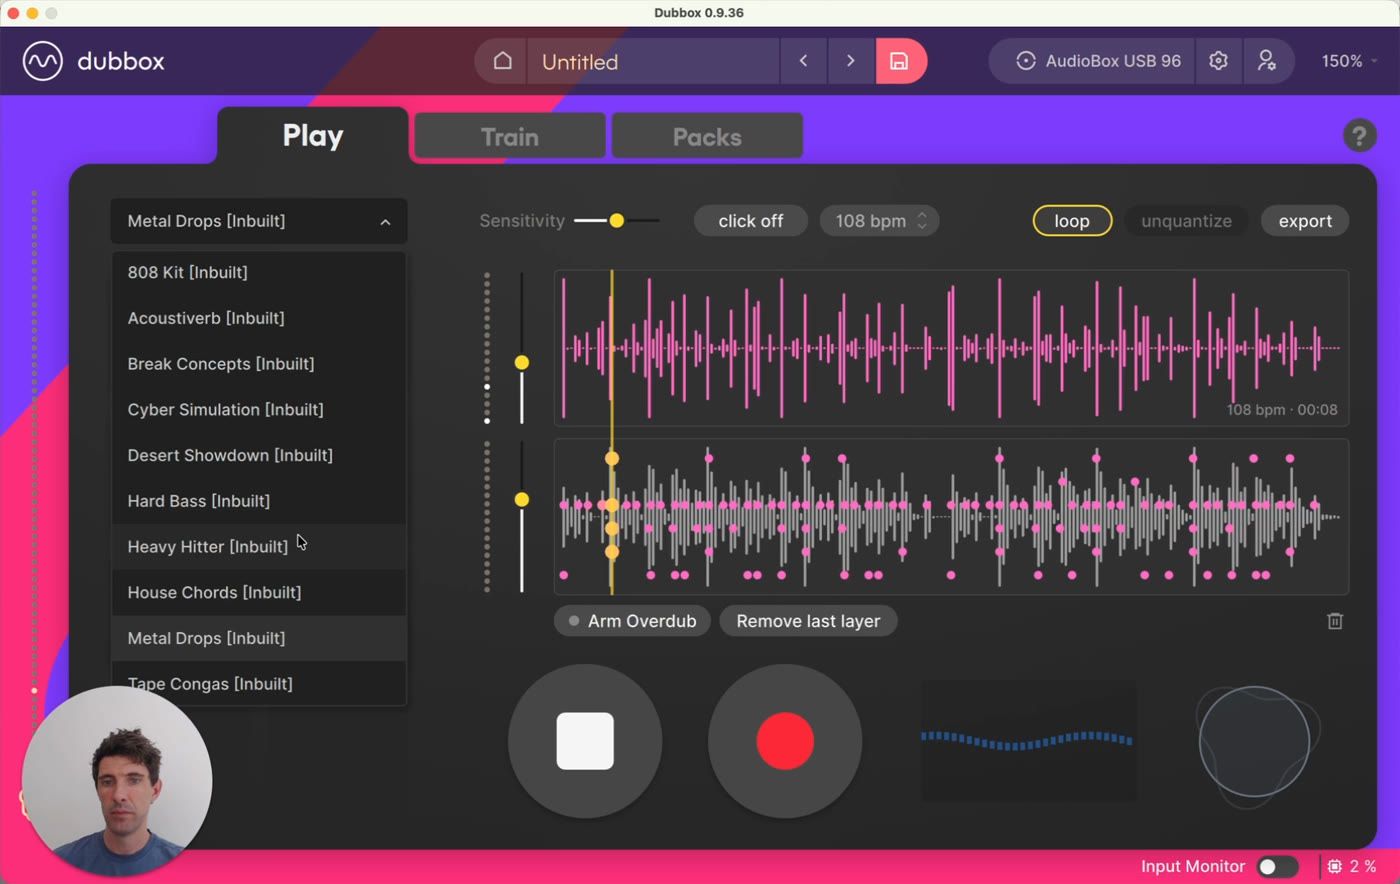
Your beat isn't tied to the sounds you recorded it with. Open the kit dropdown at the top left and switch between DubBox's ten inbuilt kits - switching kits can really change the sound of a loop.
Want to go deeper? The Packs tab lets you edit every sample in a kit (gain, pitch, tone, pan, filters, drive, even start and stop points), drag in your own audio samples to build custom packs, and save them as universal kits for use in any project. For more detail on working with Packs and importing your own samples, see the Packs tutorial.
7. Export and save
Hit export in the top right to take your loop with you:
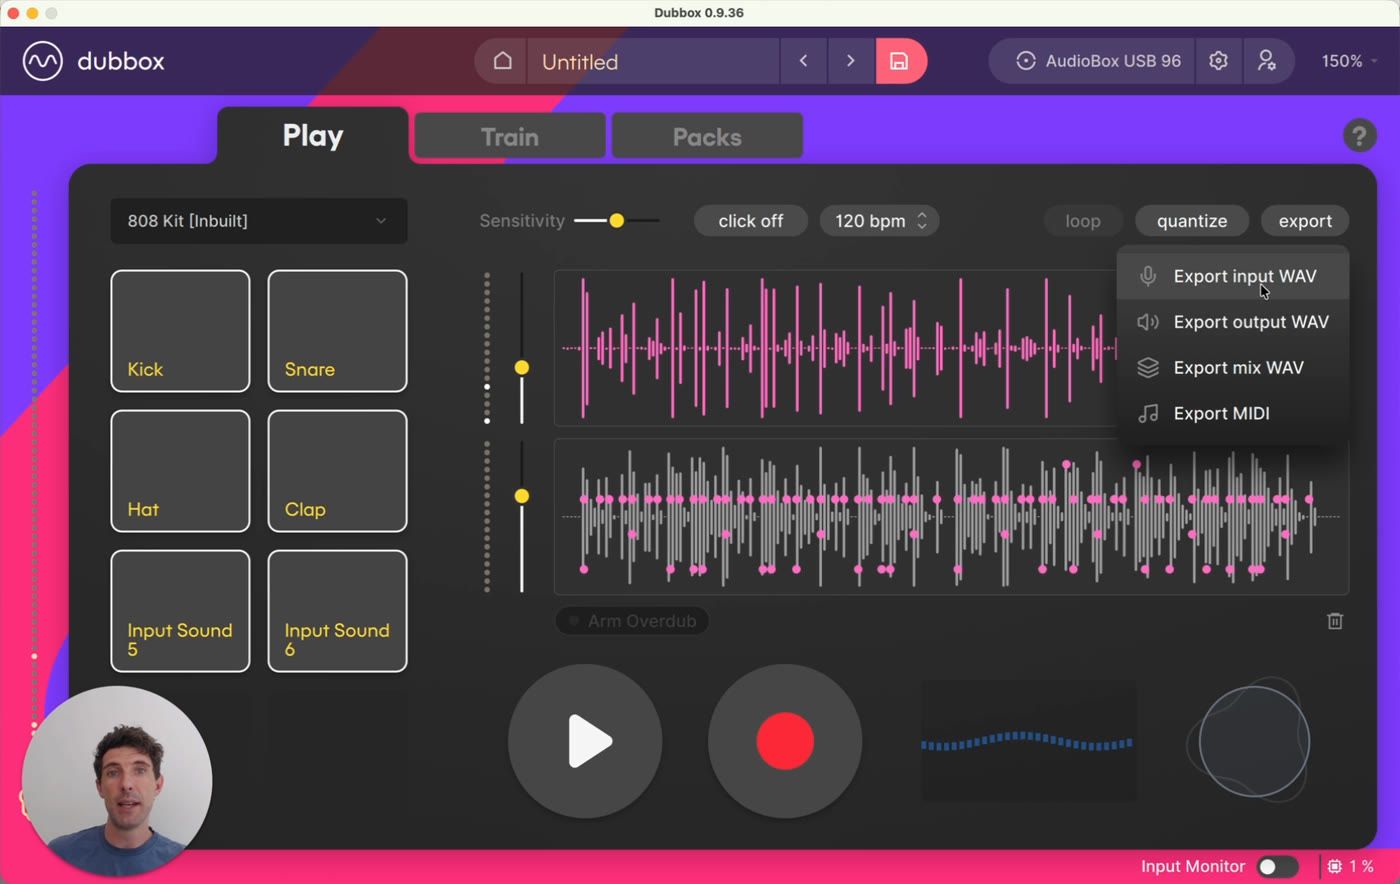
Export input WAV - your layered, quantized voice recording
Export output WAV - the sample track as an audio file
Export mix WAV - the two blended, using your mixing slider levels
Export MIDI - the pattern itself, ready to drive any sample pack in your DAW. You can also just drag the MIDI straight out of DubBox into a folder or DAW.
Finally, give your project a name in the top bar and hit save. That stores your trained triggers, your packs and every loop and recording you've built up, ready for next time.
Where next?
Audio Setup on Mac / Audio Setup on Windows - full audio configuration and troubleshooting
Packs tutorial - editing samples and building custom packs
More tutorials and support at vochlea.com