Using Vowel MIDI Mapping to Layer Sounds Like Never Before!
所要時間9 分 • 14th Apr 2021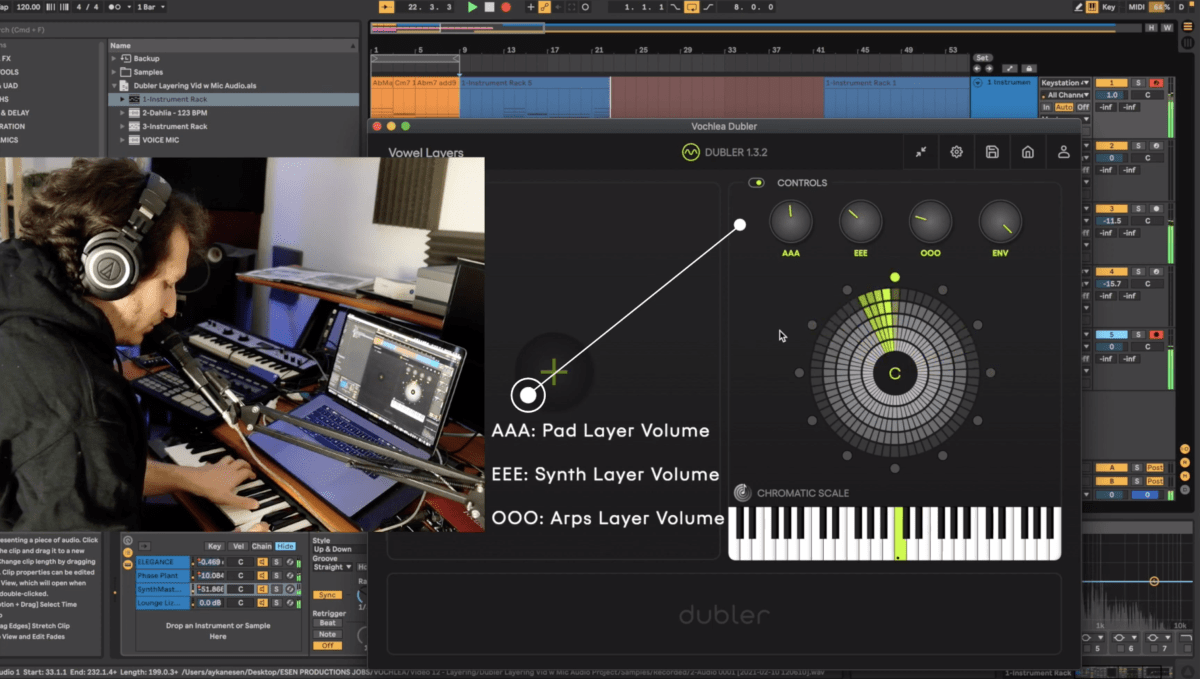
In February we shared a video on Youtube that demonstrates how to use Dubler’s unique vowel MIDI mapping capabilities to create sounds with constantly modulating layers. You can check out the full video here but be sure to read on for a detailed breakdown of the technique!
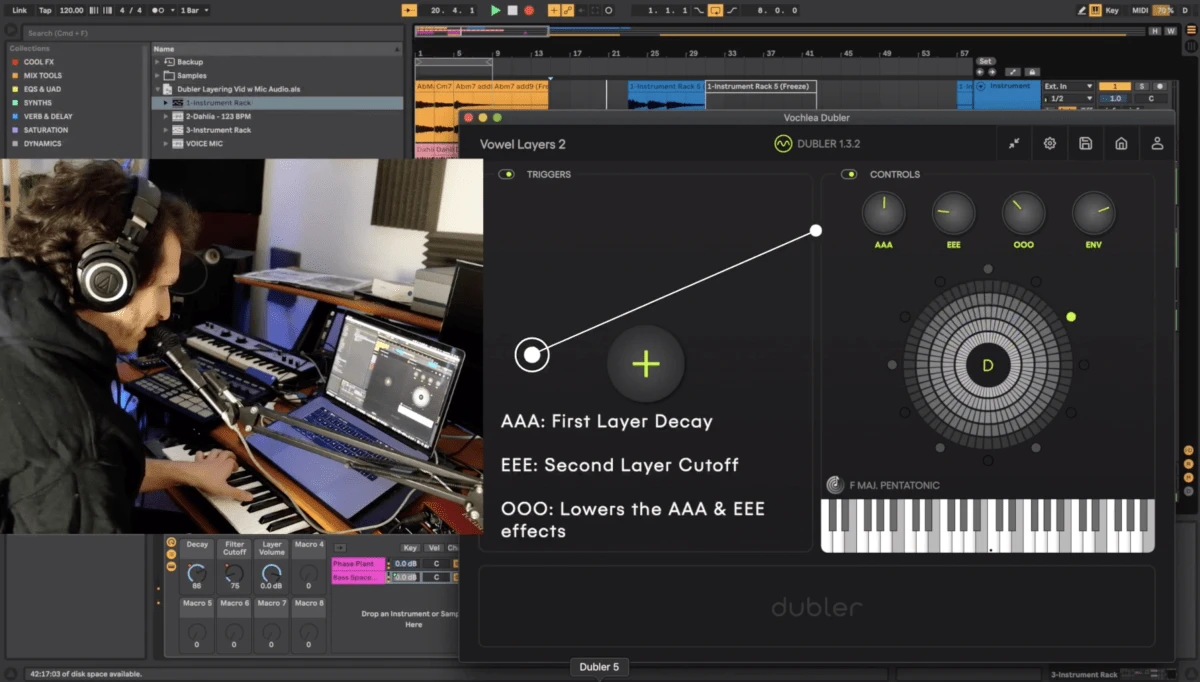
The concept is programming a sound with two or more layers and MIDI mapping Dubler’s vowel expression knobs to the volume of the layers, as well as other effects. This is a more unconventional use for Dubler, especially in our example in the video, because in the video we don’t use it to input pitch or trigger information. Instead, we sing different vowels into Dubler with the sole purpose of adding dynamic effects while playing our actual notes on the keyboard.
The equivalent of this with a traditional MIDI controller would be to map an effect or parameter to a knob and then to twist the knob while playing the keyboard. Dubler, on the other hand, allows for control over four separate knobs while performing - AAA, EEE, OOO and ENV - resulting in an unprecedented style of live automation. The added bonus is that Dubler acts as an additional limb, allowing you to do this live automation even if you’re using both hands to play the keyboard or any other instrument. You could, of course, also do this automation over a pre-recorded part instead of performing AND automating simultaneously, which can be more challenging.
Layering Sounds and MIDI Mapping
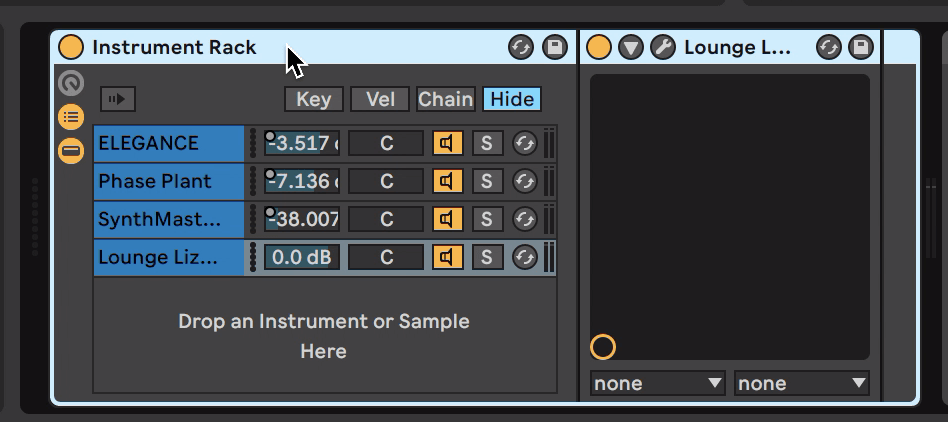
In the video we play two sounds. The first is a patch made up of four layers: Here are the layers played one by one in solo:
A pad
A poly-synth
An arpeggiated synth
A rhodes keyboard plug-in
We’ve organized all four layers in an instance of Ableton’s Instrument Rack, which allows you to create a sound with as many synths or instruments as you’d like. This is convenient because then you only have to record arm the channel containing the Instrument Rack to play all of these parts at once. You can find the Instrument Rack under Ableton’s ‘Instruments’ tab at the left of the screen.
Instrument Rack is unique to Ableton, but you can group instruments in any DAW by using track groups or stacks, or alternatively by record arming four separate channels to be able to perform them all at once.
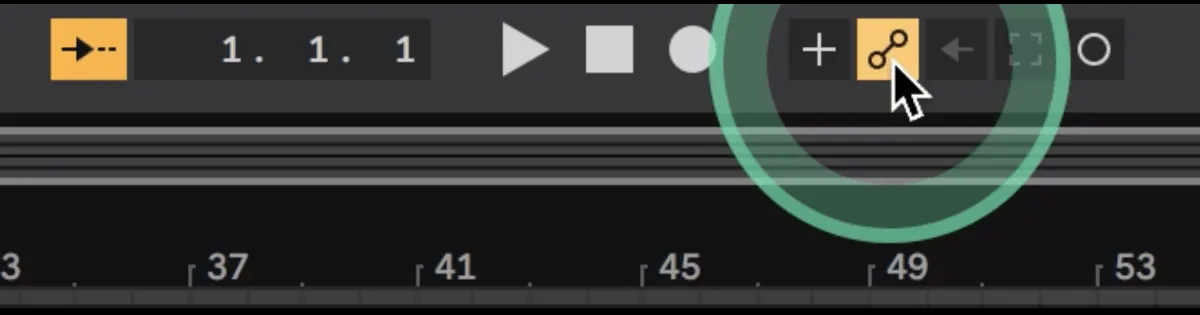
Keep in mind that to be able to use this technique you have to prevent Dubler’s pitch or trigger MIDI information from coming through to the channel with your instrument loaded. To do this you can use the channel’s ‘MIDI In’ dropdown list and specifically select your keyboard or other MIDI controller. Make sure ‘Dubler’ or ‘All Ins’ isn’t selected!
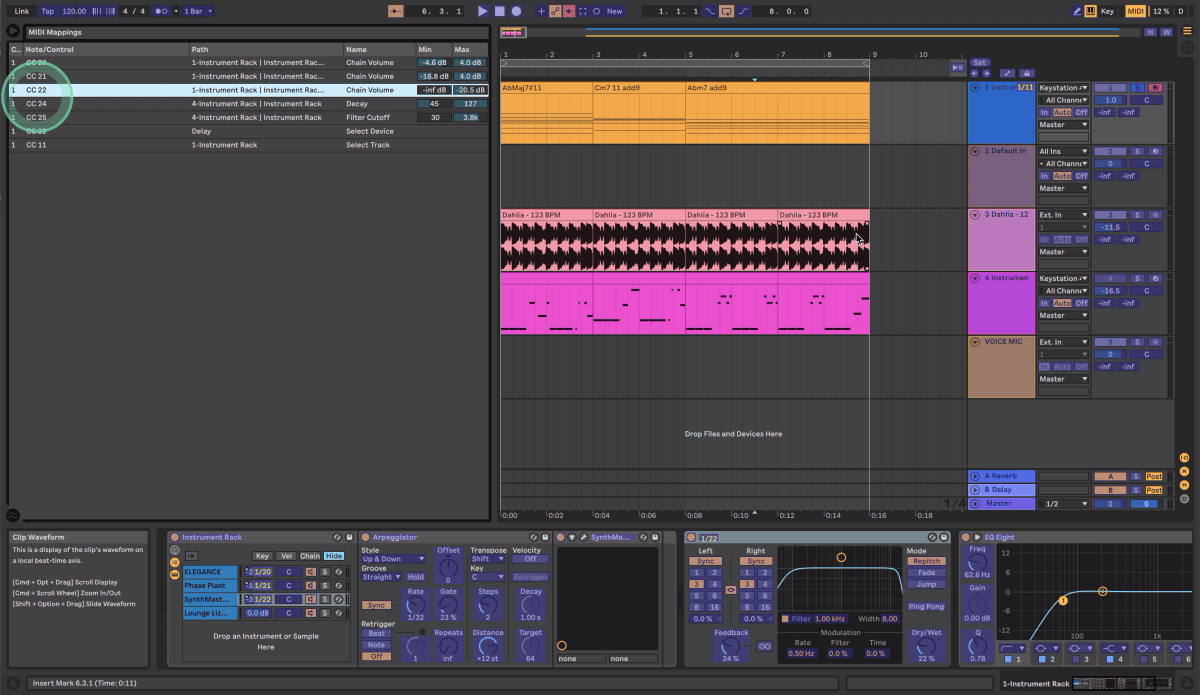
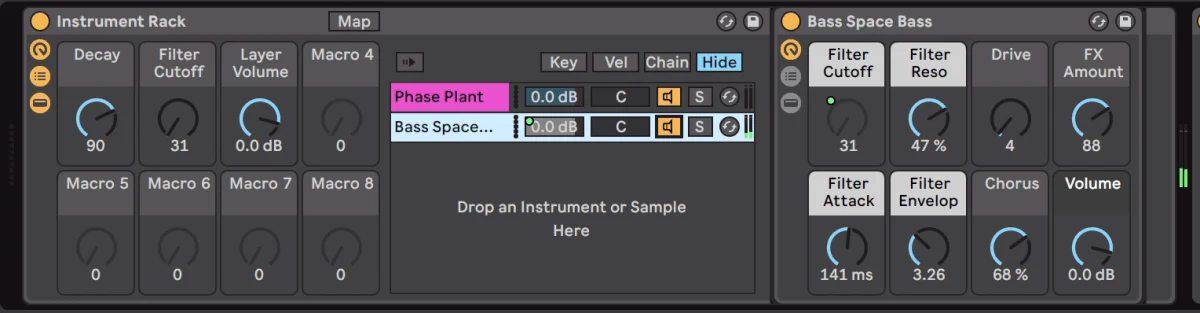
In terms of MIDI mapping we’ve mapped the volume of the pad layer to AAA, the volume of the synth layer to EEE and the volume of the arpeggios layer to OOO. This means that when we when we emphasize AAA, the pad will be louder. It will also mean that, when we emphasize AAA, the synth layer and arpeggios will get quieter. This is because way the vowels work make it so that when one is emphasized the others’ values go down.
Setting ranges for the MIDI mapping movement in Ableton is key to having more control over your sound. For example, we set the arpeggio layers’ volume range in Ableton’s MIDI Mapping list to minus infinity dB to -20,5 dB. This means that when we’re not emphasizing its OOO vowel it will be silent and when do emphasize it its maximum volume will be -20,5 dB. This is a lower range than we set with the other layers because we wanted this specific layer to be quieter than the others no matter how much we sing its vowel.
You’ll also notice notice that we didn’t MIDI map the fourth Rhodes layer’s volume. This is because with these kinds of ever-modulating sounds it is always good to have something consistent that the listener can hold on to. Otherwise the constantly changing volume could become hard to listen to.
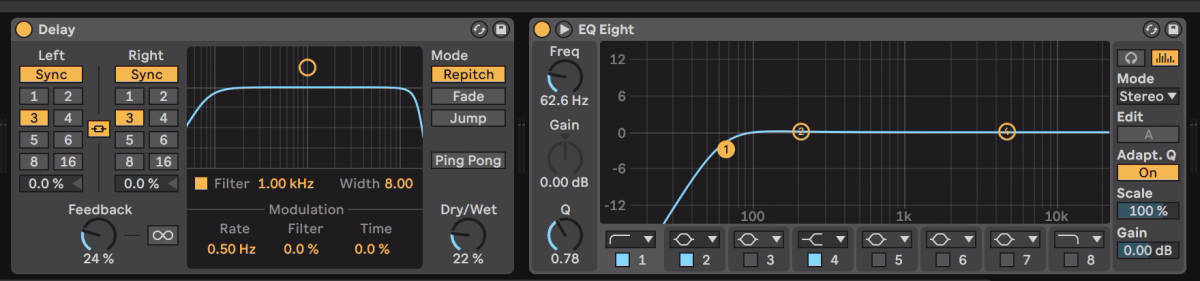
With this issue in mind, we also added a delay after the whole instrument rack so that the layers don’t just cut off when we stop emphasizing the vowels associated with their volume. The delay adds ambience to the sounds that come and go and all of the volume movement results in some very textural and unique echoes. It’s also good practice to add an EQ afterwards to cut a bit of the low end so that all of the layers’ low frequencies don’t build up.
Let’s see how the pad sounds in solo with some live vowel automation. Remember, we're playing the notes on the keyboard and only using Dubler to affect the parameters mapped to the vowels. We’ll first try it out by emphasizing the different vowels one by one:
Now with a bit of inter-vowel movement:
Here’s the patch with the voice removed from the mix alongside a beat and bassline:
Note: Remember to have automation recording enabled in Ableton or whichever DAW you are using before recording your performance! If it isn't enabled, none of your automation will be recorded.
Trying the Technique with Synth Bass Effects
The second sound we try this technique with in the video is a synth bass made up of two different synth bass sounds, again grouped in an Instrument Rack on a MIDI channel. With this sound, instead of mapping the vowels to the layers’ volume parameters, we mapped AAA to the first layer’s Decay parameter and EEE to the second layer’s filter cutoff.
Here’s how the first layer sounds in solo with its Decay control being constantly modulated:
Here’s how the second layer sounds in solo with its Filter Cutoff control being modulated:
We didn’t map OOO to any controls, but it is still useful because emphasizing OOO becomes a short cut to reducing both AAA and EEE at the same time.
Here’s an example of a performance of this bass patch with the voice removed from the mix:
Projects With Multiple Layered Sounds
In the project for the video we had two different layered instruments - the chord patch and the bass patch. This meant that we had to use two different Dubler profiles because we didn’t want one sound’s vowel MIDI mappings clashing with the other. This has to do with the each vowel’s MIDI CC number.
In the pad’s Dubler profile we left the vowel’s cc numbers at the default values 20, 21 and 22 for AAA, EEE and OOO respectively. However, in the Dubler profile we switch to before MIDI mapping parameters for the bass we set these values to 24, 25 and 26. If we had MIDI mapped the vowels to the bass' effects without changing the cc numbers, they would overwrite the mappings for the pad because you can only have one mapping per CC number.

The CC Numbers in our first Dubler Profile for the pad

The CC Numbers in our second Dubler profile for the bass
Again, this is only something to consider if you plan to use vowel MIDI mappings with multiple instrument racks or multiple MIDI channels in one project.
If you have any questions about the process be sure to also check out our the video or leave a comment so that we can get back to you!