Daft Punk Style Vocoder Vocals With Dubler
所要時間5 分 • 10th Mar 2021
In November 2020 we released a video tutorial demonstrating how to use Dubler as a vocoder in Ableton Live. The techniques shown in the video are also compatible with other vocoders like Logic X’s EVOC 20 or standalone vocoder plug-ins like Waves Ovox and TAL Vocoder.
Performing vocoded parts with Dubler is much easier than the traditional process because usually for vocoders to work you need to be playing the correct notes on a keyboard live while singing/talking but Dubler does not require this.
This content is hosted by YouTube and may set cookies.
As mentioned above, a common vocoder setup requires both an audio and a MIDI input. The vocoder’s character, sound and musical notes come from the synth loaded on the MIDI channel with a while the vocals or spoken word comes from the audio input.
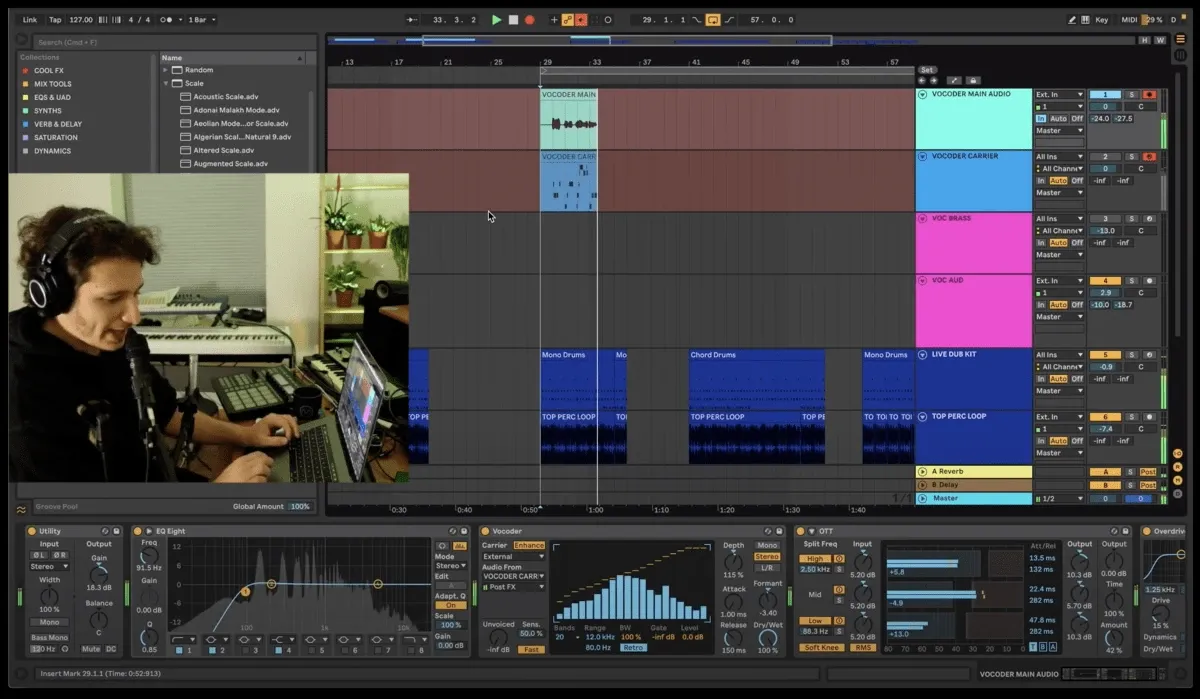
Most of Daft Punk’s signature vocoder sounds, like the one in ‘Around the World’ for example, use square-wave-based synth sounds as the vocoder MIDI input. In Ableton, the Vocoder audio effect is placed on the audio channel with an audio input set up for a microphone. The vocoder then has an ‘External Carrier’ dropdown list that allows you to choose which MIDI channel it gets an input from. Even if the MIDI channel is muted - which it should be because you don’t want the raw sound of the synth to be heard while using it as a vocoder input - the vocoder will still pick up its signal.
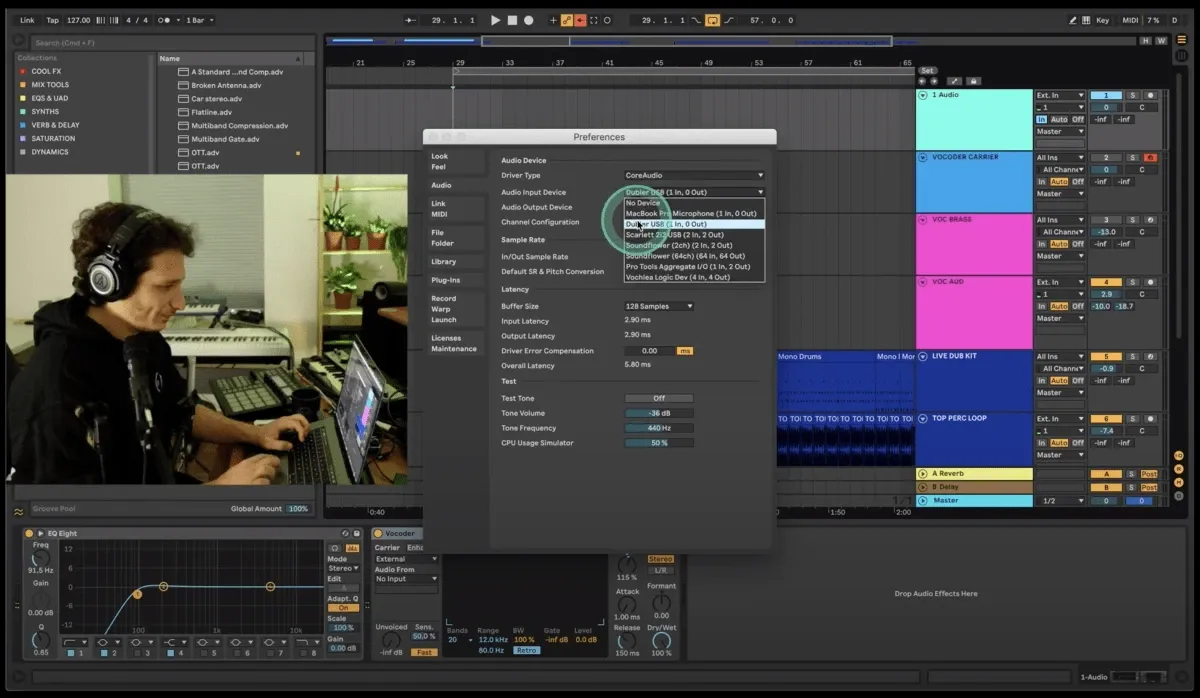
On Mac computers, Dubler can provide both the audio and MIDI signal at the same time. When you have the Dubler software running it will both send MIDI to your DAW and appear as an audio input option in your preferences. As a result, all you have to do is make sure to select Dubler as your audio input, create one audio channel that is receiving audio from your voice via Dubler, and create one MIDI channel with a synth loaded that is receiving MIDI from the Dubler software. The next step is loading up the vocoder on the audio channel and selecting the MIDI channel in the carrier dropdown list.
On Windows computers Dubler is unfortunately unable to act as both an audio and MIDI input at the same time so for the audio input you would require a second microphone. Make sure to place the Dubler microphone and your other microphone close to each other so that they both pick up your voice while performing.
An easy way to keep things organized is to name the audio channel ‘Vocoder’ and the MIDI channel ‘Vocoder Carrier.’ After record-arming both channels you can start to perform right away! Our first example in the video is at 03:47.
We used Ableton’s ‘Brassinski’ Operator preset as the instrument because it sounds great as a vocoder input but you can experiment with all kinds of sounds - there are no rules!
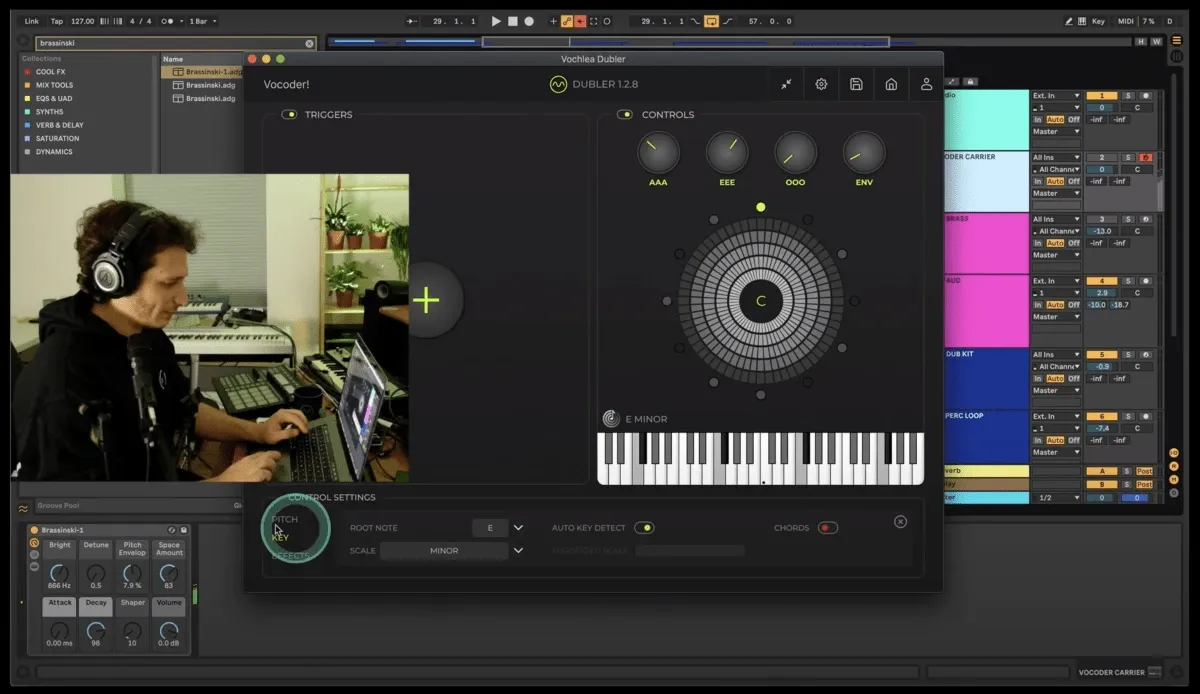
Dubler’s scale-locking feature is also really helpful while singing as it keeps you in whichever key you select. This can be very useful for live improvised vocoder performances, for example.
In the tutorial we also get into advanced vocoder techniques like formant editing to get a deep voice effect and eq’ing, compressing and overdriving the signal to get a sound with more character.
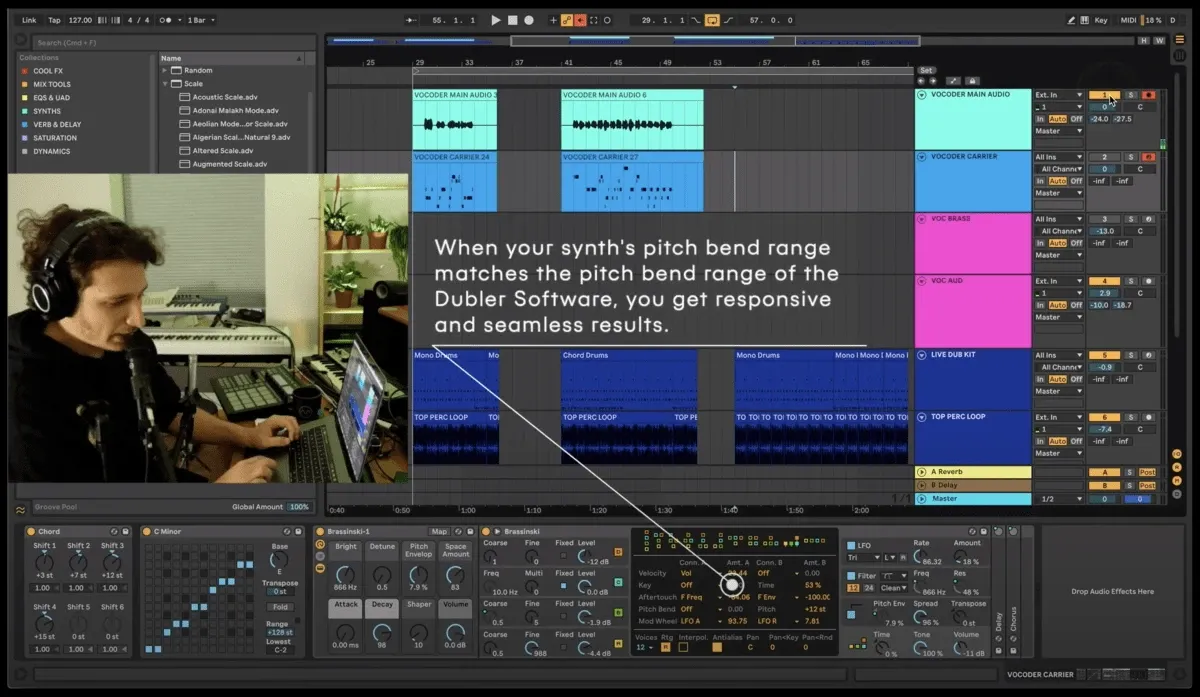
Singing vocoded parts with Dubler gets especially fun when you use a chord MIDI device to turn every MIDI note you sing into chords. There’s an example of this at the 5-minute mark.
Dubler’s pitch bend function is the last one we take a look at in the video - remember that when using pitch bend with Dubler its range has to be the same as the pitch bend. range in whatever synth you are using. When both are set to +-12 you can pitch bend across every note, as we demonstrate at 07:34.
If you’re not using Ableton don’t worry! Logic Pro’s EVOC 20 vocoder works in a similar way and for other DAW’s that may not have internal vocoders TAL’s free TAL Vocoder is a good option and also requires one MIDI and one audio input like Ableton’s vocoder.
You can download TAL Vocoder here.